Transform your home into a Christmas winter wonderland by crafting your own festive decorations with the help of our simple and fun ideas.
Seize the festive spirit by making your own Christmas decorations with your children. It is so much more impressive to display your original craftwork, rather than shop-bought glitz, to family and friends.
It couldn't be simpler to make your own Christmas decorations, and it means so much more to have a slightly amateur finish, rather than a shop-bought beauty. Think back to all those Blue Peter children's TV ideas for crafting your own projects.
Working with paper and card is also a great way of being eco-friendly, encourage your kids to think about the importance of recycling rather than buying new Christmas decorations each year.
Get your kids to make their own Christmas decorations by getting them to make aluminium-foil ring chains. All you will need is squares of foil, and they can roll them into chains and link them together - no need for glue or scissors.
Why not get young children to paint their own festive designs on paper and display them around the house. Cut paper into festive shapes and get your kids to paint or glue glitter onto them. Create a garland display of their Christmas creations.
Another simple festive idea is to fill a glass jar or bowl with walnuts and make it a centrepiece on a dining table. Or create a big bowl of lemons and limes, or red apples and baby artichokes - the colours of Christmas.
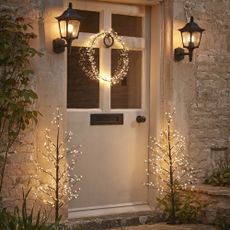
Add a pile of pinecones to a wicker basket or in the fireplace for a really subtle addition to any Christmas design. Fill pots with pinecones and position them on your porch.
1/12 Decorate your tree with christmas paper decorations

Grab some white paper, scissors and glue, and transform your home into a Christmas wonderland. Hobbycraft, Etsy and Wilko are all great places to get hold of craft supplies.
2/12 Festive snowflake

What you'll need: A4 paper, cutting mat, scalpel, glue stick, wool
1) Cut 12 0.5cm strips across the full width of the paper. Take two and stick together to make a cross (fold in half to find centre points). Glue another strip on either side of each original strip, making three horizontals and three verticals.
2) Take a vertical side strip and its nearest horizontal side strip and glue their points together. Repeat at each corner. Repeat steps 1 and 2, so you have two halves.
3) Lay one loops up. Glue the other (loops down) onto it at a 45˚ angle, so that loops are matched with straight strips. Feed each strip through its loop and stick to the point, leaving 1.5cm of strip sticking out. Thread onto wool.
3/12 Delicate teardrop

What you'll need: A4 paper, scissors, glue stick, hole punch, wool
1) Cut out a 10.5cm x 10.5cm square of paper and fold diagonally to form a triangle. Make two parallel cuts on each side of the triangle, from the folded edge to the point, stopping short of the end and not letting them meet.
2) Unfold the paper. Take the free points of the inner square and roll into a tube. Glue in place. Turn the paper over. Take the free points of the next square and glue together. Turn the paper again, and do the same with the points of the remaining square. Punch a hole in one tip and thread with wool to make a hanging loop.
4/12 Pretty lanterns

What you'll need: A4 paper, scallop-edge scissors, glue stick, hole punch, wool
1) Cut a rectangular piece of paper measuring 15cm x 10.5cm. Snip around the edges with scalloping scissors.
2) Fold the paper lengthways, making a sharp crease. Using the scalloping scissors, cut into the folded paper from the fold, stopping about 1cm from the top edge. Make another cut 1cm from the first one. Repeat until you?ve cut all along the paper, stopping 1cm from the edge.
3) Unfold the paper, roll to form a tube with the slits vertical. Glue the edges together, stand the tube upright, then gently press down to form a splayed lantern shape. Hang from wool.
5/12 Cut-out hearts

What you'll need: A4 paper, pencil, scissors, hole punch, wool
1) For large hearts, use half a piece of A4. For small hearts, use a quarter. Fold your piece of paper in half, then draw half a heart shape from the fold outwards (so that the fold is in the centre of your heart shape). Carefully cut along the pencil line.
2) Follow the same technique to cut a smaller heart shape out of the centre of the larger one.
3) Unfold the paper and smooth out the crease.
4) Carefully punch a hole out of the top of your paper heart shape and thread onto a length of wool to create a hanging loop.
6/12 Stair drops

What you'll need: Red and white A4 paper, scissors, glue stick, red rubbon
1) To make small drops, follow the ?Teardrops? instructions, as before. For large teardrops, follow the same method, but use squares of paper that measure 14cm x 14cm.
2) Punch holes in the top and bottom of each one. Thread ribbon through a small teardrop, so the ribbon goes through the inner tube. Leaving a 5cm tail, knot the ribbon so the decoration sits in a fixed position. Repeat with a large teardrop, knotting the ribbon first where you want it to sit. Finish with another small one. Hang from the underside of your banister, between the spindles.
3) Alternate strings of three small teardrops with strings of two small and one large teardrop.
7/12 3-D Star

What you'll need: 6 sheets of A4 paper, scissors, glue stick, stapler, hole punch, red ribbon
1) Take six squares of paper, each measuring 21cm x 21cm, and then follow the teardrop instruction, as before. As the paper is larger in this version, you will need to make three cuts, rather than just two ? giving you three squares to curve around the central tube. Don?t forget to turn the paper after the second square before you do the third.
2) Once you have made your six teardrop shapes, assemble them in a star shape by laying them in a circle, bottom points touching.
3) Staple at the place where all six points meet. Then, working around the circle, staple each teardrop to the next.
4) Punch a hole at the top and thread a ribbon hanging loop. Hobbycraft is a great place to pick up craft materials.
8/12 Heart garland

What you'll need: 10 stems of gypsophila, florist's wire, red and white A4 paper, hole punch, wood
1) Trim the individual flower tufts from the gypsophila stems, leaving small stems of flowers. Cut a 6ft-length of wire, twisting one end to make a loop for hanging. Lay one of the flower stems on the wire, just past the loop. Wrap the wire tightly around the stem until it?s secure.
2) Add a second stem close to the first, securing in place as before. Keep going until all the stems are fixed firmly in place.
3) Cut excess wire, leaving enough to make a second hanging loop. To keep your garland fresh, mist it lightly with water.
4) Cut out heart shapes (see ?Hearts?, as before) from red and white paper. Punch a hole in the top of each heart.
5) Cut different lengths of wool and thread them through the hearts. Hang the hearts from the garland, alternating short and long lengths.
9/12 Decorative paperchains

What you'll need: A4 paper, scallop-edge scissors, star-shaped hole punch, glue stick
1) Using the scallop-edge scissors, cut strips of paper measuring 5cm wide. Punch out star shapes along one side, leaving 4cm to 5cm between each star, then repeat on the other side. Keep cutting and punching until you have enough strips to make a chain of the required length.
2) Make the first link by gluing the two ends of one strip. Take a second strip of paper, thread it through your first link, and glue. Continue with the remaining strips and links, until your chain has reached the desired length.
3) Drape the chain around your Christmas tree as a garland, or use sticky tape to form swags along a mantelpiece.
10/12 Snowflake curtain

What you'll need: A4 paper, steel ruler, cutting mat, scissors, scalpel, glue stick, pencil, assorted dollies, hole punch, sticky tape
1) Plan your design, according to the size of your window, and decide how many of each type of decoration you?ll need. Make snowflake and heart decorations according to the instructions, as before.
2) Cut a long length of wool ? long enough to hang below your window frame, plus extra for fixing to the top.
3) Thread the wool onto a large needle and start threading your chosen decorations into place ? you will need to make small knots to hold them in position.
4) Continue until you reach the bottom of the wool. Repeat until you have enough strings to span the width of your window.
5) Fix the strings to the top of the frame with sticky tape.
Need more Christmas craft ideas and decorating tips? Take a look at our how to make your own Christmas cards gallery for festive inspiration and visit our Christmas essential guide too>>
11/12 Decorate with doilies

Sit these delicate little angel figures in groups on your mantelpiece or among Christmas tree branches.
What you'll need:
1) Cut a doily in half (or cut into quarters for thinner angels), then roll into a cone and fix at the back with tape.
2) To make the head, thread beads onto wire and tie into a ring, leaving around 2cm of wire at each end to insert into the point of the cone, then fix the ends inside with tape.
3) For the wings, use semi-sheer white ribbon to create two loops, then stick in palce with tape.
12/12 Cookie cutters

You will need:
1) Dip one edge of the cookie cutter into PVA glue, taking care not to get it on the sides, and press onto patterned craft paper.
2) Leave to dry then cut round the cutter with a craft knife.
3) Glue or tape a loop of ribbon to the back so you can hang it on the tree.
-
 How often should you mow your lawn? A month-by-month guide to cutting your grass, according to experts
Are you cutting your grass enough?
-
 How to grow mint from seed – expert tips for super easy (and tasty) herbs on tap
Amateur gardeners, assemble! Here's how to grow mint from seed like a pro...
-
 How to care for a lawn in shade – expert tips for lush green grass in a shady garden
Shady garden? No problem! You can still have the lawn of your dreams with just a few tweaks...


-
 As a stylist, I've wrapped thousands of presents for shoots – and these are my top tips for gift wrapping like a pro
Gift wrap like a pro and impress family and friends with perfectly wrapped presents this season
-
 The 5 things guests always notice when they enter a home - how to use them to make a good impression
If you're hosting this Christmas these are the things that your guests will notice
-
 Wellness Christmas gifts - give the gift of calm this festive season
Treat your loved ones to a little bit of 'me time' with one of these gorgeous wellness Christmas gifts
-
 Inclusion candles are trending this festive season – this £12 M&S version is already on track to sell out before Christmas
Christmas inclusion candles are having a moment, and this M&S one is selling like hot cakes
-
 Are you burning your cut poinsettia stems? According to experts you really should be
This unconventional hack can make your cut poinsettia flowers last for up to 3 weeks
-
 You've been hanging your Christmas tree lights all wrong – this viral TikTok hack is the secret to a twinkling masterpiece
Fancy a merrier and brighter display? Try this Christmas tree lights
-
 The Christmas tree trend celebrities are going wild for this year – Stacey Dooley included
The fun and eclectic Christmas tree look is the biggest high-profile festive trends of the season
-
 This Instagrammer just demonstrated how to make the perfect bows like a pro – and nail the Christmas tree bow trend
How to make perfect bows for your Christmas tree like a pro with this easy hack


