
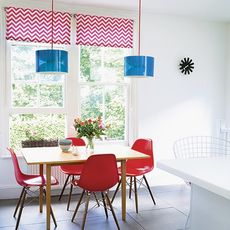
Make mismatched chairs look like a set by using the same fabric, or pick contrasting fabrics for a mix-and-match look.
You will need
- Masking tape
- Sheets of newspaper for pattern pieces
- Main fabric (we made 3 covers in complementary fabrics: Gilpin Stripe, ref J695F-05, col Grey, £39 a metre, Jane Churchill at Colefax and Fowler; Oxford Stripe Flax, £29.50 a metre; Angus Stripe Nordic Ivory, £39.50 a metre, both Ian Mankin)
- Tailor's chalk
- Matching thread
- Tacking thread
Step 1) To begin you will need to make pattern
pieces for each section of the chair cover: the outside back; inside
back; the narrow gusset strips at the sides of the chair back; and the seat.
Step 2) To make a pattern piece for the outside back, use masking tape to stick a sheet of newspaper around the outside back of your chair. Tape it so that it curves around the edges and sticks to the inside back. Once taped in place, take a soft leaded pencil
and rub around the sides and top so that the edge is clearly defined.
To mark the bottom edge, draw a line parallel with the seat. Remove the
newspaper and cut out along the pencilled areas. Repeat to mark and cut
out pattern pieces for the inside back, the narrow gusset strips at the
sides of the chair back, and the seat.
Step 3) Remembering to pattern match as necessary, lay out and pin
all your pattern pieces on the fabric. Cut out, adding 2cm all round.
Remember to cut 2 gusset strips. Use tailor's chalk to mark which piece
is which and which are the top edges on the right side of each piece of fabric.
Step 4) Right sides facing and matching raw edges, stitch the
bottom edge of the inside back to the back edge of the seat, taking a
1.5cm seam. Trim and press open seam allowances.
Step 5) Repeat to stitch
the top edge of the inside back to the top edge of the outside back.
The seat, inside and outside chair back will now be joined in one strip.
Step 6) Right sides facing and matching raw edges, pin one gusset strip between the two chair back pieces. Machine stitch
taking a 1.5cm seam and trim and press open seam allowances. Repeat to
stitch the remaining gusset piece in place on the other side of the
chair back cover. Leaving the cover inside out, slip in place on your
chair.
Step 7) To work out the size of the frill, measure all around the perimeter of the seat and the back of the chair.
Double this measurement and add 3cm. Cut a 17cm-wide strip of main
fabric to your total measurement, joining pieces as necessary.
Step 8) Along one long edge, turn under 2.5cm then 3cm. Pin, press and machine stitch
the hem in place. Right sides facing and matching raw edges, join along
the short edges, taking a 1.5cm seam to form a ring. Trim and press
open seam allowance.
Step 9) To make gathering stitches for your frill,
use the longest stitch setting on your machine and run a line of
stitches 1cm from the raw edge all around the frill. For additional
strength, you may find it better to use a polyester thread
rather than cotton. Stop stitching 1cm from where you started and lift
the presser foot. Carefully pull away your fabric to leave a good 20cm
of thread before snipping off. Leave these threads loose, but secure the
threads where you began stitching with a knot on one side of the
fabric. Repeat with a second line of stitching 1cm below the first,
snipping and securing the thread as before.
Step 10) Bring
all the loose threads to one side of the fabric and knot them all
together 2cm from the ends. Holding these threads securely with one
hand, gradually push the fabric along the thread to gather, working
slowly and evening out the gathers as you go. Keep testing if you've
gathered the frill enough to fit the bottom edge of the chair cover
by slipping it over the chair and around the seat. Adjust as necessary
until you are happy with the fit. Knot the gathering threads to hold the
frills in position.
Step 11) Remove the cover from the
chair and, right sides facing and matching raw edges all round, pin,
then tack the frill in place around the bottom edge of the chair cover. Machine stitch
all round, taking a 1.5cm seam. Remove pins, tacking and gathering
stitches, and trim back the seam allowances. Turn the cover through,
press and slip in place on your chair.
Love this? Find more of our craft ideas on Country Homes and Interiors' website. Plus, be first to hear about our favourite buys and exclusive competitions on Facebook and Twitter.
-
 How to soundproof a garden - 7 ways to block out the noise
Stuck with noisy neighbours? Busy road ruining your garden tranquillity? Here’s some effective ways to shut out the sounds
-
 The best kitchen island layout ideas for a sociable and practical cooking space
Kitchen designers reveal the ideal kitchen layout ideas to make the most of every inch of space
-
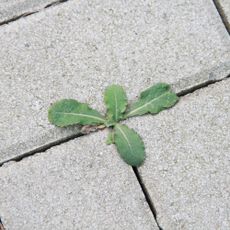 Does salt kill weeds? Absolutely, but gardening experts urge you to take note of these key considerations first
The most effective way to use it for maximum impact


-
 Craft corner: How to make Christmas table favours
If you're after some simple festive craft ideas learn how to make these pretty table favours
-
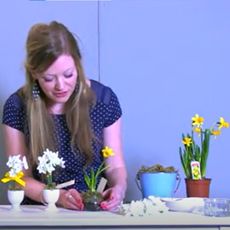 Craft Corner: How to make a spring place setting
We show you step by step on how to make a lovely spring place setting to brighten up the room.
-
 Craft corner: How to make a decorative place setting
We show you how to make a pretty place setting for your dinner guests in a few simple steps.
-
 Craft Corner: How to make a reversible placemat
Channel Editor Vicky shows you how to make a reversible placemat as an interesting quirk to add to your dining table.
-
 Create a gorgeous lampshade in 3 simple steps
Add colour to your dining area with a bold lampshade, choose a bright accent for a fun look. Brought to you by Style at Home.
-
 Coastal craft: make simple seaside-style baubles
Create personalised place name holders for a summer party table
-
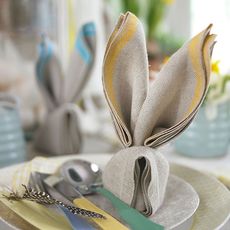 How to fold a napkin into a bunny
Discover how to make a napkin into a bunny using Country Homes and Interiors' easy instructions
-
 How to make a patchwork tablecloth
Sew a patchwork tablecloth with these simple step-by-step instructions from Country Homes & Interiors


