

Add a seasonal touch to the home with a simple straw wreath...
Create a starburst corn wreath
Gather and cut corn ears from the stalks. Three different sizes will be required; larger corn heads with a short stalk (our stalks measured 5cm); medium ears and small sized ones for the middle. Using a dry oasis wreath base, wind a length of garden wire around to top and bend into a small loop in order to have something to hang the wreath up with. Starting at the top of the wreath, take the larger stalks and push them into oasis around the side edge. Make sure the whole stalk is pushed in to secure firmly. Repeat working around the wreath. Next take the medium sized corn ears and stick them onto the front of the oasis with a blob of glue from a hot glue gun. These can be done randomly or positioned to feature different facing seed configurations to create a subtle pattern. Make sure the tip of the corn ear lines up with the inner circle of the wreath. Glue a little sprig of lavender at regular intervals if desired for added decoration. Take a length of ribbon and glue it in soft pleats around the inside edge of the wreath to cover any exposed oasis before finishing with a top circle of smaller corn ears. Position and glue these diagonally to create both a different visual effect and to make it easier to cover any exposed wreath base. Finally tie some decorative ribbon in a double bow and attach to the wreath either with a blob of glue or with some nylon thread before hanging up by the wire loop.
*Tip Cut and sort the corn ears into sizes before crafting into the wreath to help maintain the same structure and dimensions as you work.
* Style idea Weave decorative ribbon or raffia through the wreath or dot flowers around the inner circle to add a decorative touch.

Arrange a striking table centerpiece
Let humble straw take centre stage with a hand tied bouquet. To begin this arrangement, make up lots of pre-tied mini bundles of a mix of barley, wheat and lavender. To create these take a few barley stalks and place them down flat on a table. Lay a couple of straw grasses on top of the barley, just lower than the top whispy lengths, then repeat with some lavender sprigs. Gather together and tie with nylon thread. Repeat this to make a large number of bundles - we made about 30. Hold the first bundle in one hand then add a second one in one the diagonal. Turn around to the side then repeat with another bundle to create another diagonal layer. Keep adding and turning until there are about 10 bundles then at this point secure with some garden twine. Continue adding and turning again, stopping to secure when the posy feels loose before finishing with a final loop and knot of garden twine. Cover the twine with decorative ribbon bows. Snip the bottom stalks off so that they measure the same as the top decorative tips thenneaten to create a flat bottom to stand the posy upright.
*Tip The grasses can easily be tweaked after the posy is tied to establish a well-rounded arrangement.
* Style idea Adding barley brings a fluffier texture to the arrangement but it works just as well using purely straw stalks.

Make personalised place settings
Add a country touch to a casual lunch with simple named cards decorated with corn ears. To create cut the stalks from the corn leaving a couple of centimetres of stem. Wrap a little piece of ribbon around the base, glue in place and allow to dry. Cut out some card then write the guests name near the bottom edge before folding in half - scoring with a craft knife halfway up along the reverse of the card will make this neater. Measure and cut a piece of hessian ribbon sized to fit the front of the card. Fix onto the card with a small blob of glue followed by a corn stalk then allow to dry. Repeat with other place cards.
*Tip For a neat finish type and print out the name cards or use a stencil or stamp.
* Style idea Choose coloured card or handmade paper for a decorative finish.
Feeling inspired..? Visit the Country Homes & Interiors homepage for more seasonal craft ideas.
-
 This genius built-in wardrobe has instantly doubled the available space in this bedroom
Sometimes all you need is a piece of furniture to change everything
-
 How much does a porch cost? A breakdown of what you can expect to pay
We've put together a general ballpark of costs with all the factors that will influence the final price of building a porch
-
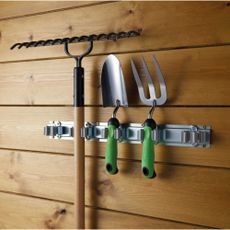 Aldi's garden tool holder will double the available space in your shed – for less than £5
It costs less than a takeaway coffee to get organised

