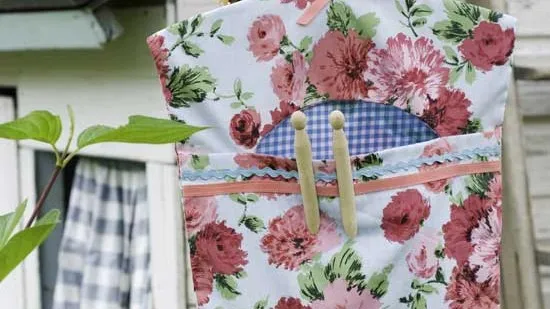
Use floral fabric, co-ordinating ribbon and rick-rack braid and a bright gingham lining to create your peg bag.
You will need:
50cm floral fabric
50cm gingham fabric
50cm blue rick-rack braid
50cm pink grosgrain ribbon, 1cm wide
Clothes hanger
Matching thread

Step 1 Using the illustration above as a guide, draw out 3 templates on paper: 1 for the back (the whole area) and 2 for the front (1 for the top section and 1 for the bottom section). Add 1.5cm all round for seam allowances and cut out the 3 paper templates.

Step 2 In floral fabric, cut one back piece, then two front pieces - one for the top and one for the bottom. Repeat using the gingham fabric. Right sides facing, pin and then machine stitch the floral and the gingham top front pieces together along the lower curve only (see illustration, above). Trim the seam allowance, turn through and press.

Step 3 Lay the gingham bottom front piece right side up on your work surface. Place the front top floral and gingham piece right side up on top and the floral bottom front piece wrong side up on top of that (see illustration, above). Machine stitch through all the layers along the top edge where the opening will be. Turn through and press.

Step 4 Pin a length of blue rick-rack braid across the bag about 1.5cm below the opening. Pin a length of pink grosgrain ribbon about 1cm below that (see illustration, above). Top stitch both in place.

Step 5 Lay the front of the bag right side up on your work surface. Place the floral back piece, right side down on top and then the gingham back piece, right side up, on top of that. Machine stitch around the two side and top edges, leaving a 2cm gap at the top for the hanger (see illustration, above). Turn through and insert the hanger. Turn under the bottom seam and slip stitch, then stitch a grosgrain ribbon bow below the hook.
This make was adapted from the book Sewing In No Time by Emma Hardy (£14.99, CICO Books), which features 50 step-by-step weekend projects. Illustrations courtesy of CICO Books.
For more decorating inspiration, craft ideas and cleaning hacks don't miss our dedicated DIY guide.