Brighten up your home with this quick and easy rainbow ornament using air drying clay
Create colourful decorations from air drying clay

Rainbows have long been symbols of hope and togetherness, and this has never been more true in recent times. This rainbow ornament DIY is the perfect quick and easy project for showing someone you care.
Related: DIY novice upcycles stunning black sideboard – saving herself £530 in the process
Made using Rust-Oleum furniture paint and the latest must-have crafting material air-drying clay, sales of the material have gone through the roof thanks to The Great British Pottery Throwdown. These ornaments are simple to make and just the thing for hanging in a window as a symbol of thanks to key workers or part of a care package to brighten someone's day.
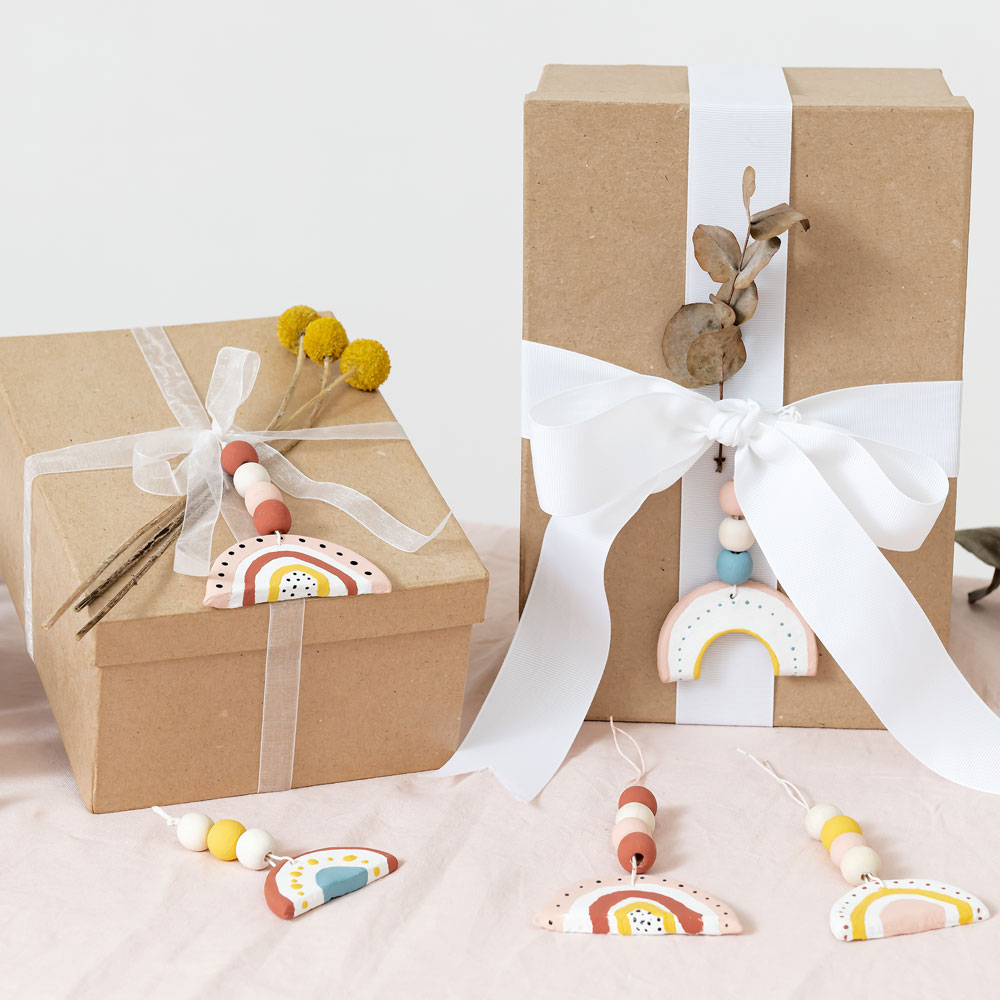
How to make a rainbow ornament
What you will need:
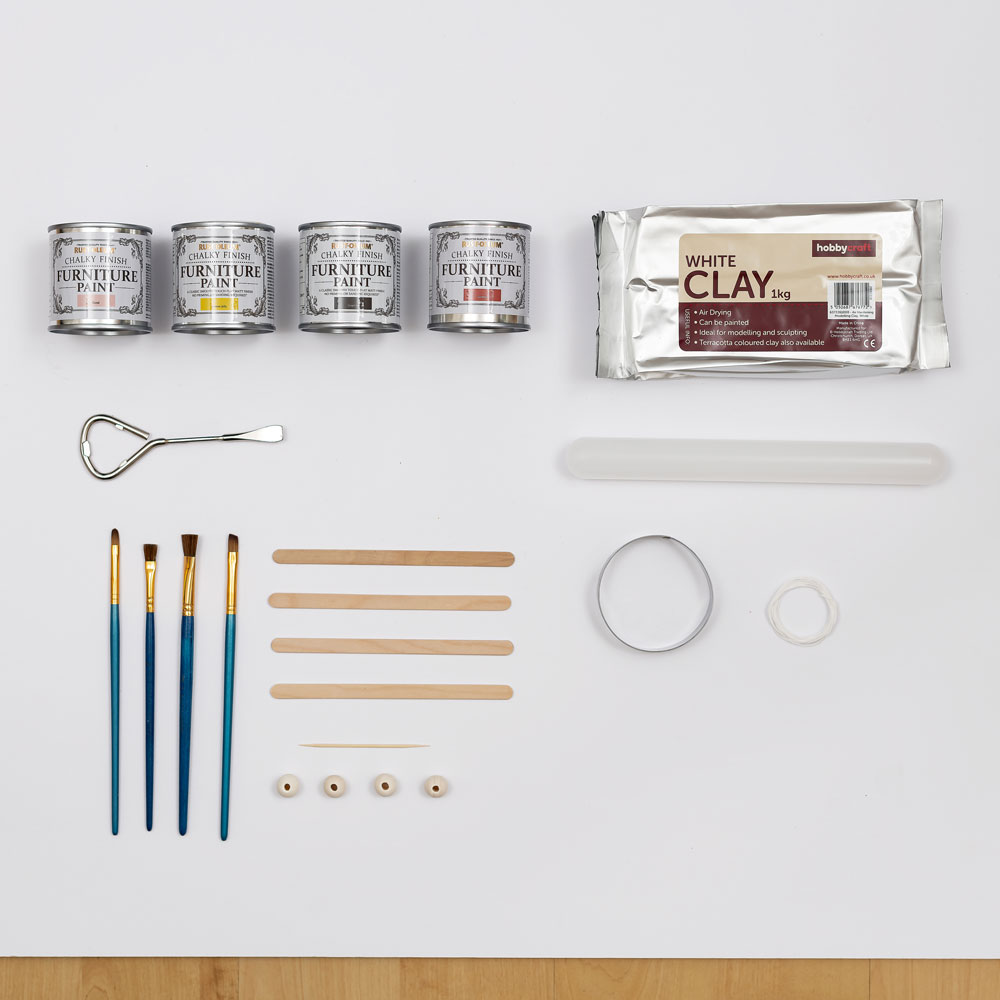
Rust-Oleum Chalky Finish Furniture Paint (125ml)
White air clay
Rolling pin
Paint tin opener
Paint brushes
Toothpick
Wooden beads
String
Round cookie cutter or drinking glass
1. Cut out your rainbows

Using a rolling pin, roll out the clay to a thickness of approximately 2cm. Cut out circles using a round cookie cutter or a drinking glass. Cut the circles in half to create two rainbows.
Use a toothpick to poke a small hole through the tops of your rainbows ready for hanging. Gently smooth out the edges with your finger. Leave to dry overnight under a book so your shapes dry flat.
2. Decorate your rainbows
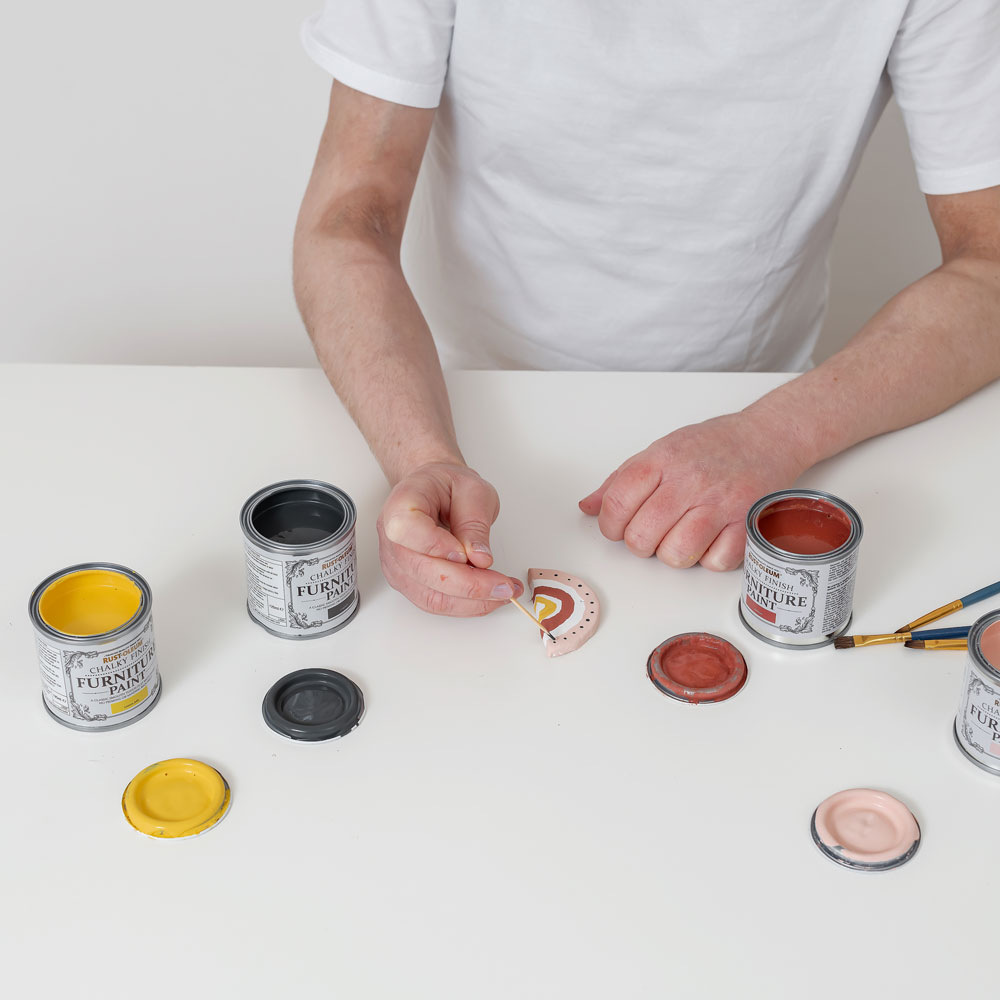
Once completely dried, decorate your rainbow shapes using Rust-Oleum chalky finish paint. There are 34 shades to choose from, so you'll be spoiled for choice.
Sign up to our newsletter for style inspiration, real homes, project and garden advice and shopping know-how
Buy now: Rust-Oleum Chalky Finish Paint in Fire Brick, £5.50 for 25ml, Homebase
Pick any colour combinations you like, starting with the lightest shades and finishing with the darkest. Be as creative as you like, experimenting with different thicknesses of stripes and adding decorative dots.
Once you're happy with your designs, leave to fully dry.
3. Add wooden beads
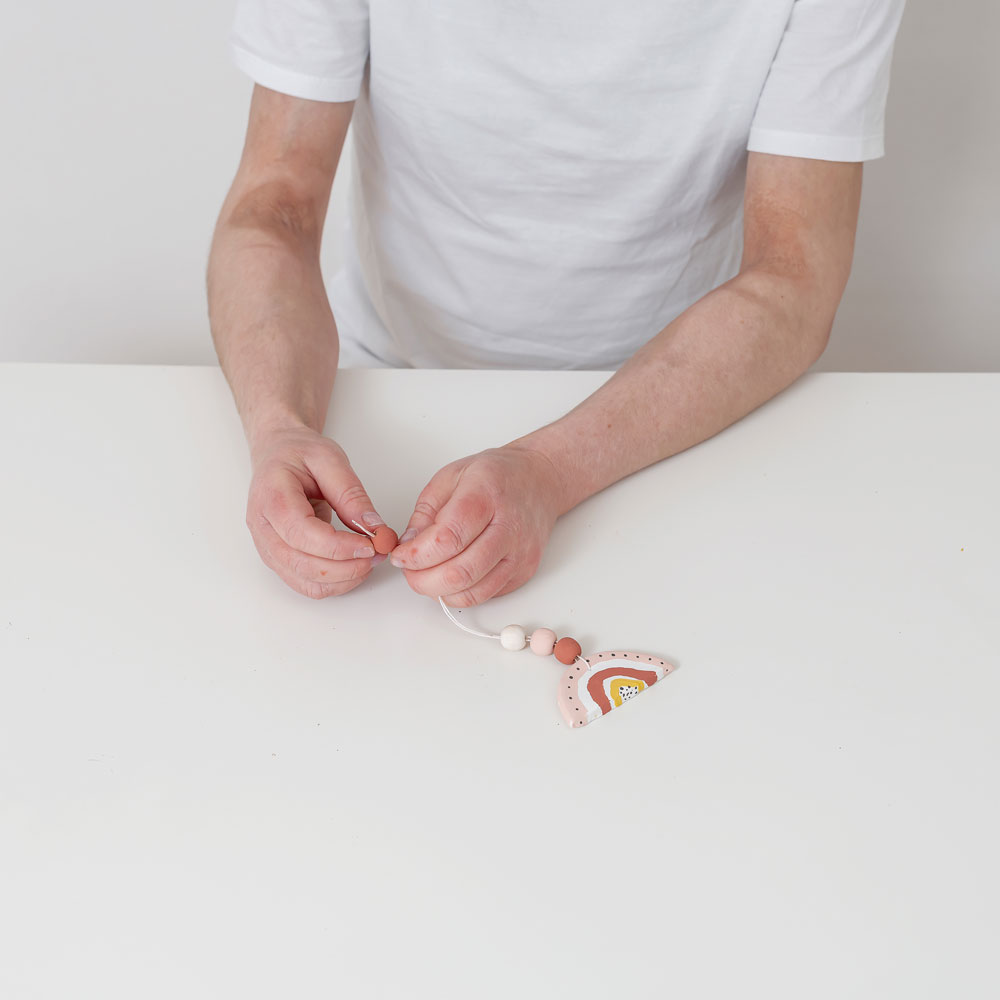
Thread string or twine through the hole at the top of your rainbows. Place several wooden beads onto the strings and tie a knot in the top to prevent them falling off.
Related: Clever DIYer shows how to create a Crittall-effect shower door – for just £2!
Alternatively, make your own beads from air clay and paint in co-ordinating colours of chalky paint.
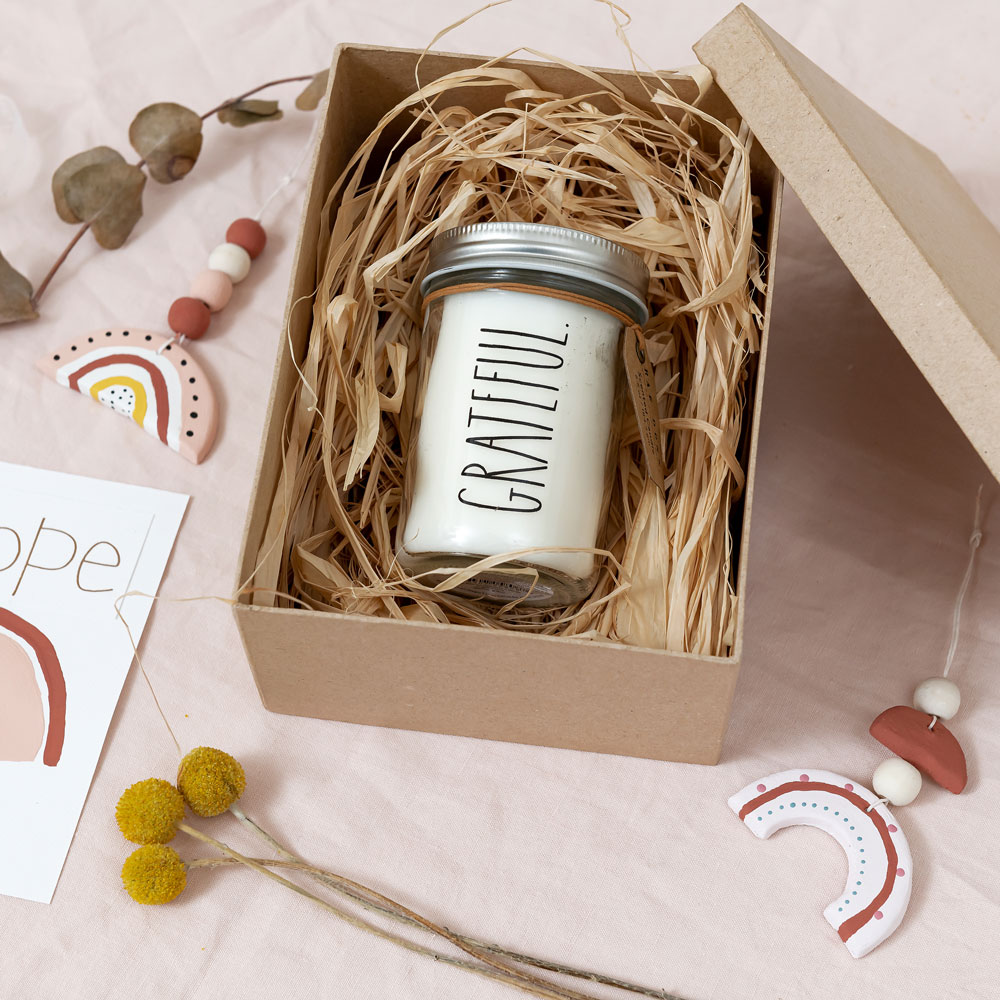
Your rainbow ornaments are ready for gifting! Why not add to a special present for your Valentine or as a handmade Mother's Day token?

Steph Durrant is the Deputy Editor of Ideal Home’s sister magazine, Style at Home. Steph is an experienced journalist with more than 12 years under her belt working across the UK’s leading craft and interiors magazines. She first joined the team back in 2016 writing for both homes brands, specialising in all things craft, upcycling and DIY.