How to make a set of fabric-covered storage boxes
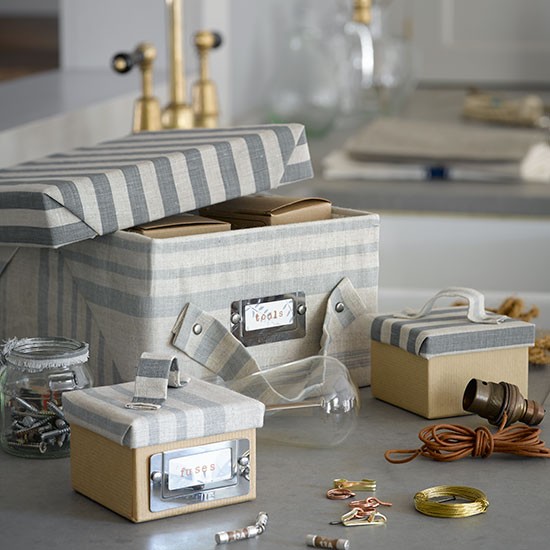
Keep all sorts of bits and bobs organised with this pretty storage idea – it looks super-cute with the smaller boxes fitting neatly inside the larger one. Country Homes & Interiors shows you how to complete this project in three easy steps.
Sign up to our newsletter for style inspiration, real homes, project and garden advice and shopping know-how
You are now subscribed
Your newsletter sign-up was successful

Find a place for all those tiny home maintenance essentials, such as fuses and light bulbs, in labelled boxes that can be stored inside a large fabric-covered main box. Choose a fabric that complements your decorating scheme and add label holders for a professional look. To create your own boxes, simply follow the three easy steps below.
You will need:
- Boxes (there is a very wide selection available at Paperchase with prices starting from just £1.75. Remember to plan your choice of boxes to ensure the smaller ones will fit snugly inside the biggest one)
- Brads (find a selection at Paperchase)
- Label holders (find similar label holders at Etsy or on Ebay)
- Fabric (ours came from Cabbages & Roses)
- Wallpaper (optional - ours came from Elanbach)
- Glue
Step one
Measure the boxes and cut fabric to fit, adding 1cm all round. Cover the boxes and lids neatly with fabric, folding in all raw edges and using a multipurpose adhesive. You can cover the whole box or just the lid as you prefer.
Step two
To make the handles for the boxes, cut strips of fabric measuring three times the desired thicknesses by the width of the box, plus 1cm at each short end. Fold each strip of fabric lengthwise into three, turn under the ends and raw edges and glue neatly in place. Fix the handles to the boxes using brads.
Step three
Attach the label holders to each box using glue and brads and pop in a card detailing what each box contains.
Tip: To add an extra decorative touch, you could use pretty wallpaper inserts as labels.
Get even more inspiring decorating ideas from Country Homes & Interiors.
******
Sign up to our newsletter for style inspiration, real homes, project and garden advice and shopping know-how