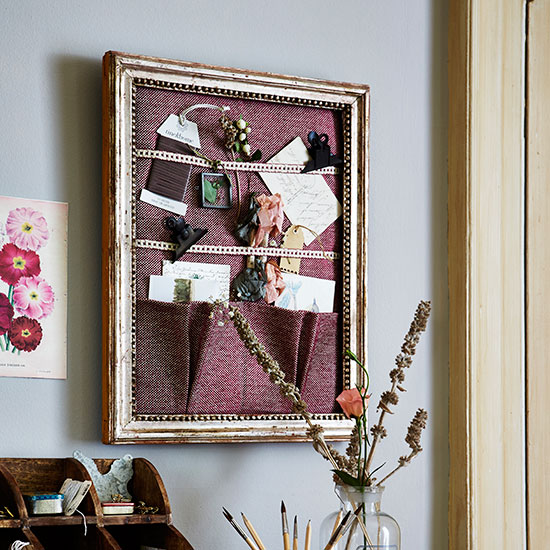
How to make a pocketed wall organiser
Make a smart wall-hung wall organiser following Country Homes and Interiors’ simple instructions
Sign up to our newsletter for style inspiration, real homes, project and garden advice and shopping know-how
You are now subscribed
Your newsletter sign-up was successful

Sew this stylish wall organiser with integral pockets using Country Homes and Interiors' easy step by steps.
******
You will need
- Picture frame with backing board
- Quilt wadding
- Fabric (we used Beaucaire Lie de Vin, £62 per m, Manuel Canovas)
- Ribbon braid (we used Carnaby ribbon braid in Aubergine, £36 per m, Jane Churchill)
- Staple gun
- Hot glue gun
- Scissors
Step 1) Take the backing board out of the picture frame. Lay it on top of the quilt wadding and cut around with scissors. Lay the backing board on the fabric, add 5cm on all the surrounding sides and cut out.
Step 2) Secure the wadding on to the front of the backing board with the hot glue gun. Place the board on to the middle of the fabric, wadding side facing the wrong side of the fabric. Secure the fabric in place with some blobs of glue from the glue gun. Once dry, turn over and pull the fabric around the back of the board and neatly staple gun in place.
Step 3) Next make the fabric pockets. Measure and cut out a strip of fabric approximately 1/3 the height of the frame plus 7cm for hems by the width of the frame plus 30cm. Make a top seam along one long edge by turning under a 2cm hem. Sew in place. Using the photograph as a guide, take the length of fabric and pin 2 folded pockets, pinching and pleating so the inside fold measures approximately 10cm, then press. Sew along the bottom long edge taking in 2cm to secure the fabric in place. Lay the pockets across the bottom of the backing board, lining up the seam with the edge of the board, and glue into place along the side and bottom edges plus the middle of the pocket strip to create two separate pockets. Once dry, turn the backing board over and pull the extra fabric around the back of the board once more and staple gun into place.
Step 4) Stretch two lengths of braid across the top two thirds of the board, secure into place on the back of the board with the staple gun. Finally, reassemble the frame.
Sign up to our newsletter for style inspiration, real homes, project and garden advice and shopping know-how
Liked this? Find more of our craft ideas on Country Homes and Interiors' website. Plus, be first to hear about our favourite buys and exclusive competitions on Facebook and Twitter