Yes, you can paint plastic plant pots – but only if you follow one of these two foolproof methods
It’s time to start a plastic plant pot revolution

EDITOR’S NOTE: An earlier version of this article included a quote from a purported expert whose credentials we have not been able to verify. The quote has been removed. We regret this lapse in our verification process and have updated our internal protocols to reduce the risk of recurrence.
If you’re wondering whether you can paint plastic plant pots, you’ve come to the right place. After all, we’ve got a whole stack of them in our garden shed, too… and they’re screaming out for a makeover.
Yes, we all know that it’s super easy to paint terracotta plant pots, but it seems as though fellow plastic plant pot hoarders are missing a real trick. That’s because it’s incredibly easy to paint these pots, no matter whether you’re looking for budget garden ideas or you want to add a new look to your living room.
But there’s still an art to painting plastic plant pots (no pun intended). You need to make sure that you use the right materials and put in the right amount of prep to bring your unique designs to life.
So, that’s why we decided to do the hard work for you! We've created the ultimate guide on how to paint plastic plant pots. And the best part? There are two foolproof methods to choose from...

Can you paint plastic plant pots?
In a nutshell, and with the right prep and paint, yes you can paint plastic plant pots! So, instead of throwing these plastic pots in the bin, focus on giving them a new lease of life using either acrylic paint or spray paint.
Painting plastic pots with acrylic paint
The first option is to paint your plastic plant pots with acrylic paint. This is the safest and easiest option of the two, but also one of the most time-consuming.
What you’ll need
- Plastic pots - like these KINGLAKE 50Pcs Plastic Plant Pots from Amazon
- Acrylic paint of your choice (opt for waterproof if you’re keeping the pots outside)
- Sandpaper
- Paint brushes
- Sealant - like this Rust-Oleum Crystal Clear Gloss Protective Top Coat from Dunelm

Step-by-step
1. Wash your plant pot
Whether you have old plant pots lying around or if you’ve bought some online or from the garden centre, this first step of a thorough clean is essential if you want to successfully paint a plastic plant pot. Grease, dirt and dust will all stop the paint from adhering properly.
Sign up to our newsletter for style inspiration, real homes, project and garden advice and shopping know-how
To wash your plant pot, dunk it in a bucket (or sink) full of warm soapy water and make sure you wipe both the inside and the outside of the pot. Once you’ve done this, ensure it’s fully dry before moving on to the next step.
2. Sand the pot with sandpaper
Anyone who has tried and failed to paint a plastic pot may have dealt with dripping or cracked paint. That’s because, to successfully paint a plastic plant pot, you actually need to sand off the shiny surface of the pot.
Sanding away this shiny top layer offers the paint a rougher surface for the acrylic paint to stick to, and fine-grit sandpaper will allow you to do this without leaving sandpaper lines behind.
When you have this rough surface, brush away any loose debris or give it another dunk in warm, soapy water to ensure you don’t paint over any dirt particles. For extra peace of mind, you could even apply primer paint before painting the plant pot in your desired.
3. Paint the pots
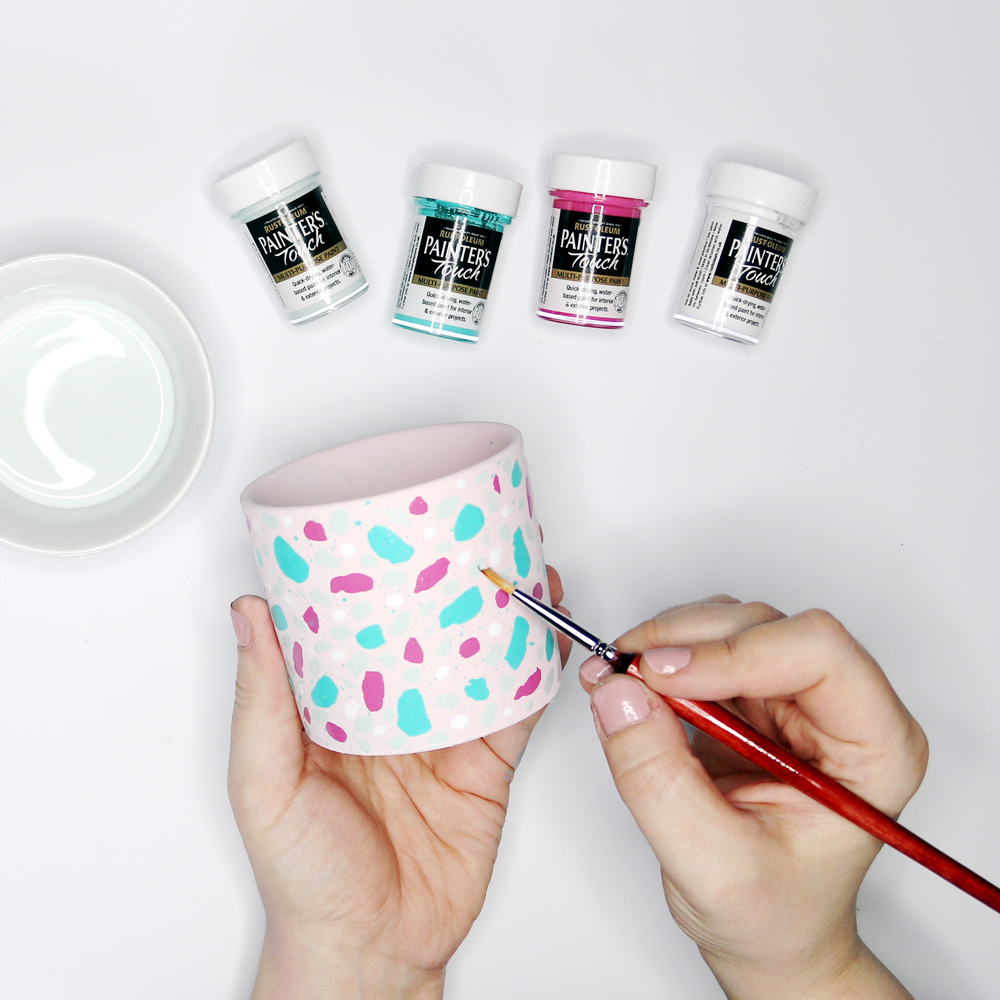
The final step is where you can really let your creativity shine. As long as you’ve chosen acrylic paint or paints, you can go wild with your design.
You could opt to go for one single colour, or you could draw and paint a design that will truly show off your personality and your home decor style. There are no rules when it comes to this step, so put on your creative hat and let the paintbrush guide the way.
Of course, this may be a time-consuming process. 'Keep in mind it may require several layers to get a good coverage. Remember to allow for each coat to dry properly before applying the next,' says Emma Bestley, Co-founder & Creative Director for YesColours
After putting so much time and hard work into painting plastic plant pots, though, it’s always a good idea to give it a coat or two of sealant. This will protect it from UV damage while also giving it a glossy sheen.
Painting plastic plant pots with spray paint
The second option is painting your plastic plant pots with spray paint. And while this will take you no time at all, there are some safety precautions you need to consider before starting.
What you’ll need
- Plastic pots
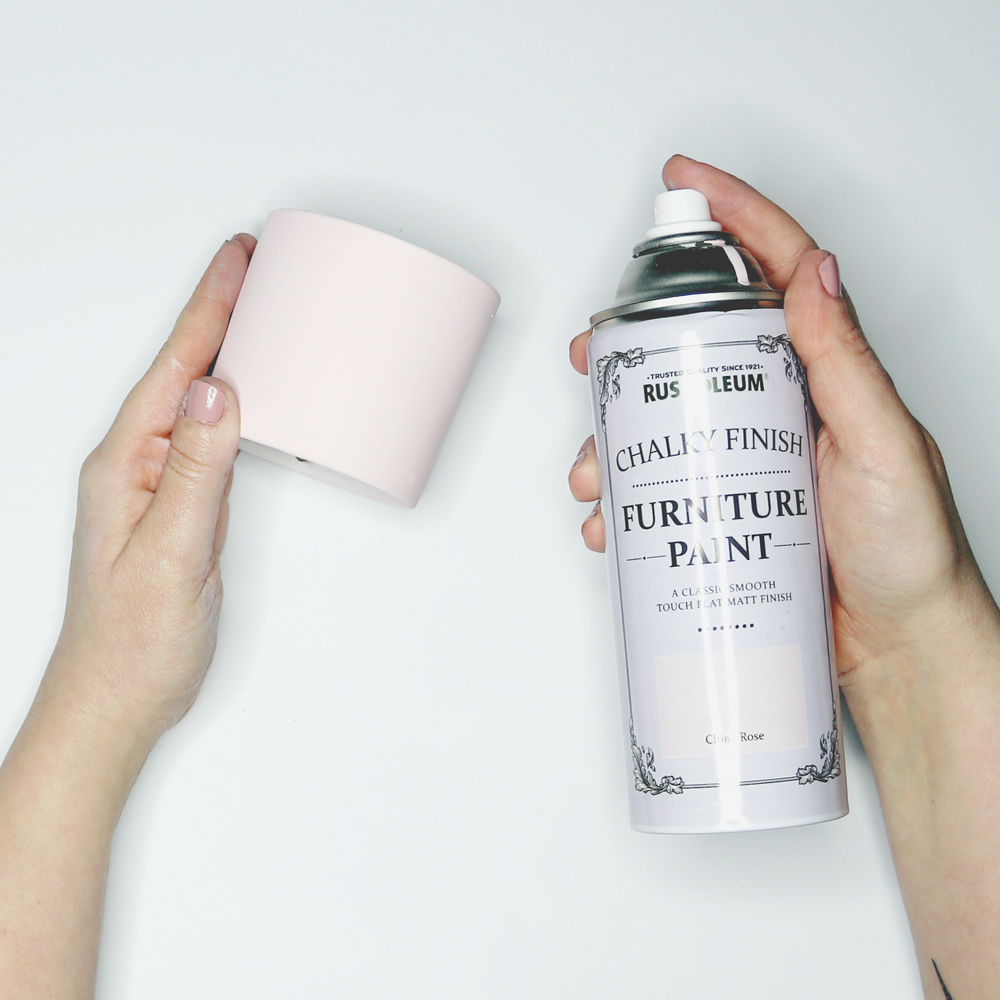
- Spray paint of your choice - like this Rust-Oleum Chalky Finish Furniture Spray Paint
- Sandpaper
- Floor protection (for example, a large piece of cardboard or a plastic sheet)
- Respiratory mask - like this Site Reusable Half Respiratory Mask from B&Q
- Sealant
Step-by-step

1. Wash and sand your plant pot
No matter whether you’re painting a plastic plant pot with acrylic paint or spray paint, much of the prep is the same.
‘Before you start painting the pot, give it a clean – either with soap and water or some alcohol/nail varnish remover to ensure it is completely free from dirt and make sure the planter is completely dry before you begin painting,’ says Holly Jones from Garden Street.
Then, sand your plant pot to remove the shiny outer surface. You want to create a roughened surface that the spray paint can easily grip. Use normal sandpaper for this, then brush or wash off any loose debris.
2. Protect yourself and the area
Although spray painting is arguably much easier than painting with paintbrushes and acrylic paint, it’s also a much dirtier and dangerous process. That’s why it’s always a good idea to protect the area around you - and protect yourself, too.
Always wear a face mask when you’re spray painting, but make sure you don’t just grab one of your leftover lockdown masks. Opt for a respirator, as this will stop you from breathing in harmful spray paint particles.
You then need to find the perfect spraying spot. Ideally, head outside and place some floor protection on the grass. But if you have a small garden or you don’t have a garden at all, opt for the largest room in your house and open up all of the windows around you. Then, place your protection on the floor and cover up any nearby furnishings with some old sheets.
3. Spray the bottom of the pot
One of the things we love about spray painting is that you have the option to work with texture. And while it’s easy to opt for gloss or chalk spray paint, you could also play around with stone-effect spray paint, too. This Rust-Oleum Stone Spray Paint is perfect if you’re looking to take a leaf out of Stacey Solomon’s book - but the choice is ultimately yours.
And when it comes to spray painting a pot, it’s best to work in sections to ensure that you don’t ruin your work in the process. So, start by spraying the bottom of the pot.
You can do this by turning it upside down on the floor and then spraying the bottom there and then. This shouldn’t take long, but it’s important that you wait for it to dry before continuing with the next step.
4. Spray the rest of the pot
When the bottom of the pot is painted and dry, you can turn the pot upright. Then, you can grab your can of spray paint and spray the rest of the pot.
If you can, move yourself rather than the pot to finish this step. By keeping the handling of a pot to a minimum, you can reduce the chances of fingerprints or smudges. Of course, you might have to spray a few coats of spray paint to get your desired effect - but this is a personal choice.
And when that’s all done, you can finish off with a spray sealant to protect your newly painted pot.
FAQs
What kind of paint do you use on plastic pots?
Normal wall or wood paint won’t work on plastic pots, and you may find that it’ll simply slide off or crack within a few days. Instead, try and find a paint that’s designed specifically for use on plastic. This is normally acrylic or chalk paint.
However, you may still need to do some prep work when using this plastic paint. It’s always a good idea to sand off the shiny coating of a plant pot before you do anything to it, as this will offer a roughened surface that the paint can stick to.
What is the best way to paint plastic plant pots?
The best and easiest way to paint plastic plant pots is to use spray paint. By using this method, you could paint your plastic plant pots in a matter of minutes. However, this method is more dangerous than the alternative - and should ideally be done outside.
If you live in a small apartment and don’t have the necessary space to spray paint carefully, it might be better to use acrylic paint instead. As long as you prep the pot before you start painting, it’ll offer a similar aesthetic.

Lauren Bradbury has been the Content Editor for the House Manual section since January 2025 but worked with the team as a freelancer for a year and a half before that. She graduated with a Bachelor’s degree in English and Creative Writing from the University of Chichester in 2016. Then, she dipped her toe into the world of content writing, primarily focusing on home content. After years of agency work, she decided to take the plunge and become a full-time freelancer for online publications, including Real Homes and Ideal Home, before taking on this permanent role. Now, she spends her days searching for the best decluttering and cleaning hacks and creating handy how-to guides for homeowners and renters alike, as well as testing vacuums as part of her role as the Ideal Home Certified Expert in Training on Vacuums, having spent over 110 hours testing different vacuum models to date!