Plywood kitchens are making a comeback - this is how to DIY the look for less without having to rip out your cupboards
Replace your kitchen cabinet doors with stylish plywood in 4 easy steps

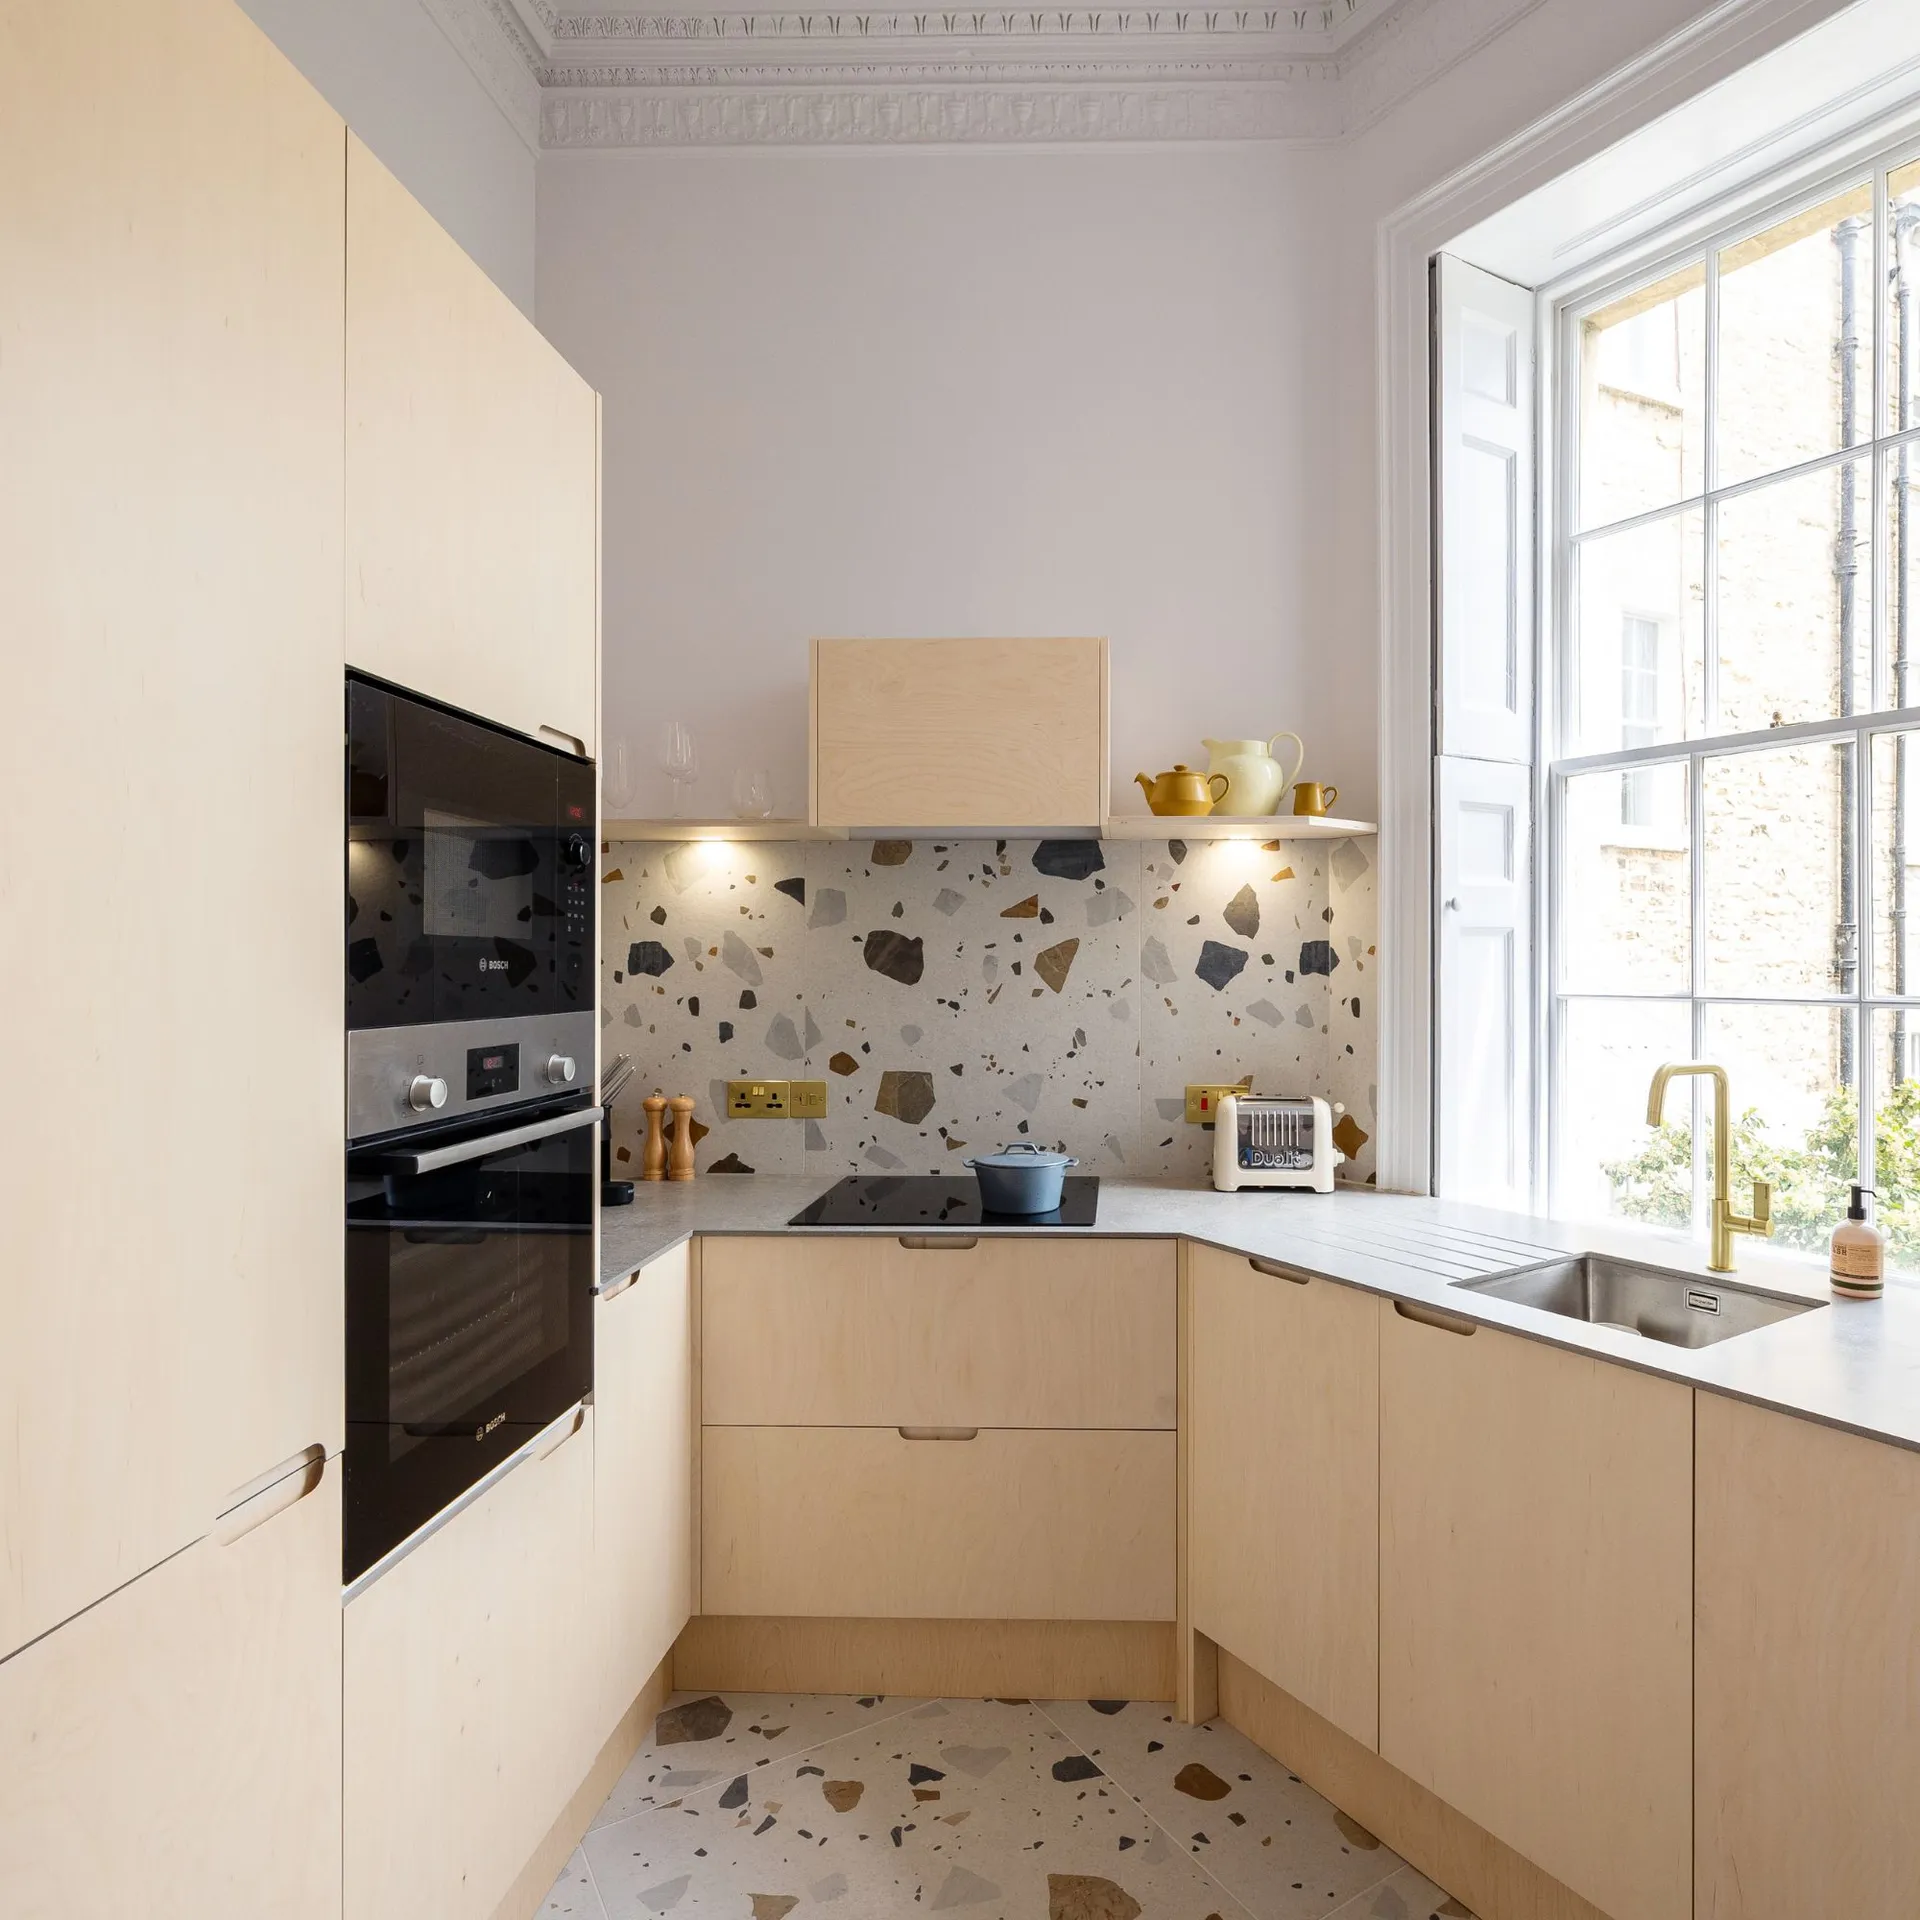
Plywood cabinets are one of the top kitchen trends the ‘Ikea-hack’ kitchen company HUSK is predicting for 2024. And it’s safe to say that we’re very much on board with this!
‘Plywood's pale colour, gorgeous grain and nod to utilitarian chic makes it a top choice for a stylish kitchen revamp,’ says the kitchen company. But what we love most about plywood is the opportunities for upscaling. With a relatively blank canvas to work with, you can transform the rest of your kitchen with colourful tiles, chic LED lighting, stylish appliances, and more.
But if you don’t have the cash to buy replacement kitchen cabinet doors, why don’t you make them yourself? Plywood is an incredibly cheap material, and doing it yourself is perfect for those looking for budget kitchen ideas. But don’t worry, it’s not as difficult as it may seem. All you need to do is follow these simple instructions.
How to make plywood kitchen cabinet doors
‘Replacing door and drawer fronts is a cost-effective and eco-friendly way to update a kitchen because, by reusing existing units, you are reducing waste that would normally go to landfill. It is also a great way to customise a kitchen,’ says Dave Young from HUSK.
And we’re here to tell you that gloss kitchen cabinets are out, and minimal hardwood kitchen cabinets are in.
What you’ll need
- Plywood sheets - like these Hardwood Plywood Sheets from B&Q
- Electric sander - like this Black + Decker Mouse Sander from Argos
- Waterproof sealant - like this Ronseal Ultra Tough Internal Clear Mattcoat Varnish from B&Q
- Tape measure
- Sandpaper
- Cabinet hinges
- Drill
- Screwdriver
Step-by-step

1. Measure your cabinet doors
Just because your kitchen looks tired and in need of a refresh doesn’t mean that you have to replace the whole kitchen. In most cases, the kitchen cabinets themselves will be in good condition - meaning you just need to replace the doors.
But to get this right, you need to make sure that you measure your current doors… and then measure again for good luck. After all, if you measure twice, you should only need to cut once!
If you have standard cabinets from the likes of Ikea or Howdens, you can also find these measurements on their website. And with these measurements in tow, you’ll be able to move on to the next step.
2. Choose and cut your plywood
One of the things we love about plywood is that every piece is different. The grains are different, the colours are different, and there are different thicknesses.
And while you can choose whatever colour or grain you’d like, it’s important to stick to the same thickness of your original kitchen cabinet doors when making your own. This will ensure that they fit properly into the cabinets and sit well underneath your kitchen countertop.
Of course, with the other measurements on hand, you can also work out how many pieces of plywood you need. For example, if you have ten standard IKEA 60 X 80cm door fronts in your kitchen, you’d need five sheets of 2.44m x 1.22m plywood. If you’re using this Hardwood Plywood from B&Q, five sheets would cost you £135.
It’s important to note that many DIY stores will also cut your wood to size if you ask them, making your life much easier. If you want to do it yourself, though, just make sure that you cut them carefully and stick to your measurements.

3. Sand and seal your new cabinet doors
Plywood is traditionally used to board lofts or build interior walls, which means you’ll normally buy it in a very rough-and-ready form. Because of this, it’s important to give it a good sand before you hang them in your kitchen.
This is an important step if you really want to showcase the beauty of plywood. As Dave says, ‘Ply has a beautifully tactile surface which, when sanded, almost has a velvet texture to touch.’
To do this, you can either sand by hand or use an electrical sander - but we’d suggest using a mixture of both. Use the electric sander for the larger surface, and use fine-grit sandpaper to finish off the edges.
Once you’re confident that you have a smooth surface, you can then seal your cabinet doors. And as kitchens can be both wet and dirty, it’s important that you remember this step in order to protect the plywood and keep it in top condition for years to come.
It’s best to opt for a sealant that has polyurethane in it, as this will be more hard-wearing. And while you’ll probably need a few coats of this to get the protection you’re after, always follow the instructions on the tin for the best results.
4. Hang your doors
When your plywood has been sanded and treated, you can then move onto the hinges. We’d always recommend buying new hinges for new doors to give them that good-as-new look while also making the DIY process even easier.
After all, by keeping the old hinges in your old cabinet doors, you can use them as the perfect measuring guide for your new hinges on your new cabinet doors. As long as you drill the holes in the same place, you should be able to hang them with ease.
To make this step even simpler, you might want to consider buying a Hinge Hole Cutter from Wickes and attaching it to your drill. Of course, the size of this drill bit will depend on the size needed for your specific hinges.
With the holes in place, you can then work on hanging your doors and screwing everything in place. And when you’ve done that, all you need to do is add the handles and hardware of your choice.
Of course, if you don’t want to DIY your kitchen cabinets, companies like HUSK will happily do the hard work for you.

FAQs
Can you make kitchen cabinet doors out of plywood?
‘Creating custom plywood cabinet doors is an economically savvy alternative to buying fully custom-made cabinets,’ explains Keely Smith, interior designer expert and artist at Home Stratosphere.
Yes, plywood is extremely durable and offers that minimalist feel that many homeowners are after. And creating your own kitchen cabinets if also a very easy process - especially if you can find a DIY shop that will cut your plywood to size.
When that’s done, you just need to make sure that you treat your wood and hang your doors in place of the old ones.
Should I use plywood or MDF for DIY cabinets?
When it comes to making your own cabinets, there are normally three options homeowners consider: plywood, MDF, and particle board/chipboard. And in interior design expert Keely’s eyes, plywood will always come out on top.
‘On the note of alternatives, while plywood holds its own merits, materials like MDF and particle board also exist as options. Particle board is lighter on the wallet, though it doesn't quite match plywood's durability. MDF sits somewhere in between,’ she explains.
Of course, it’s always a good idea to weigh up your needs and requirements, alongside your budget, when deciding between MDF or plywood for DIY cabinets.