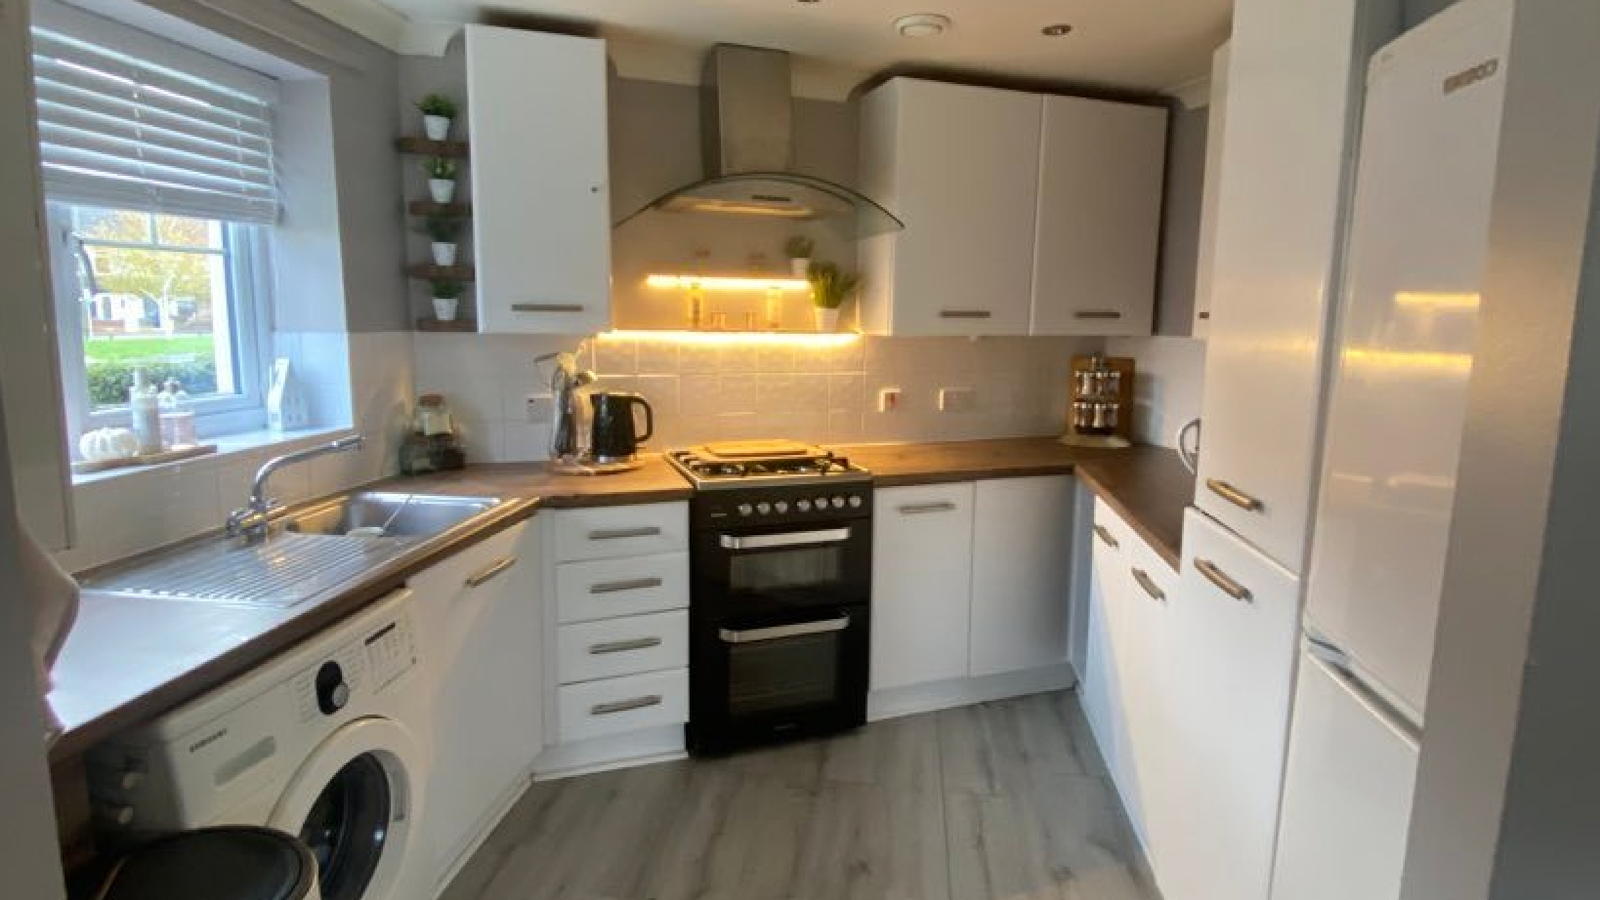
This kitchen was given a chic new look for just £70 using genius vinyl wrap hack
An ordinary wooden kitchen was given a chic white glow-up on a shoestring budget

Sign up to our newsletter for style inspiration, real homes, project and garden advice and shopping know-how
You are now subscribed
Your newsletter sign-up was successful
Kitchen makeovers aren't synonymous with being easy on the purse strings, but sometimes small, more affordable changes can make all the difference. One mum, for example, saved money by wrapping her kitchen – and gained a whole new look in the process.
If you're not sure what we mean by wrapping, it's the process of applying adhesive vinyl to your kitchen cabinets or worktops, transforming their look quickly and cheaply. Instead of spending hundreds on hiring professionals, it's a small easy budget kitchen idea that you can do yourself.
Self-adhesive vinyl kitchen makeover
Using B&Q bargains, along with freebies from Facebook Marketplace, Eleanor Bromley, from Farnham, Surrey, set about transforming her dated kitchen.
'I follow lots of home Instagram accounts and I'm inspired by women such as Mrs Hinch and Stacey Solomon,' she told money-saving community LatestDeals.co.uk. 'I'm also a member of various groups on Facebook – all related to home improvements – so being surrounded by these influences led me to come up with the idea for my kitchen makeover.'
Before
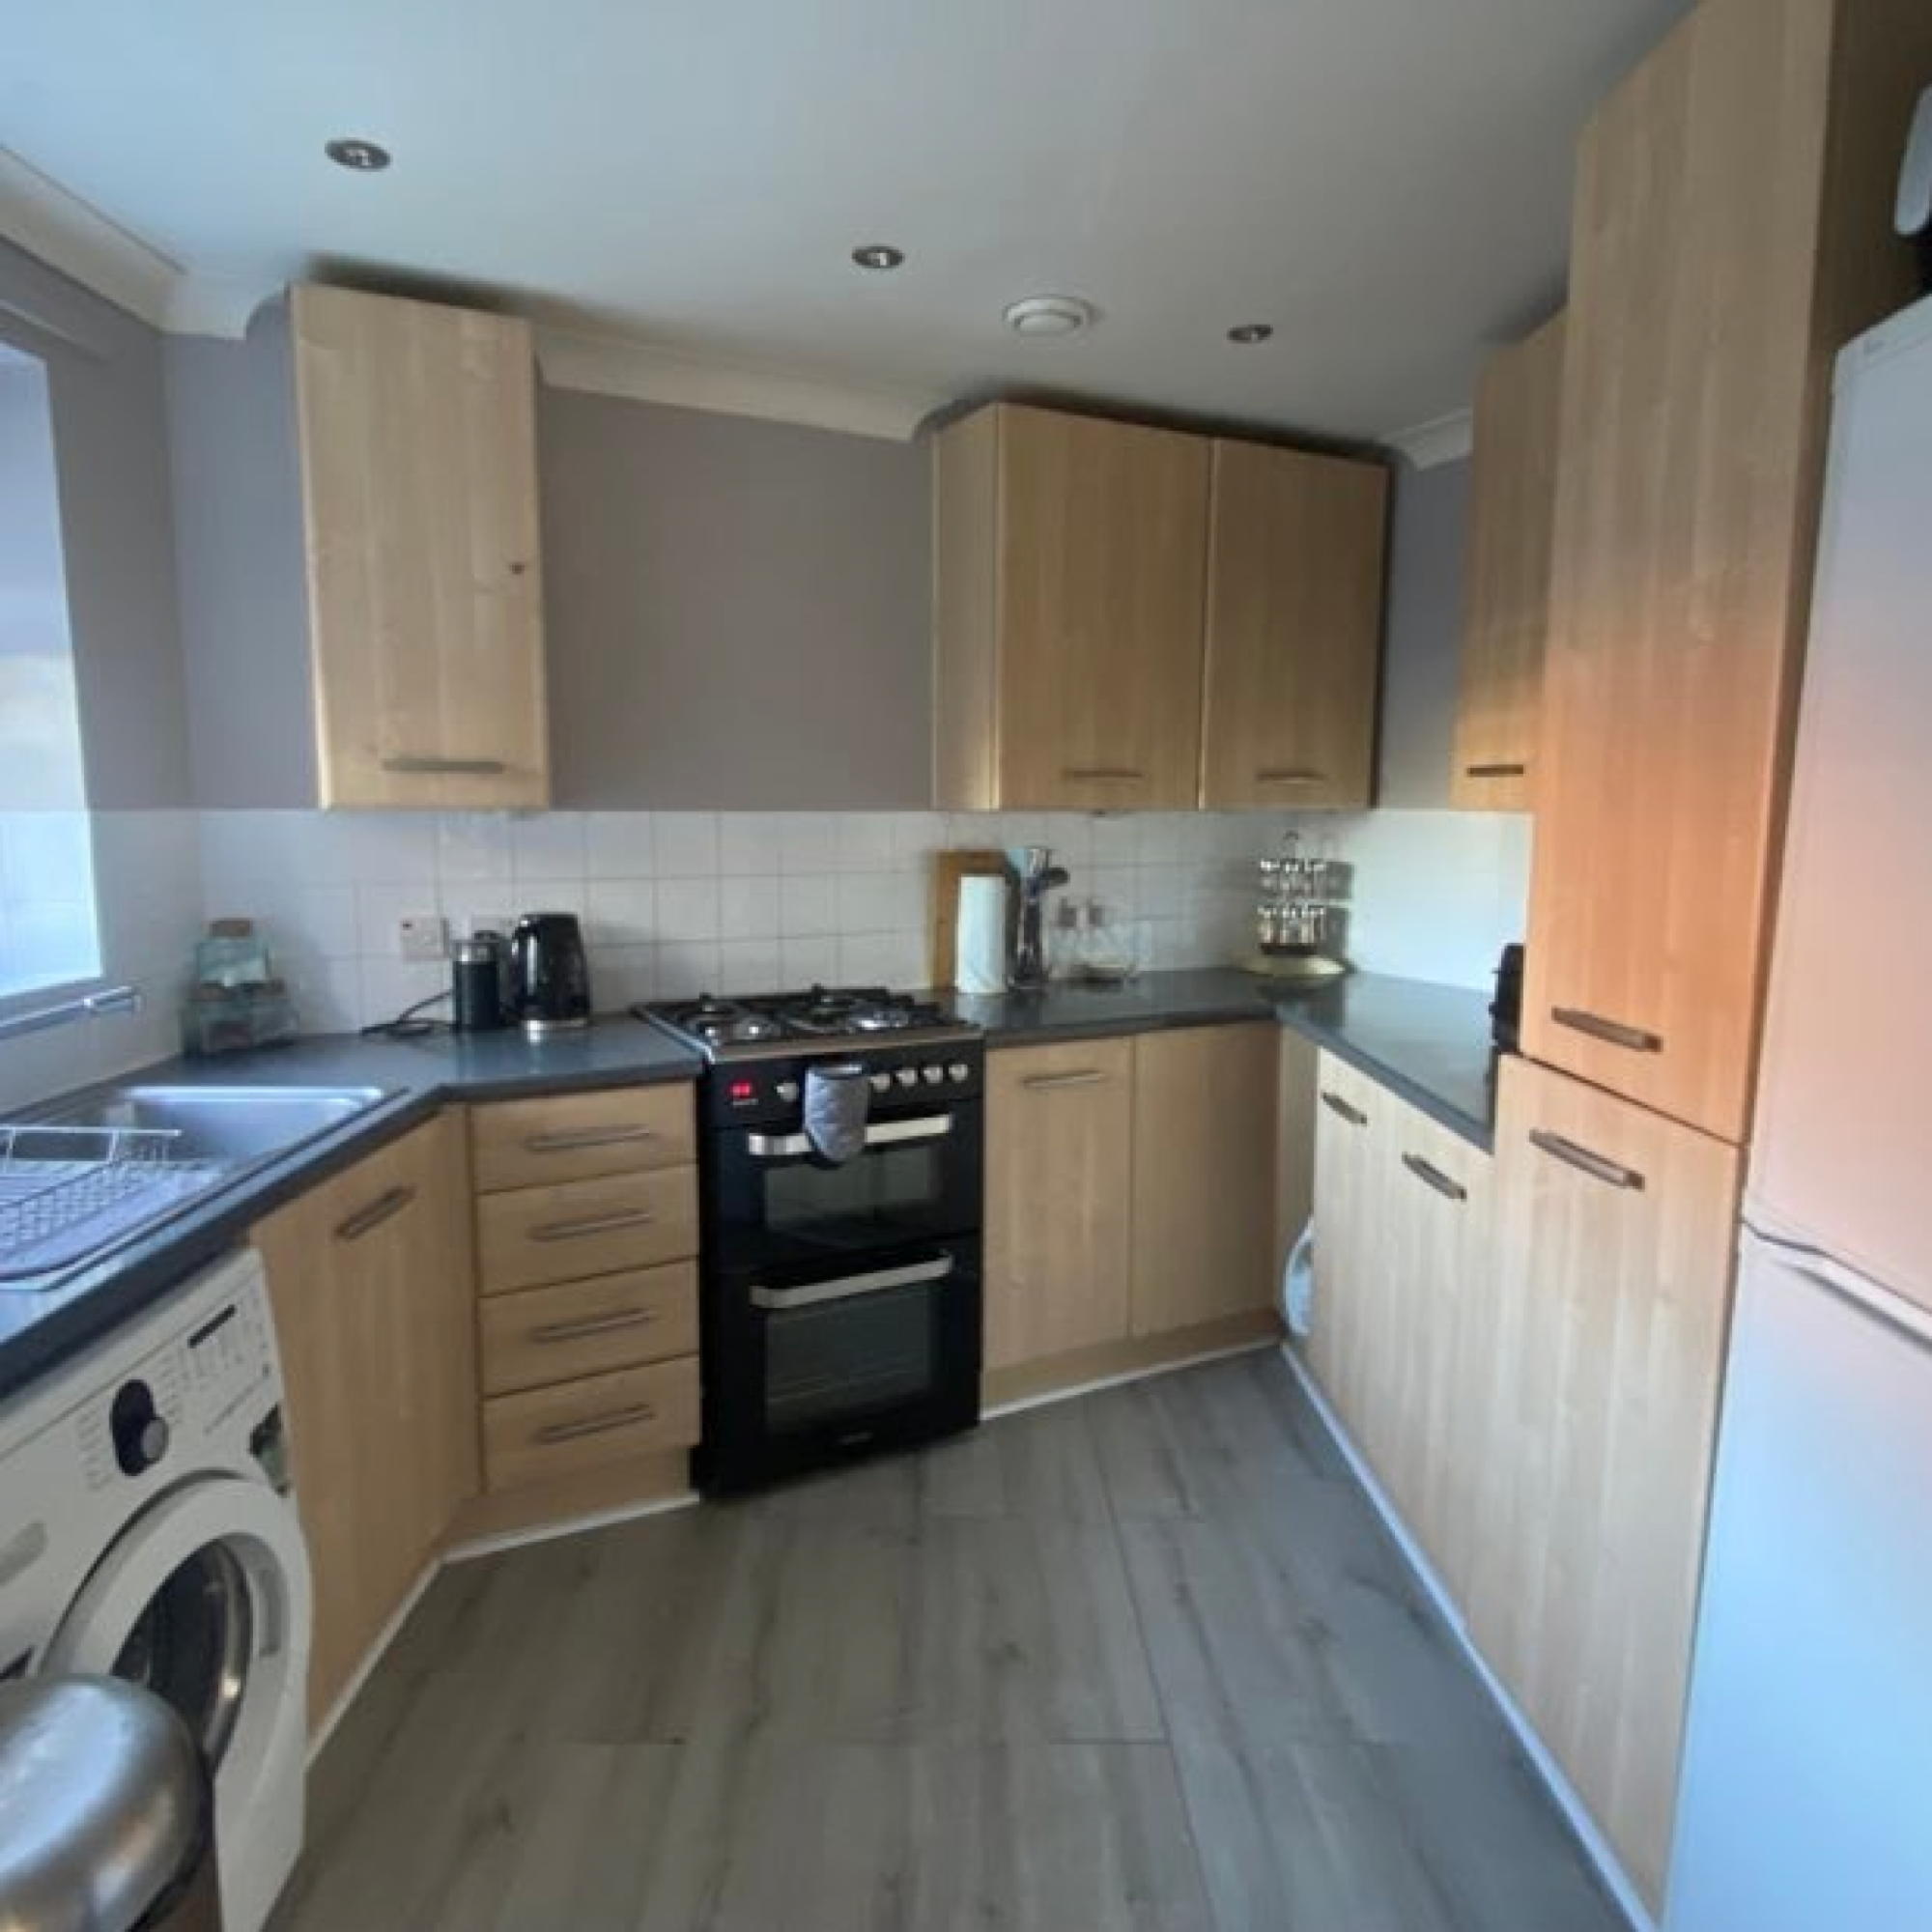
As part of an open-plan living space, the kitchen scheme had been chosen to tie in with the rest of the room. ‘My living room has lots of neutral, earthy tones and since the kitchen is attached I'd tried to keep that theme flowing through,' says Eleanor. 'The cabinets and drawers had a pine wood effect with grey worktops.'
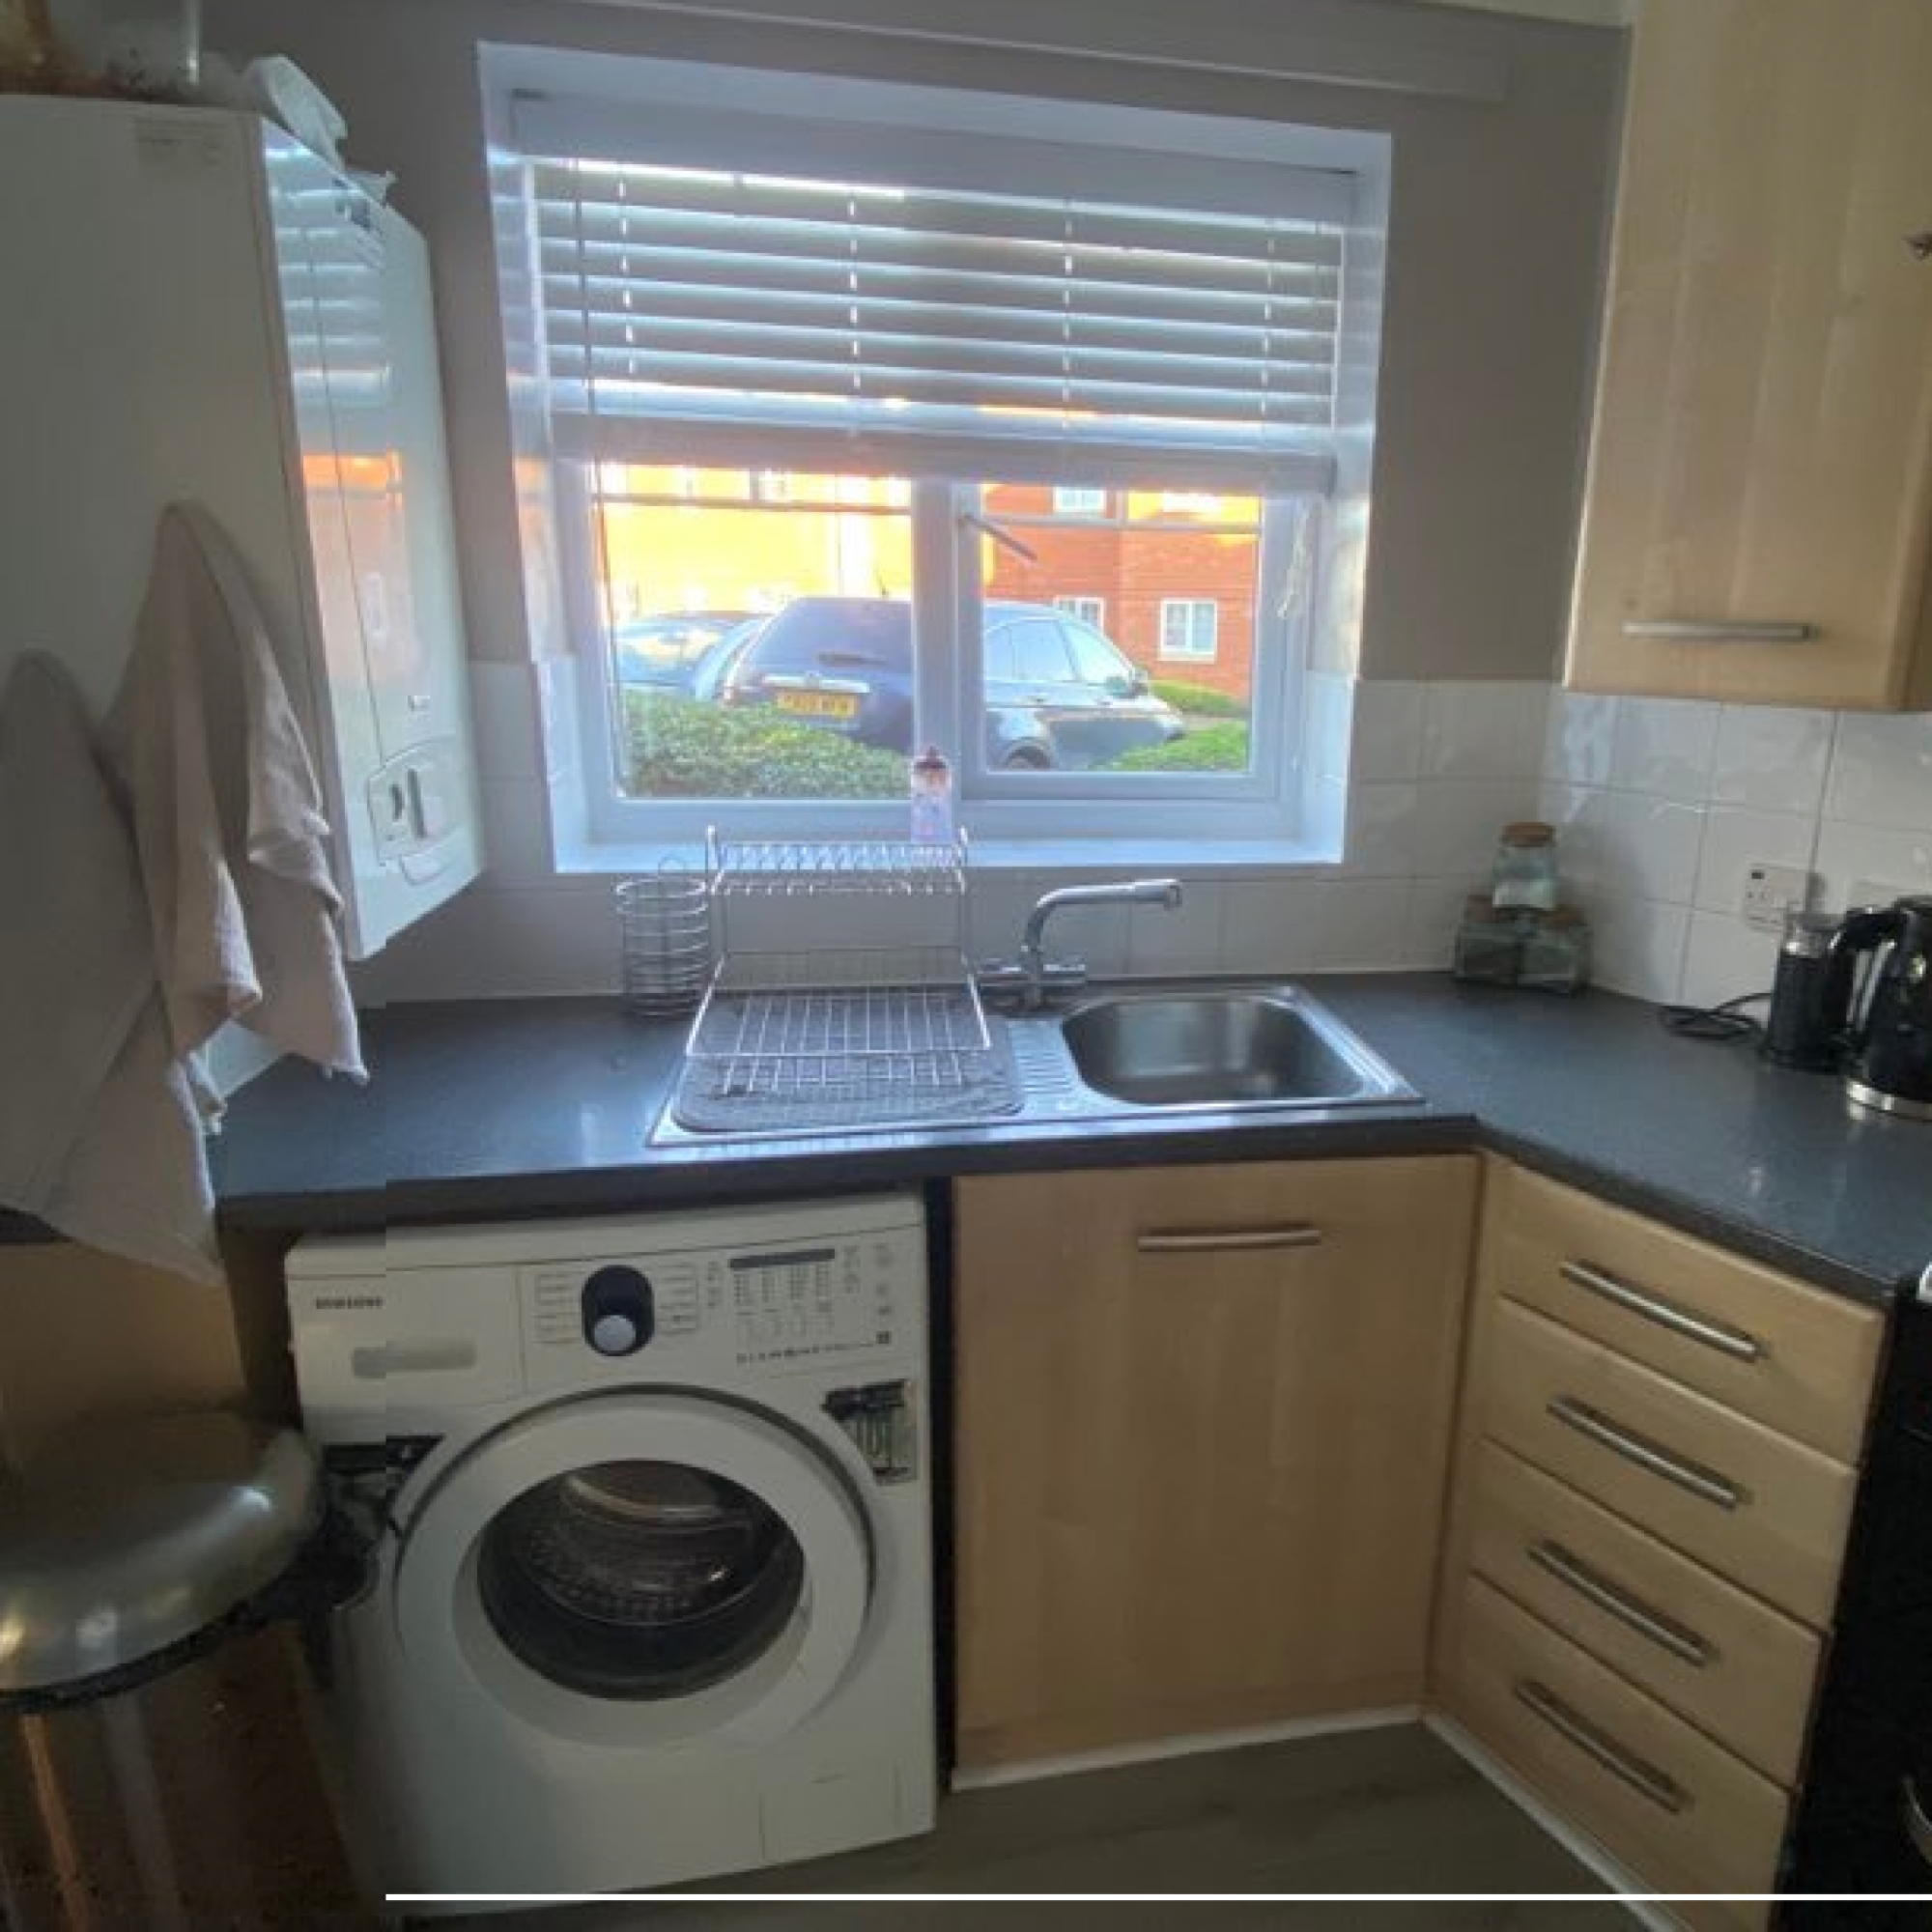
Although the kitchen was fully functional, Eleanor was keen for a change. ‘I wanted to make it look a little different by giving the counters that wooden feel and turning the cabinets white instead to make the space look bigger,' she says.
'I'd seen people using vinyl wrap in their kitchens and I realised I could save a lot of money by doing this myself.'
Sign up to our newsletter for style inspiration, real homes, project and garden advice and shopping know-how
After
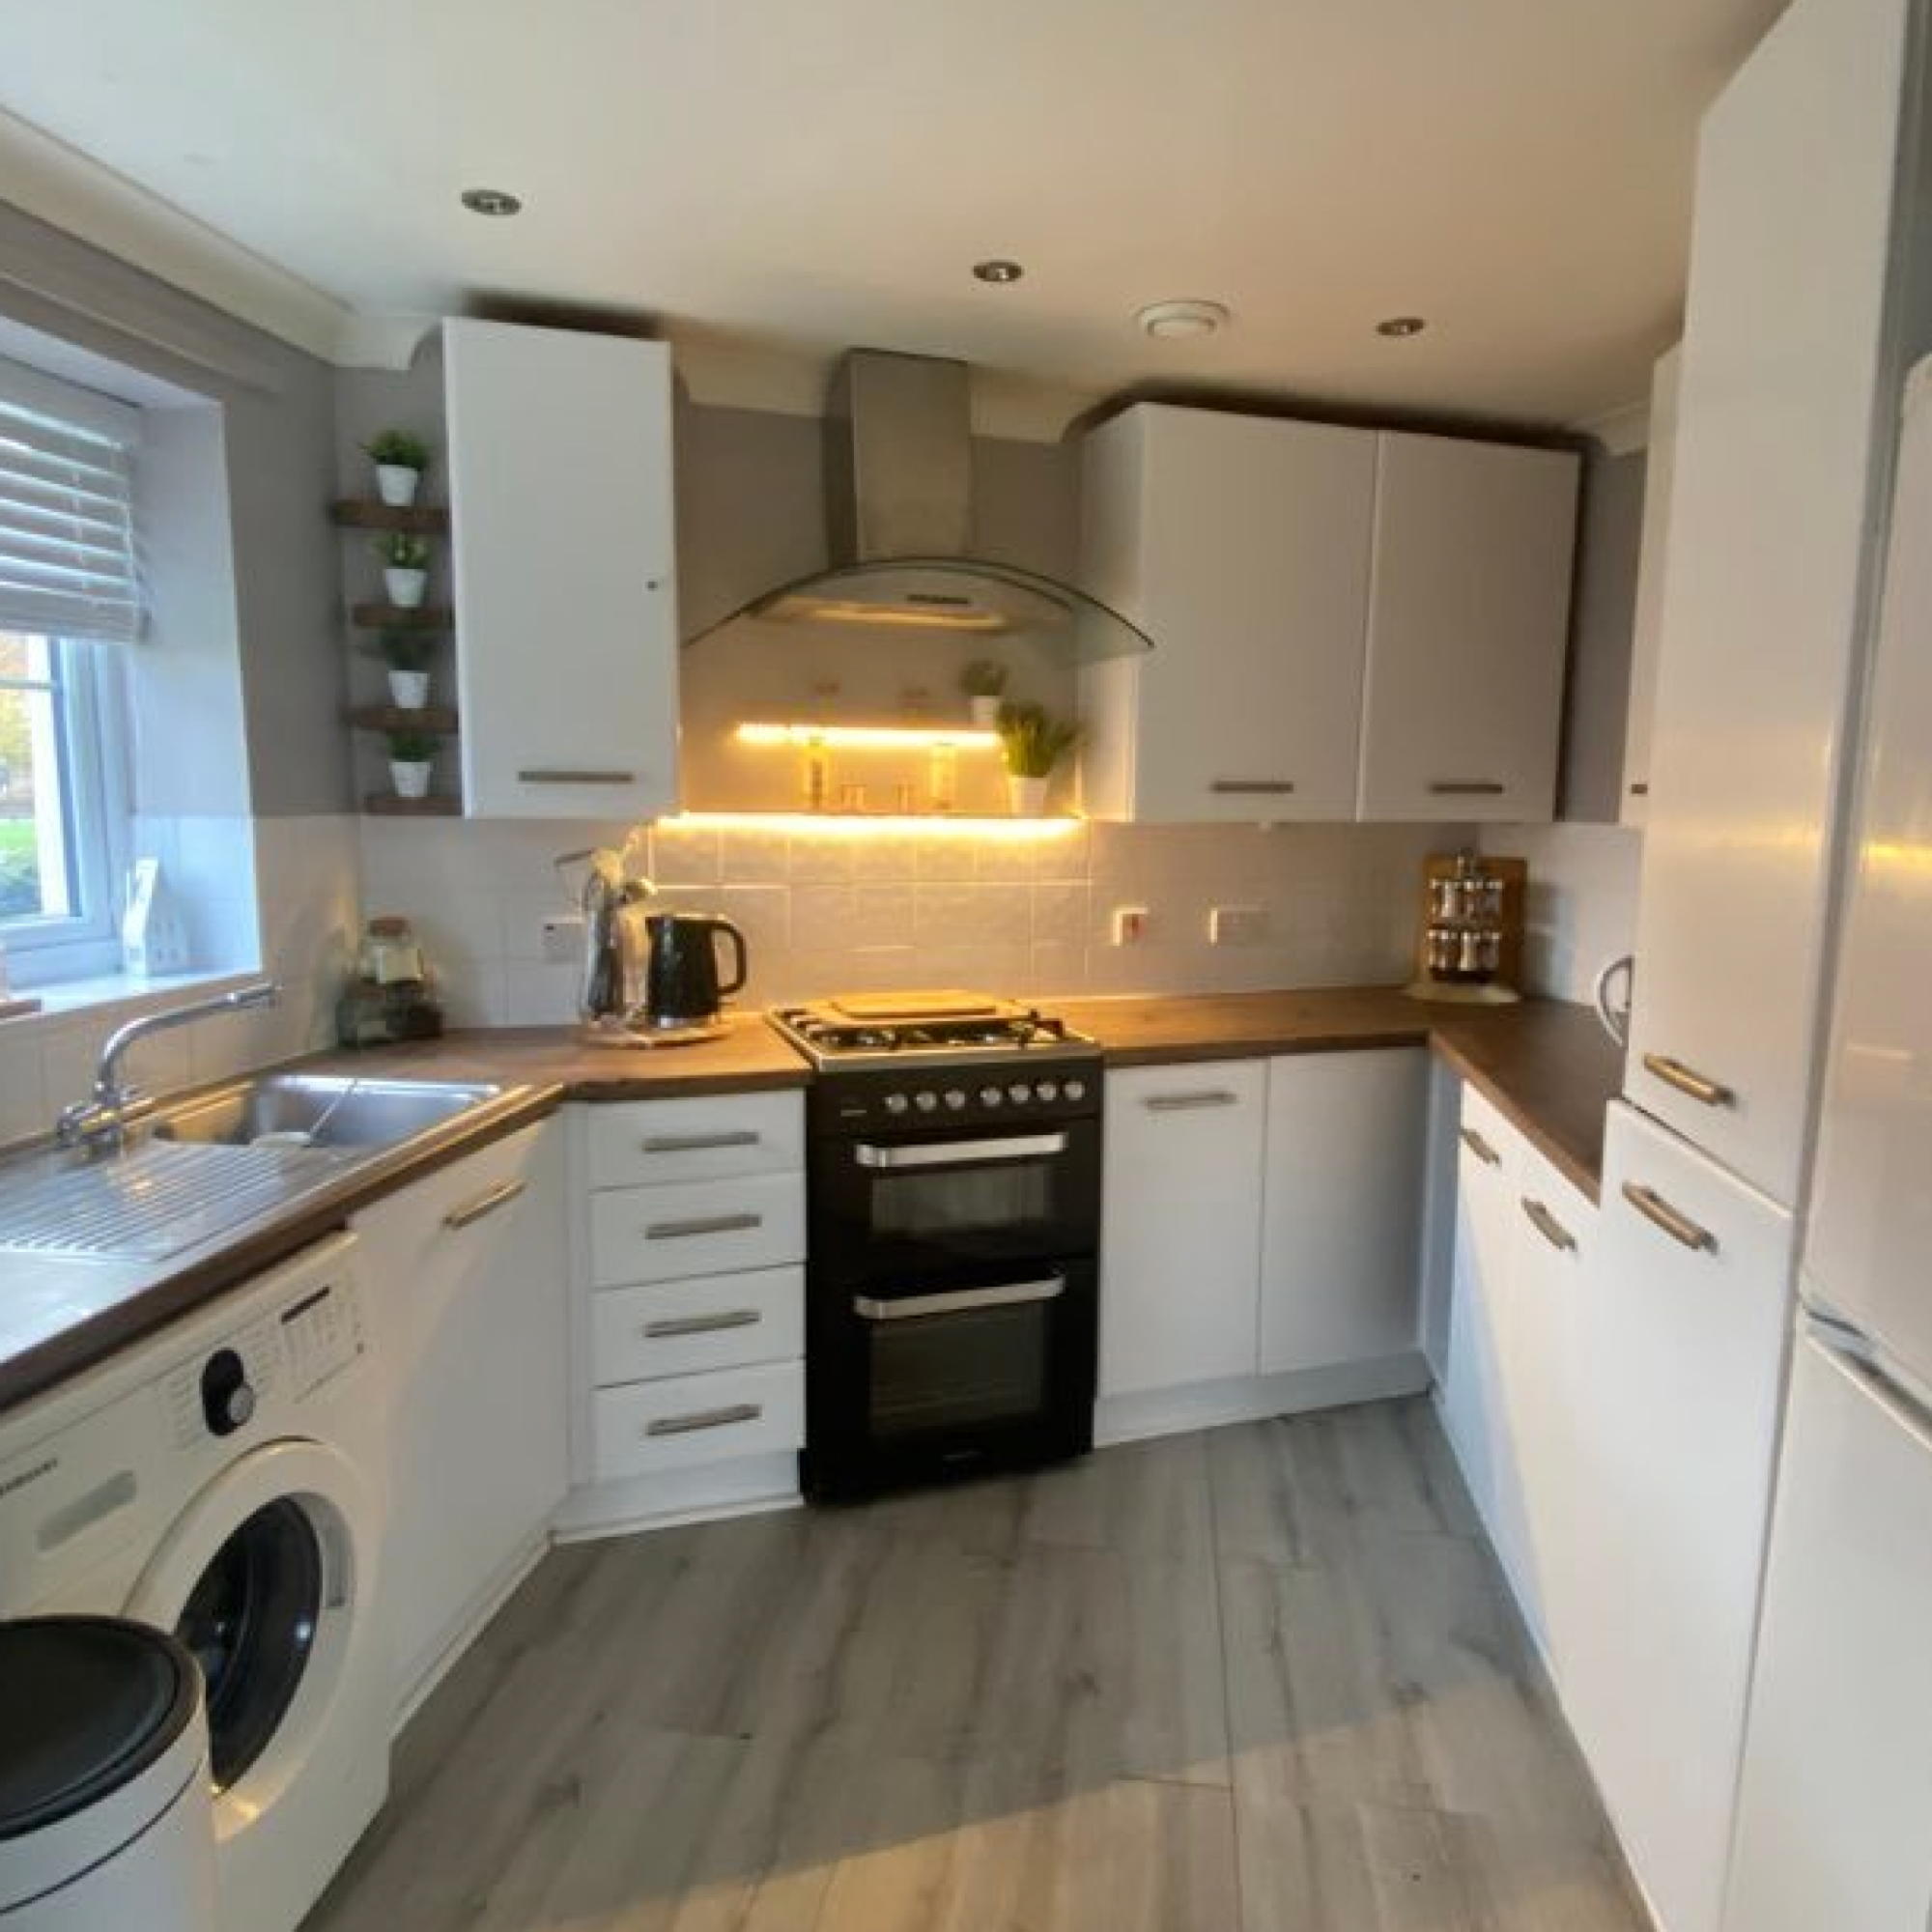
What a difference those subtle changes have made and it cost less than £70 – not bad for a new-look kitchen! ‘I bought most of the supplies from B&Q and my first purchase was D-C-Fix Whitewood Gloss White Wood Effect Self-Adhesive Film, which was £6.50 a roll at the time,' says Eleanor. 'I bought seven rolls after measuring out how much I needed for the cabinets and drawers.'
‘The wrap I chose for the counters was D-C-Fix Woodgrain Artisan Oak Self Adhesive Vinyl Wrap Film,' she continues. 'This was slightly more expensive at £7 a roll but I only needed three rolls for this part of the project. I also picked up a D-C-Fix Self-Adhesive Film Decorator Knife Set for £3.50.'
‘I knew that getting the wrapping job to look professional would take thorough cleaning, time and patience,' admits Eleanor. 'To get started, I watched some helpful videos on YouTube to ensure I had a good overview of the process. Then the cleaning stage began. I made sure every surface was scrubbed clean and dried thoroughly.'
After lining up the paper on the surface and cutting away any access, Eleanor slowly peeled away the vinyl film a couple of inches at a time, smoothing it down as she went. ‘My kitchen has very strange angles and it made it tricky to line up the D-C-Fix,' she says.
'Bubbles under the paper were another issue, and you need to be really slow and patient. If you notice a bubble under the paper you have to peel it back and redo the section all over again!'
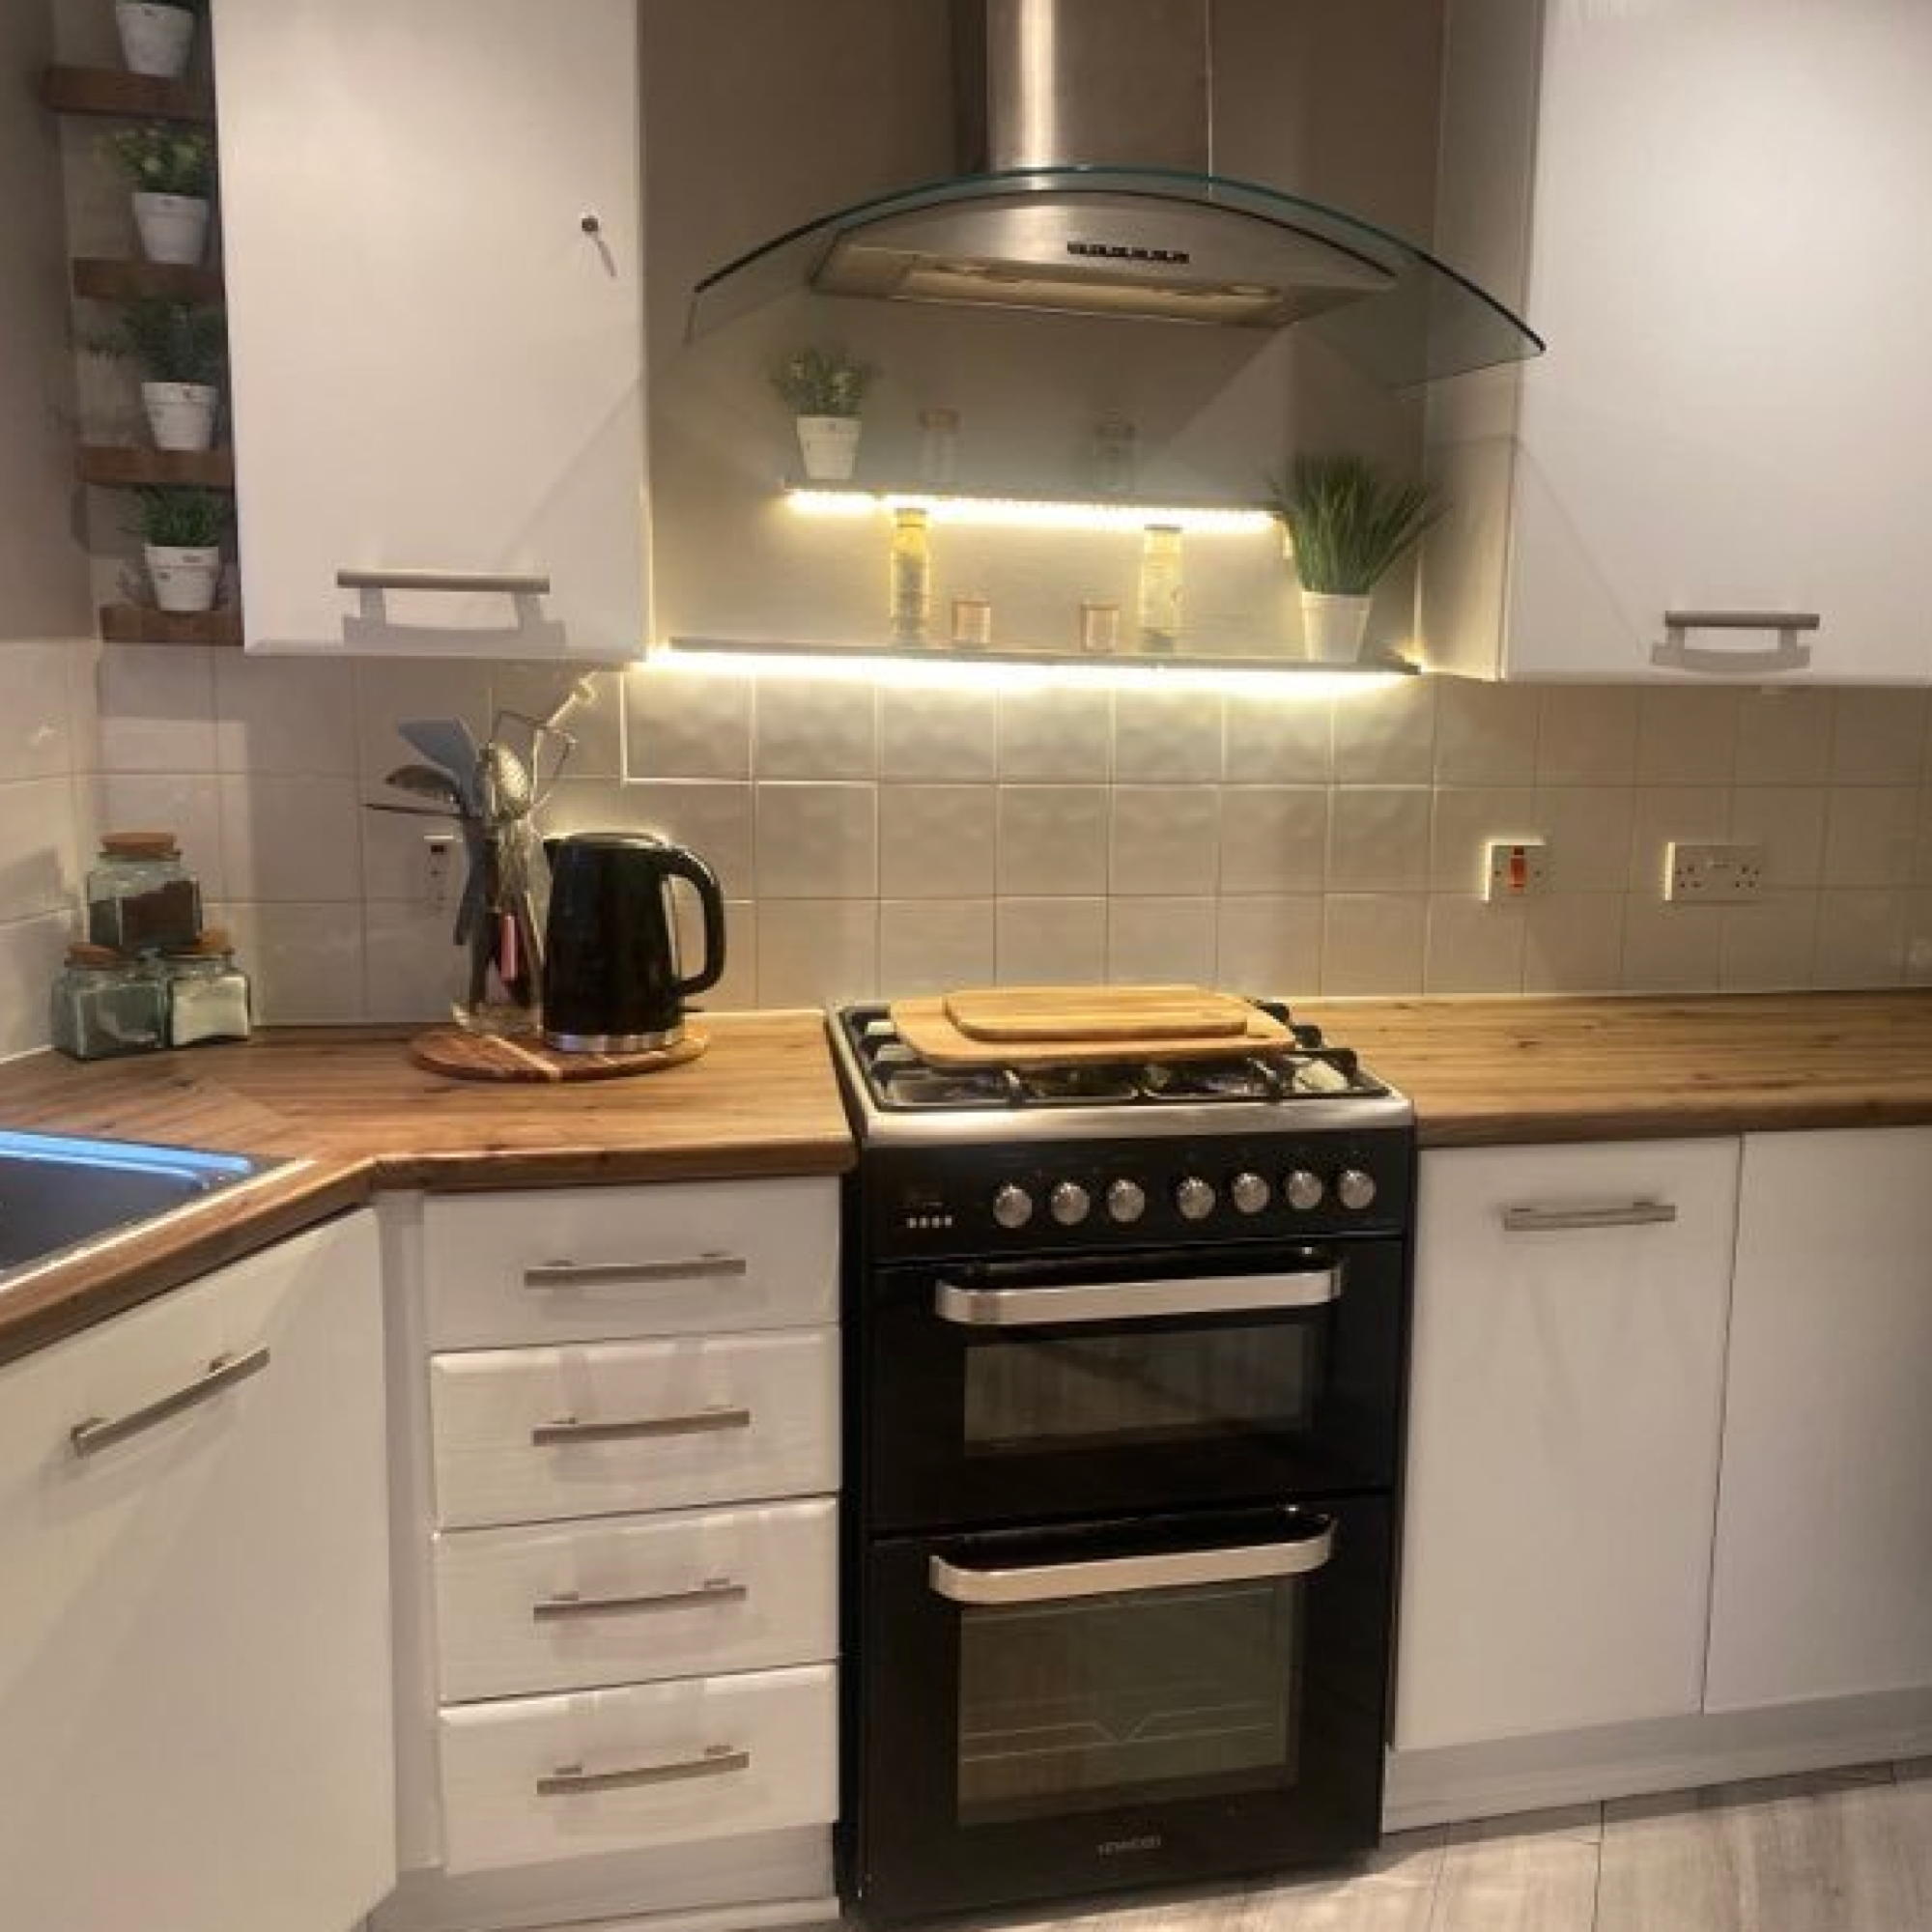
Wrapping the units wasn't the only change Eleanor made to her kitchen ideas. ‘I wanted to make the space look more decorative, so I collected a free extractor fan from somebody on Facebook Marketplace and I had help with putting it onto the wall securely,' she says.
‘I also had some spare wood lying around so I sawed it down to make some shelves. I hated that the tiles finished directly below the cupboards as it really highlighted the gap between the cupboards. So I figured that adding the shelves would tie it together better. I already had some LED strip lights from Amazon and used them underneath the central shelves.
‘I'm so pleased with the outcome. It was a lot of work – over 20 hours on my own, mostly after my two-year-old went to sleep! – but it feels worth all my efforts after seeing the results.’
Laurie Davidson is a professional stylist, writer and content creator, who lives and breathes interiors. Having worked for some of the UK’s leading interior magazines, styled homes up and down the country and produced sets for TV shows, adverts and top brands, it’s safe to say Laurie has had a pretty exciting career. Find her on Instagram at @lifeofaninteriorstylist or over at lauriedavidson.co.uk