Planning bathroom lighting – our expert guide to achieving lighting perfection
Transform your bathroom into a spa-like sanctuary with step-by-step assistance from design pros

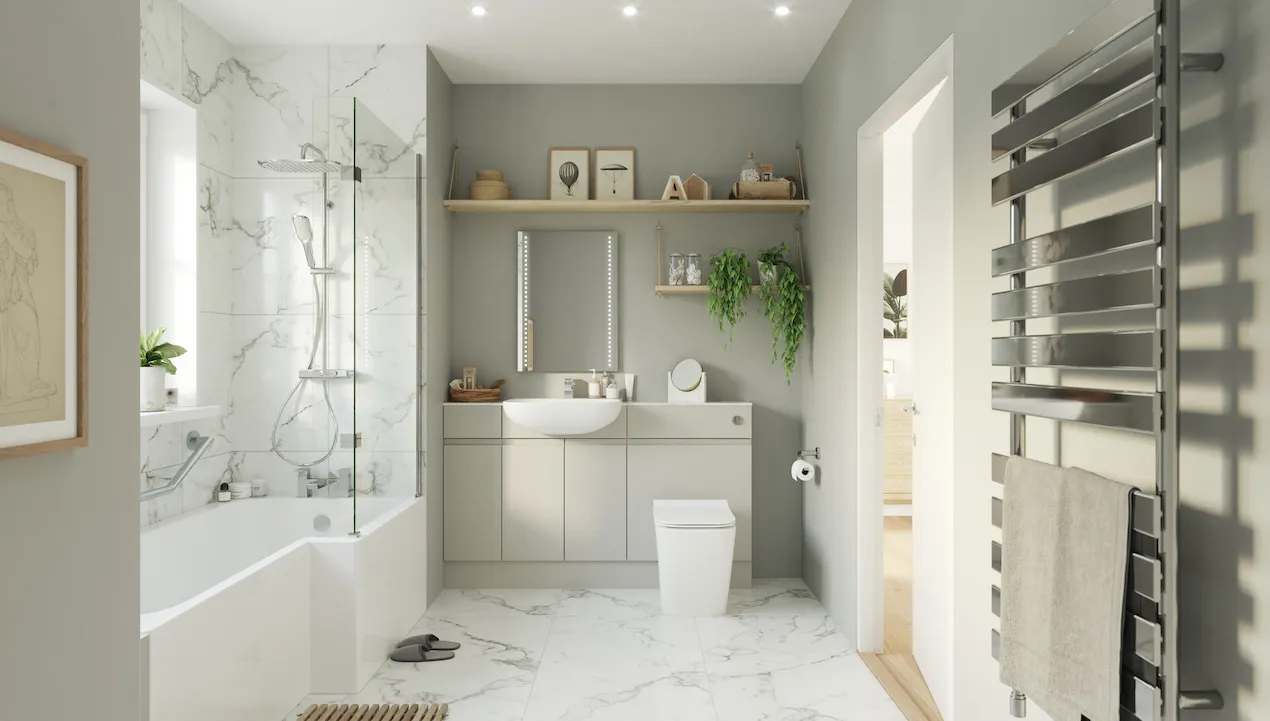
Forget the ugly frosted-glass fittings that hugged the ceiling of every bathroom you ever entered growing up (get therapy if necessary); those dark days are long gone. Now when it comes to planning bathroom lighting, the sky is your limit, (well, bathroom safety regulations are your limit).
Modern bathroom lighting ideas are awash with imagination, flexibility and glamour.
‘The best bathroom lighting schemes rely on light coming from several different sources, and each controlled separately, so that it creates a relaxed and warm scheme, but one that is functional too,’ says Grazziella Wilson, Head of Creative at Ca' Pietra. ‘Your choice of lighting also has an impact on the overall room design and is a great way of illuminating key features in your bathroom.’

It might sound complicated but dedicating a little time to planning bathroom lighting properly, before you so much as buy a light bulb, can make all the difference. Once everything is wired in and working, you can look forward to lying back and relaxing in a softly lit soapy bath, without your inner zen being ruined by ugly lights looming over you.
Planning bathroom lighting
Any bathroom reno will benefit from strategically positioned illumination that’s fully flexible, mood enhancing and immensely satisfying to look at, whether switched on, or off. Let our experts explain how to make it happen in just six simple steps.
1. Find an electrician

If you’re installing additional lights, adding in more circuits or just moving things around, you’ll need a skilled electrician, which can be easier said than done. ‘Personal recommendations are often the best way to find a reliable electrician in your area. Seek referrals from reputable sources, such as local bathroom professionals, and always check your chosen electrician is licensed and well-versed in the specific requirements of bathroom installations,’ says Ruth Foster, Interior Designer, Victoria Plum.
Most bathroom electrical work will need to be tested and certified that it complies with building safety standards. The easiest way to make that happen is to find an electrician who is registered with a government body such as NICEIC or NAPIT, as they can self-certify the work.
The cost of hiring an electrician will vary depending on where you live, and the complexity of the work to be done. Alterations/upgrades to your fuse board will up the cost, as will awkward access issues in the roof space above your bathroom, and the amount of cables that need to be chased into walls. Victoria Plum estimates the cost of fitting a single new bathroom light fixture at around £150-£190.

Ruth Foster is Victoria Plum’s resident Interior Designer. She is passionate about home-related trends and loves light, airy interiors shaped by organic forms and colours. With a background in textiles for interiors, she has recently received her Master’s Degree in interior design.
2. Create a lighting plan

A lighting plan will also help ensure your bathroom is adequately lit, with no dark corners, and really help you maximise the atmosphere-boosting powers of a beautifully illuminated bathroom.
‘When taking on a bathroom renovation, crafting a lighting plan should be among the initial stages of your project. Integrating the lighting plan into the early design phase will help ensure you seamlessly align the lighting with key fixtures, such as the basin, bath and shower,’ advises Julian Page, Head of Design, BHS.
Your lighting plan doesn’t need to be complicated – it can be done with pen and paper if necessary. Use it as a positioning guide for your electrician (who may then do any detailed schematics the builder/plumber requires) and can also be handy to share with your lighting supplier if you need to talk through the options.
Your lighting plan should detail how many lighting circuits you would like; having lighting on separate circuits means certain lights can be turned off and on independently.
Lighting professionals recommend at least two layers of lighting in a bathroom to effectively control the atmosphere. For example, you might have your over mirror light ideas and bathroom pendant lighting ideas on one circuit, and softer, indirect lights on another. This will allow a brightly lit bathroom in the morning when you need to wake up, and a more gently lit space for relaxing in the bath before bed.
3. Control the mood

Mood lighting, aka accent lighting, is not essential in a bathroom, but it will bring ALL the boutique-spa grade feels. You might decide it’s not necessary in an en-suite shower room, where you dash in and out as quickly as possible, but mood lighting can prove a game-changing ingredient when creating a spa-style bathroom.
‘Mood lighting is the most important layer of lighting for creating atmosphere. It helps set the tone for the space and is essential for creating a place for relaxation and retreat. This type of lighting can be incorporated in soft spot lighting or strip lighting on top of recesses, by a bath or underneath a vanity unit,’ explains Jo Sangster, Senior Designer, Ripples London.
Mood lighting should ideally be on a separate switch to the other lights in your bathroom and be fitted with bulbs that emit a low-watt, warm white light, rather than cold white.
4. Shop for fittings

Whether you do it online or on foot, shopping for bathroom light fittings is now much easier as more manufacturers respond to the demand for more choice and more stylish options. Some of our favourite bathroom lighting trends can be found at Pooky, Mullan Lighting and Industville.
Whatever you buy, you’ll need to be sure they have the correct Ingress Protection ratings to suit where they are to be installed in the room. The main areas of concern are around and inside the shower and bath, and within splashing distance of the basin. In short, the higher the IP rating, the better the light fitting will be at keeping out moisture and dust particles.
As well as shopping for dedicated bathroom light fittings, it is also worth checking out outdoor lighting collections, many of which are IP44 rated so suitable for use in Zone 2, which is around the basin area, as well as any areas outside of the IP rating zones.
Besides safety, also consider the finish of your bathroom light fittings. Modern metallic finishes like brass, copper and bronze can be matched to your brassware for a cohesive look but do check if the finish is unlacquered or coated. Unlacquered metals, like brass or copper, are often known as ‘living finishes’ because they patinate and evolve over time. In moisture-rich bathrooms, that process can be accelerated, and the results are not always pretty.
‘For those seeking a consistent look with less upkeep, alternatives such as coated brass or copper, stainless steel, or chrome are preferable choices in bathrooms,’ adds Shehryar Kahn, director, Sheraton Interiors. ‘These materials provide durability and resistance to corrosion while maintaining their appearance with minimal maintenance.’
5. Plan your switches

While it’s not illegal to fit light switches inside the bathroom, they do need to be plate switches suitable for bathroom use and must be positioned at least 60cm away from the bath or shower. For small bathroom lighting ideas, it is often safer to install the switches just outside the entrance to the bathroom, allowing you to flip the switch as you enter and leave. If you only have one light to control in the bathroom, a pull cord is an alternative option.
‘Consider fitting dimmable controls, which enable you to set the mood for a relaxing bath, or provide maximum illumination for applying makeup,’ adds Julie Lockwood, Product Manager at Bathrooms to Love. ‘Look for switches and controls in smart finishes, such as brushed brass or matt black, that match the hardware used in your bathroom. Paying attention to these small details can make all the difference and give your new bathroom a designer edge.’
6. Source the best bulbs

The type of bulb you choose can have a huge impact on how effective and comfortable the lighting is in your bathroom. Get it wrong and you may end up with the skin of a corpse every time you look in the mirror or, worse, never notice that stray whisker growing under your chin. Shudder.
‘When selecting bulbs for bathroom light fittings, consider factors like brightness, colour, and warmth to create an ideal ambiance. Opt for bulbs with a colour temperature between 2700K and 3000K for a warm and inviting glow,’ advises Mara Rypacek Miller, Managing Director, Industville.
‘Additionally, choose bulbs with a high Colour Rendering Index (CRI) to ensure accurate colour representation. Brightness, measured in lumens, depends on the bathroom's size and purpose; 800-1100 lumens are suitable for general lighting, while task areas may require higher intensity. For optimal energy efficiency, use LED bulbs, which are long-lasting and eco-friendly.’
FAQs
What are the guidelines for bathroom lighting?
Bathroom lighting safety regulations are fairly straightforward and involves the bathroom being split into zones, with each zone determining the correct IP rating required for the light fittings used inside.
Zone 0 covers where light fittings are most likely to get wet (inside the shower or bath for example) and stipulates a rating of IP67
Zone 1 is within splashing distance (such as around the sink and bath) and requires IP44 or ideally higher
Zone 2 is further away from splashes, at least 60cm radius from any tap, and requires at least IP44.
Zone 3 applies to bigger bathrooms and is well away from water. There is no IP requirement in this zone unless water jets are likely to be used when cleaning (for example a shower hose in a large wet room).
How do you arrange bathroom down lights?
There’s nothing relaxing about lying in the bath looking up at a grid of dazzling downlights – so the first rule of arranging downlights is to avoid overdoing it, a.k.a one of the most common bathroom lighting mistakes. Your ceiling should not be peppered with them; no more than one downlight per square metre is recommended. The second rule is to throw any notions of perfectly symmetrical downlight spacing out with the bath water.
Downlights fit snugly to the ceiling, so you won’t notice the alignment, especially if you choose fittings with white trims that blend in. Put the tape measure down and instead focus on where you need the light to hit. Typically, this would be above the key features, like the loo, shower and bath. Choose directional downlights so that you can adjust the angle of light. Bathroom wall light ideas are more effective on either side of a mirror – ideally at eye level – but if you want a downlight in that area, position it closer to the wall so you don’t block the light with your head as you lean over the basin!
No matter what size your bathroom, there's no excuse not to fill it with flattering lighting that performs perfectly on multiple levels
