How to fit a decorative ceiling rose
Want to give your home a period touch? Style at Home tells you how to add ceiling roses to give your rooms grand impact


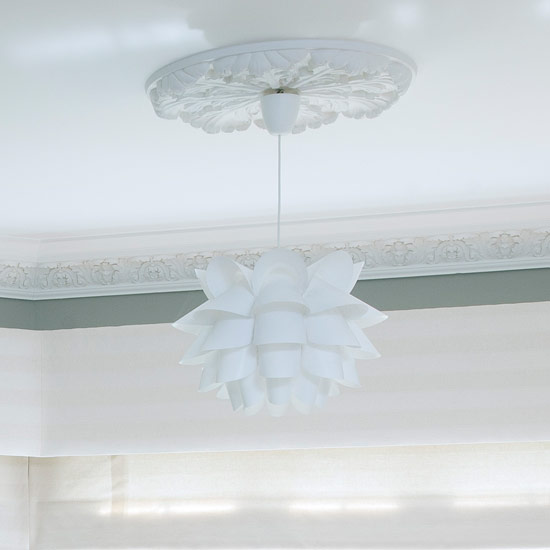
Is your home an older property that needs its period features reinstated? Then why not transform your ceiling by adding a decorative ceiling rose and make a feature of your light fitting.
Plaster ceillng roses are great focal points but they're heavy so are best fitted by a professional to ensure they're securely fitted. You could also use polyurethane ones which are much lighter and can be screwed into place or polystyrene ones which you can glue straight on to the ceiling. Make sure you pick a ceiling rose which matches the period-style of your home and don't forget to fit a stunning light fitting to make it stand out! Here's the kit you will need:
* Electric cable, pipe and stud (joist) detector
* Drill-driver with countersink drill bit
* Grip-and-grab adhesive
* Wood screws
* Flexible filler
* Emulsion paint
Turn the electricity off at the mains and dismantle your light fitting
until you're left with the light flex dangling from the ceiling and
nothing on the end. Heavy ceiling roses should be screwed into the
joists, so find those and check for pipes and cables with the detector.

Drill
a hold for the flex in the centre of the ceiling rose. Hold the rose in
place and if you're going to screw it, mark four equally spaced points
on it to correspond with the joist, then drill countersunk holes through
these points.
Apply adhesive all over the back of the rose. If you're just gluing,
thread the flex through the centre hole, position the rose and press
firmly. If using screws, do the same but also screw through the
pre-drilled holes in the joists. Neatly fill in the screw holes.
Fill
any gaps between the rose and ceiling with flexible filler, then wipe
off the excess. Paint when dry. Put the light fitting back together and
reconnect the power.
Sign up to our newsletter for style inspiration, real homes, project and garden advice and shopping know-how
For more decorating inspiration, craft ideas and cleaning hacks don't miss our dedicated DIY guide.

Amy Hodge has been working on interiors magazines for over 11 years. She's a freelance writer and sub editor who has worked for some of the UK's leading interiors magazines including Ideal Home, Style at Home and Country Homes & Interiors. She started at Style at Home just after it launched as food editor and is now chief sub editor for Ideal Home, Style at Home and Country Homes & Interiors.