How to render a garden wall - an easy step-by-step guide to update your garden on a budget
Rendering a garden wall can be tricky, but our easy step-by-step guide breaks it down for you

Money is tight for everyone at the moment, homeowners around the country are clutching at their purse strings and looking for ways to update their houses while keeping costs low. That is where learning how to render a garden wall yourself can come in if you're looking to update your garden on a budget.
But while it’s easy to make your own outdoor kitchen or build your own pallet furniture from scratch, rendering a garden wall is a little tricker. And no matter whether you need to render it for practical reasons or aesthetic reasons, it can easily go wrong.
That’s why we’ve put together this easy step-by-step guide for a foolproof and flawless finish, and you can expect this to cost you around £30 to £60/m2. A bargain, right?

How to render a garden wall
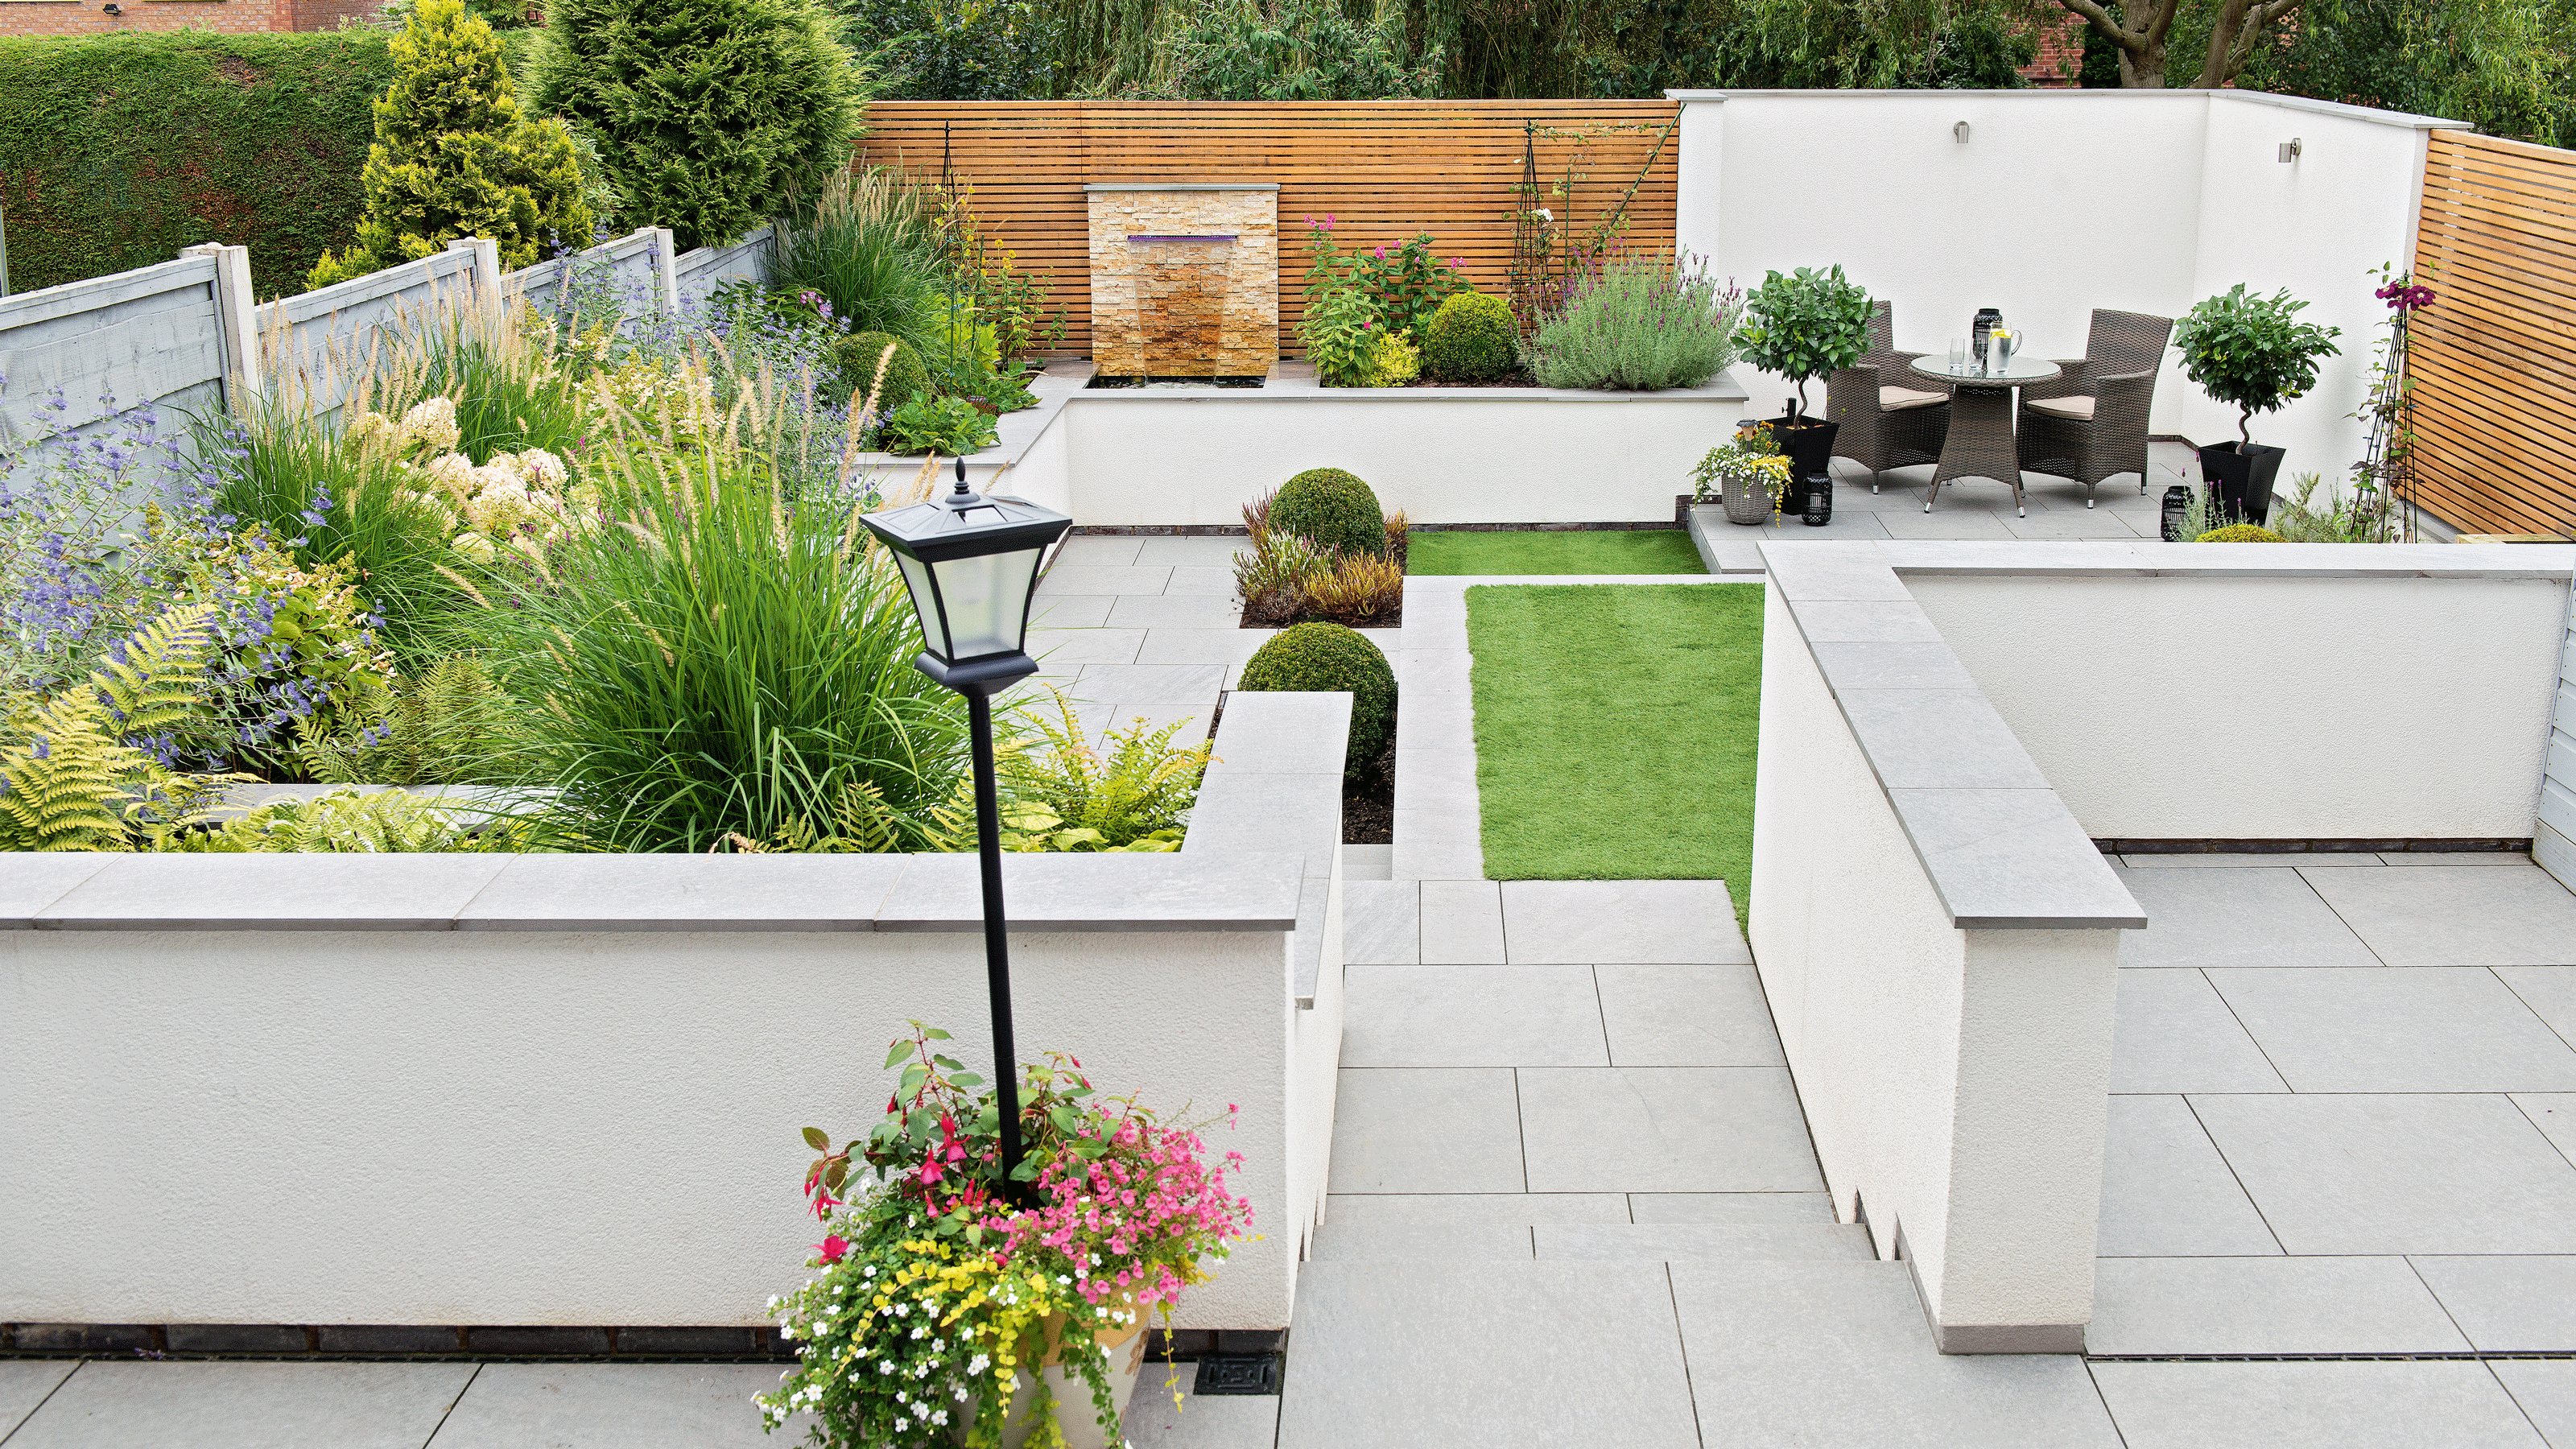
‘Rendering a garden wall can help modernise your garden space, and for those with smaller garden areas, painting it white can add some much-needed light with it being able to reflect any light that shines on it,’ explains Andy Simms, trade expert from MyBuilder.com.
What you’ll need
- Plastering hawk - like this Saber Plasterers Hawk from The Range
- Trowel - like this Faithfull Soft-Grip Pointing Trowel from Amazon
- Rendering mortar - like this Blue Circle Quality assured Mortar from B&Q
- Electric mixer - like this Mac Allister Corded Paddle Mixer from B&Q
- Rendering mesh - like this Drywall Master Rendering Render Mesh from Amazon
- Mixing bucket
- Brush
- Sponge
- Plank of wood
Step-by-step
1. Prepare the wall
Before you can even think about slapping on any new render, you need to prepare the wall. In fact, rendering a wall that hasn’t been prepared properly is a surefire way to fall at the first hurdle - and within just a few days, you could see it cracking and falling off.
‘It’s essential to strip the wall back to its original state, free from old render and any lurking debris,’ says James Mayfield, CEO and president of Mayfield Environmental Engineering.
Once you’ve removed any old render or debris, you then need to give your wall some extra attention. Give it a good look over, and keep your eyes peeled for any cracks or holes.
If these cracks or holes are bigger than you hoped they would be, it’s probably best to consult a professional to avoid any structural disasters. But if they’re manageable, you can fill in these imperfections yourself.
Then, give the whole wall a good wipe-down with water and a bristled brush to ensure a clean and smooth surface.
2. Choose your render and mix it up
When you’re confident that you have a safe and clean surface to work with, you then have to choose the right render for you.
‘The market offers a plethora of options, from acrylic to silicon,’ says James. ‘Yet, from my experience, lime and polymer-enhanced lime renders have always stood out, especially for garden walls. Their durability promises a wall that stands strong and free from cracks for years.’
Of course, the choice is yours when it comes to the render you use to render a garden wall. When you’ve chosen, it’s best to follow the mixing instructions on the packet for the best chances of success.
No matter what you choose, though, you’ll need to mix your render in a bucket with water and an electric mixer. The aim? ‘To achieve a consistency reminiscent of childhood clay - pliable yet firm,’ explains James.

3. Apply the render
With the render at the ready, you then need to start applying it to the garden wall. To do this, use a trowel to scoop up some render and transfer it to your plastering hawk.
Then, with your hawk at a 45-degree angle, apply it to the wall and spread it out in a thin layer until the whole wall is covered. Ideally, you don’t want this first layer to be any thicker than 5mm.
When you’ve done this, you need to move quickly onto the next step while the render is still wet.

4. Add rendering mesh and apply another coat
If you want to guarantee the strength of the render on your garden wall, rendering mesh is a must - and James agrees.
‘Trust me; this step can be the difference between a wall that's merely good and one that's exceptional,’ he explains.
All you have to do is lay the rendering mesh on top of the wet layer of the render, making sure it is smooth and flat. Then, you can apply a second, slightly thicker layer of render on top of the rendering mesh. This time, you should aim to apply a layer that’s around 10mm thick.
5. Smooth and finish
Next, you need to smooth the render for a picture-perfect finish. But you shouldn’t do this straight away. Instead, wait around 30 minutes after applying the second layer of render.
When 30 minutes have passed, grab a long plank of wood and hold it against the bottom wall, keeping it flat. Then, pull it up towards the top, smoothing out the surface as you do so.
After this, finish the render by wetting the wall with a damp sponge and wiping it across the wall. This will give it a smooth, professional finish that will completely transform your garden.

FAQs
Can you render a garden wall yourself?
Yes, you can render a garden wall yourself. While it is tricky, it’s not impossible and can be done in just a few hours when you have the right tools and follow the right instructions.
However, it’s important to inspect a garden wall to determine whether it’s worth rendering it yourself. You need to make sure that it has no structural damage before you start messing around with it. If you’re ever in doubt, contact a professional.
How do you render an exterior garden wall?
To render an exterior garden wall, you need to be confident that the garden wall is worth rendering. You must remove any old render and fix any cracks or imperfections to ensure maximum success. Then, follow these steps:
- Mix the render
- Apply a thin first layer
- Lay the rendering mesh on top
- Apply a thicker second layer
- Smooth and finish
