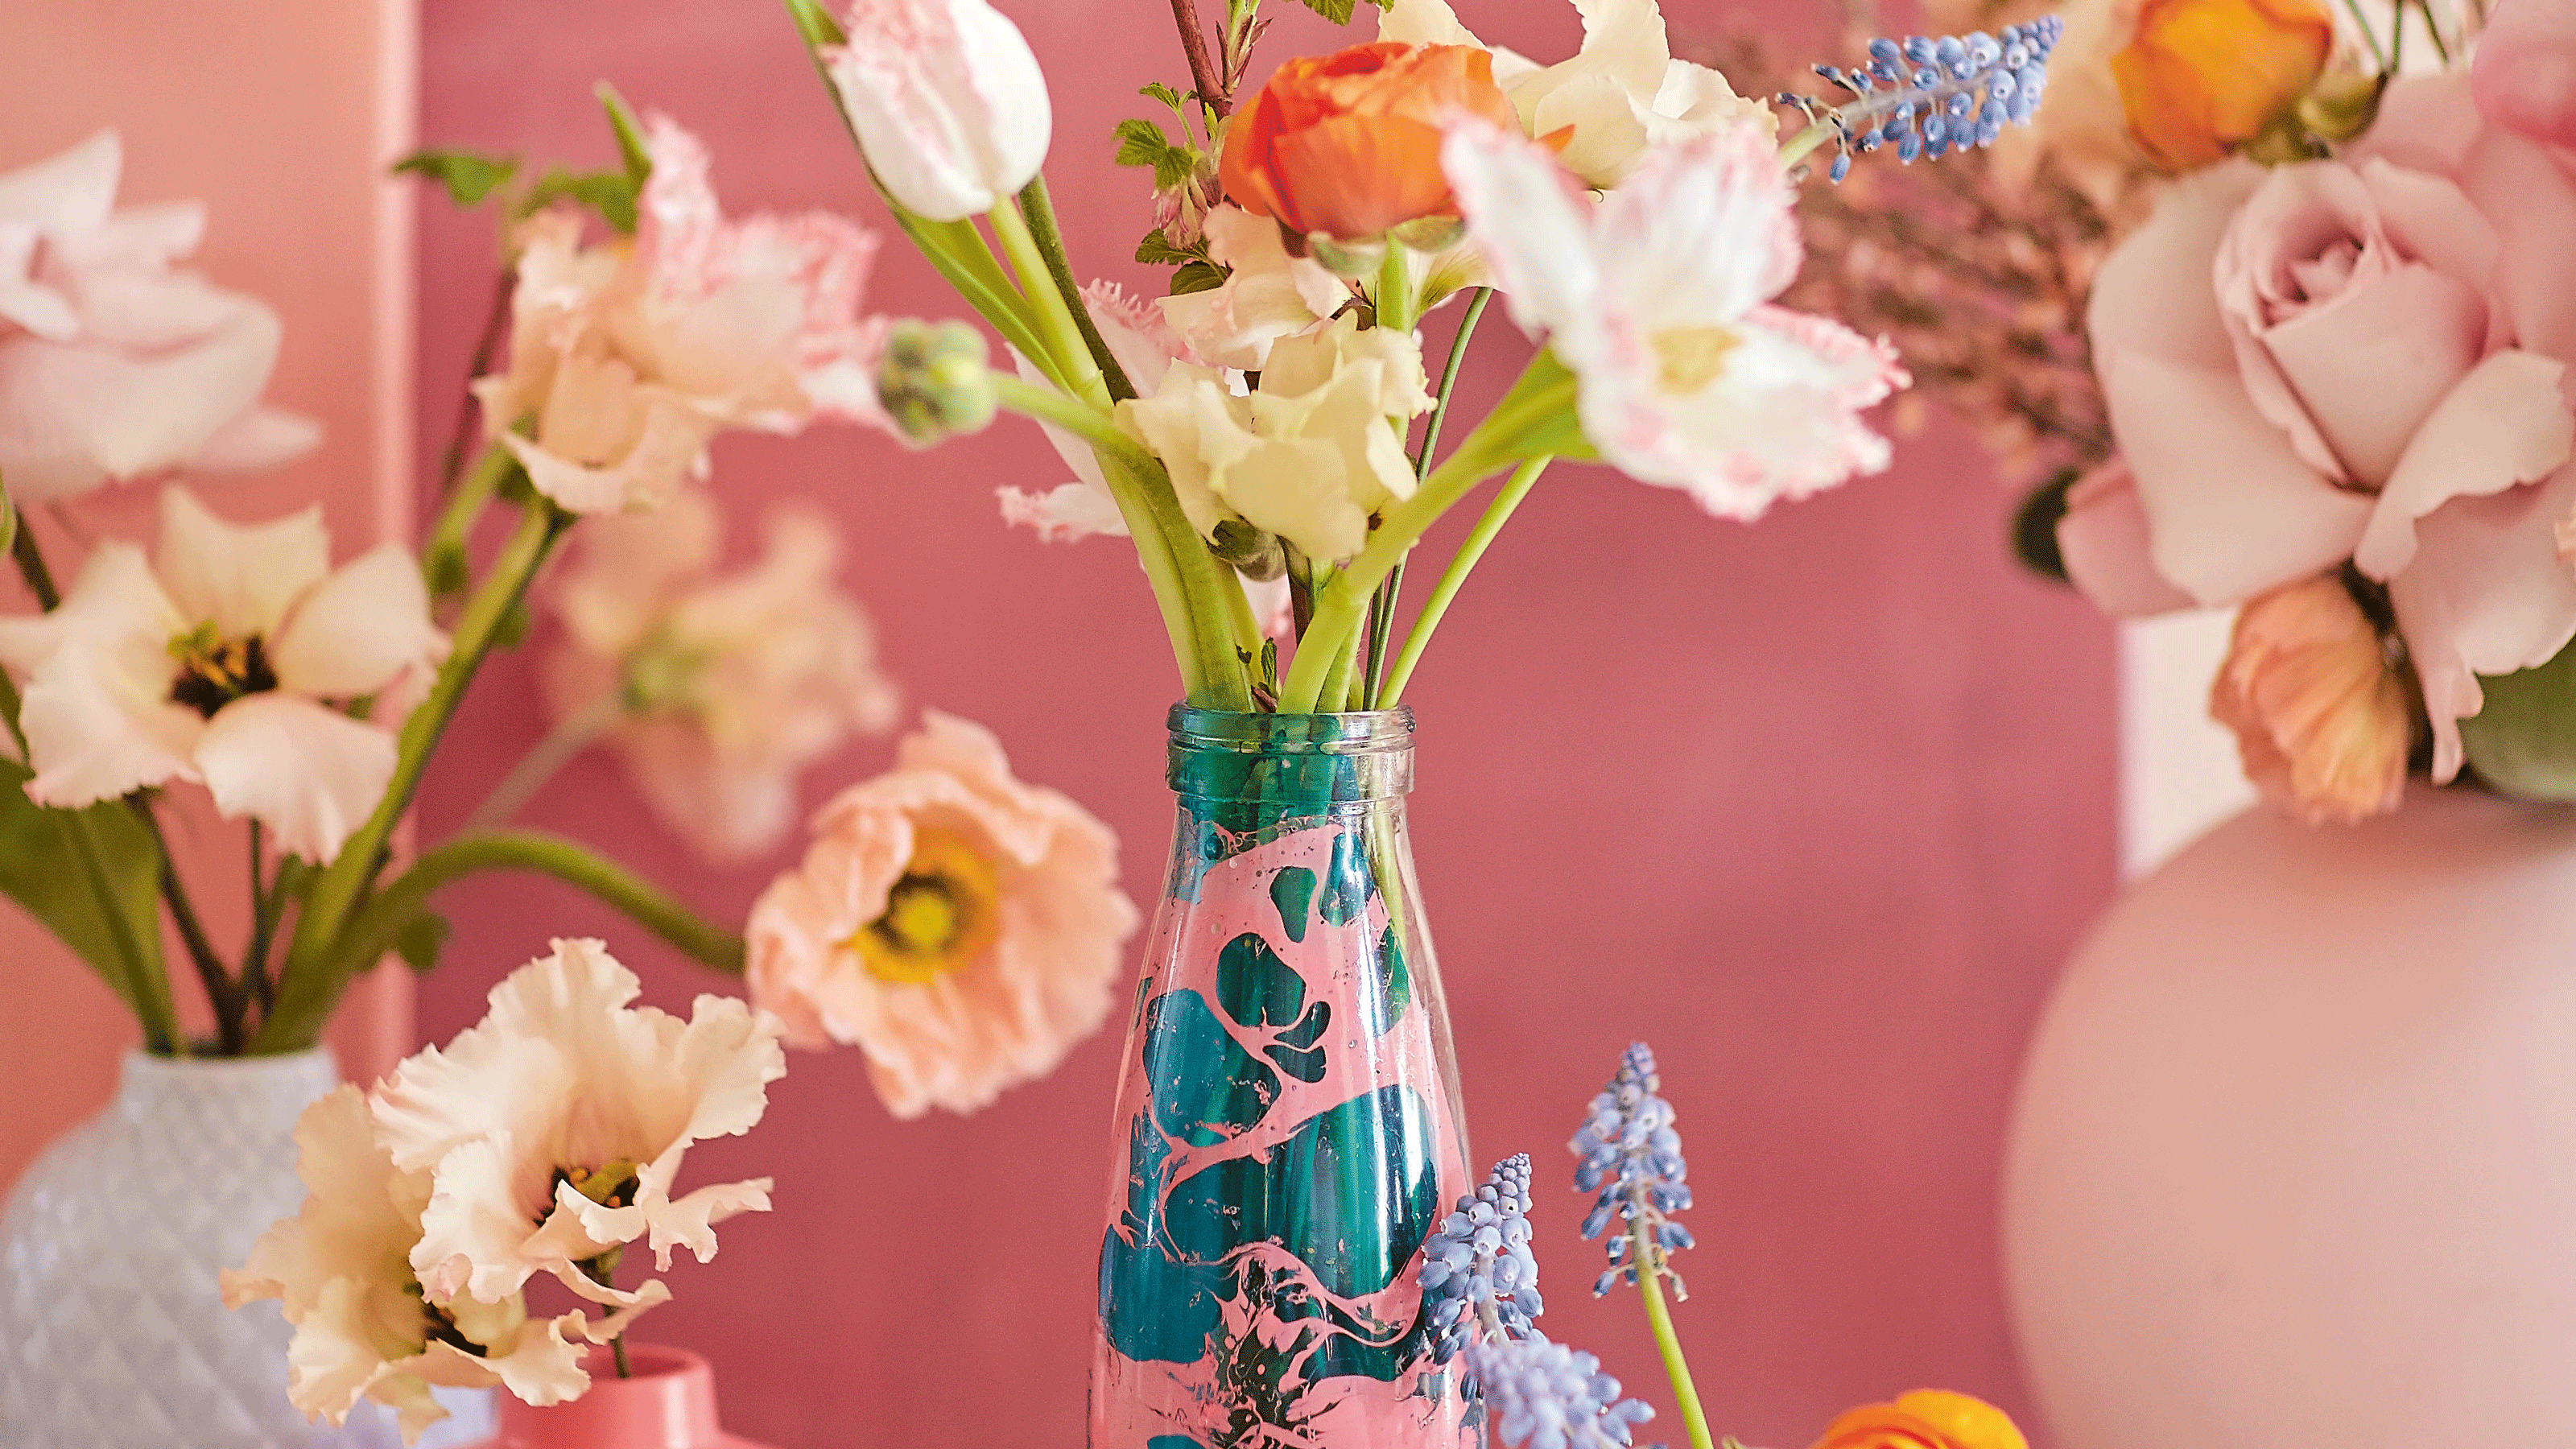
How to make a statement marbled vase in minutes with DIY expert Zeena Shah
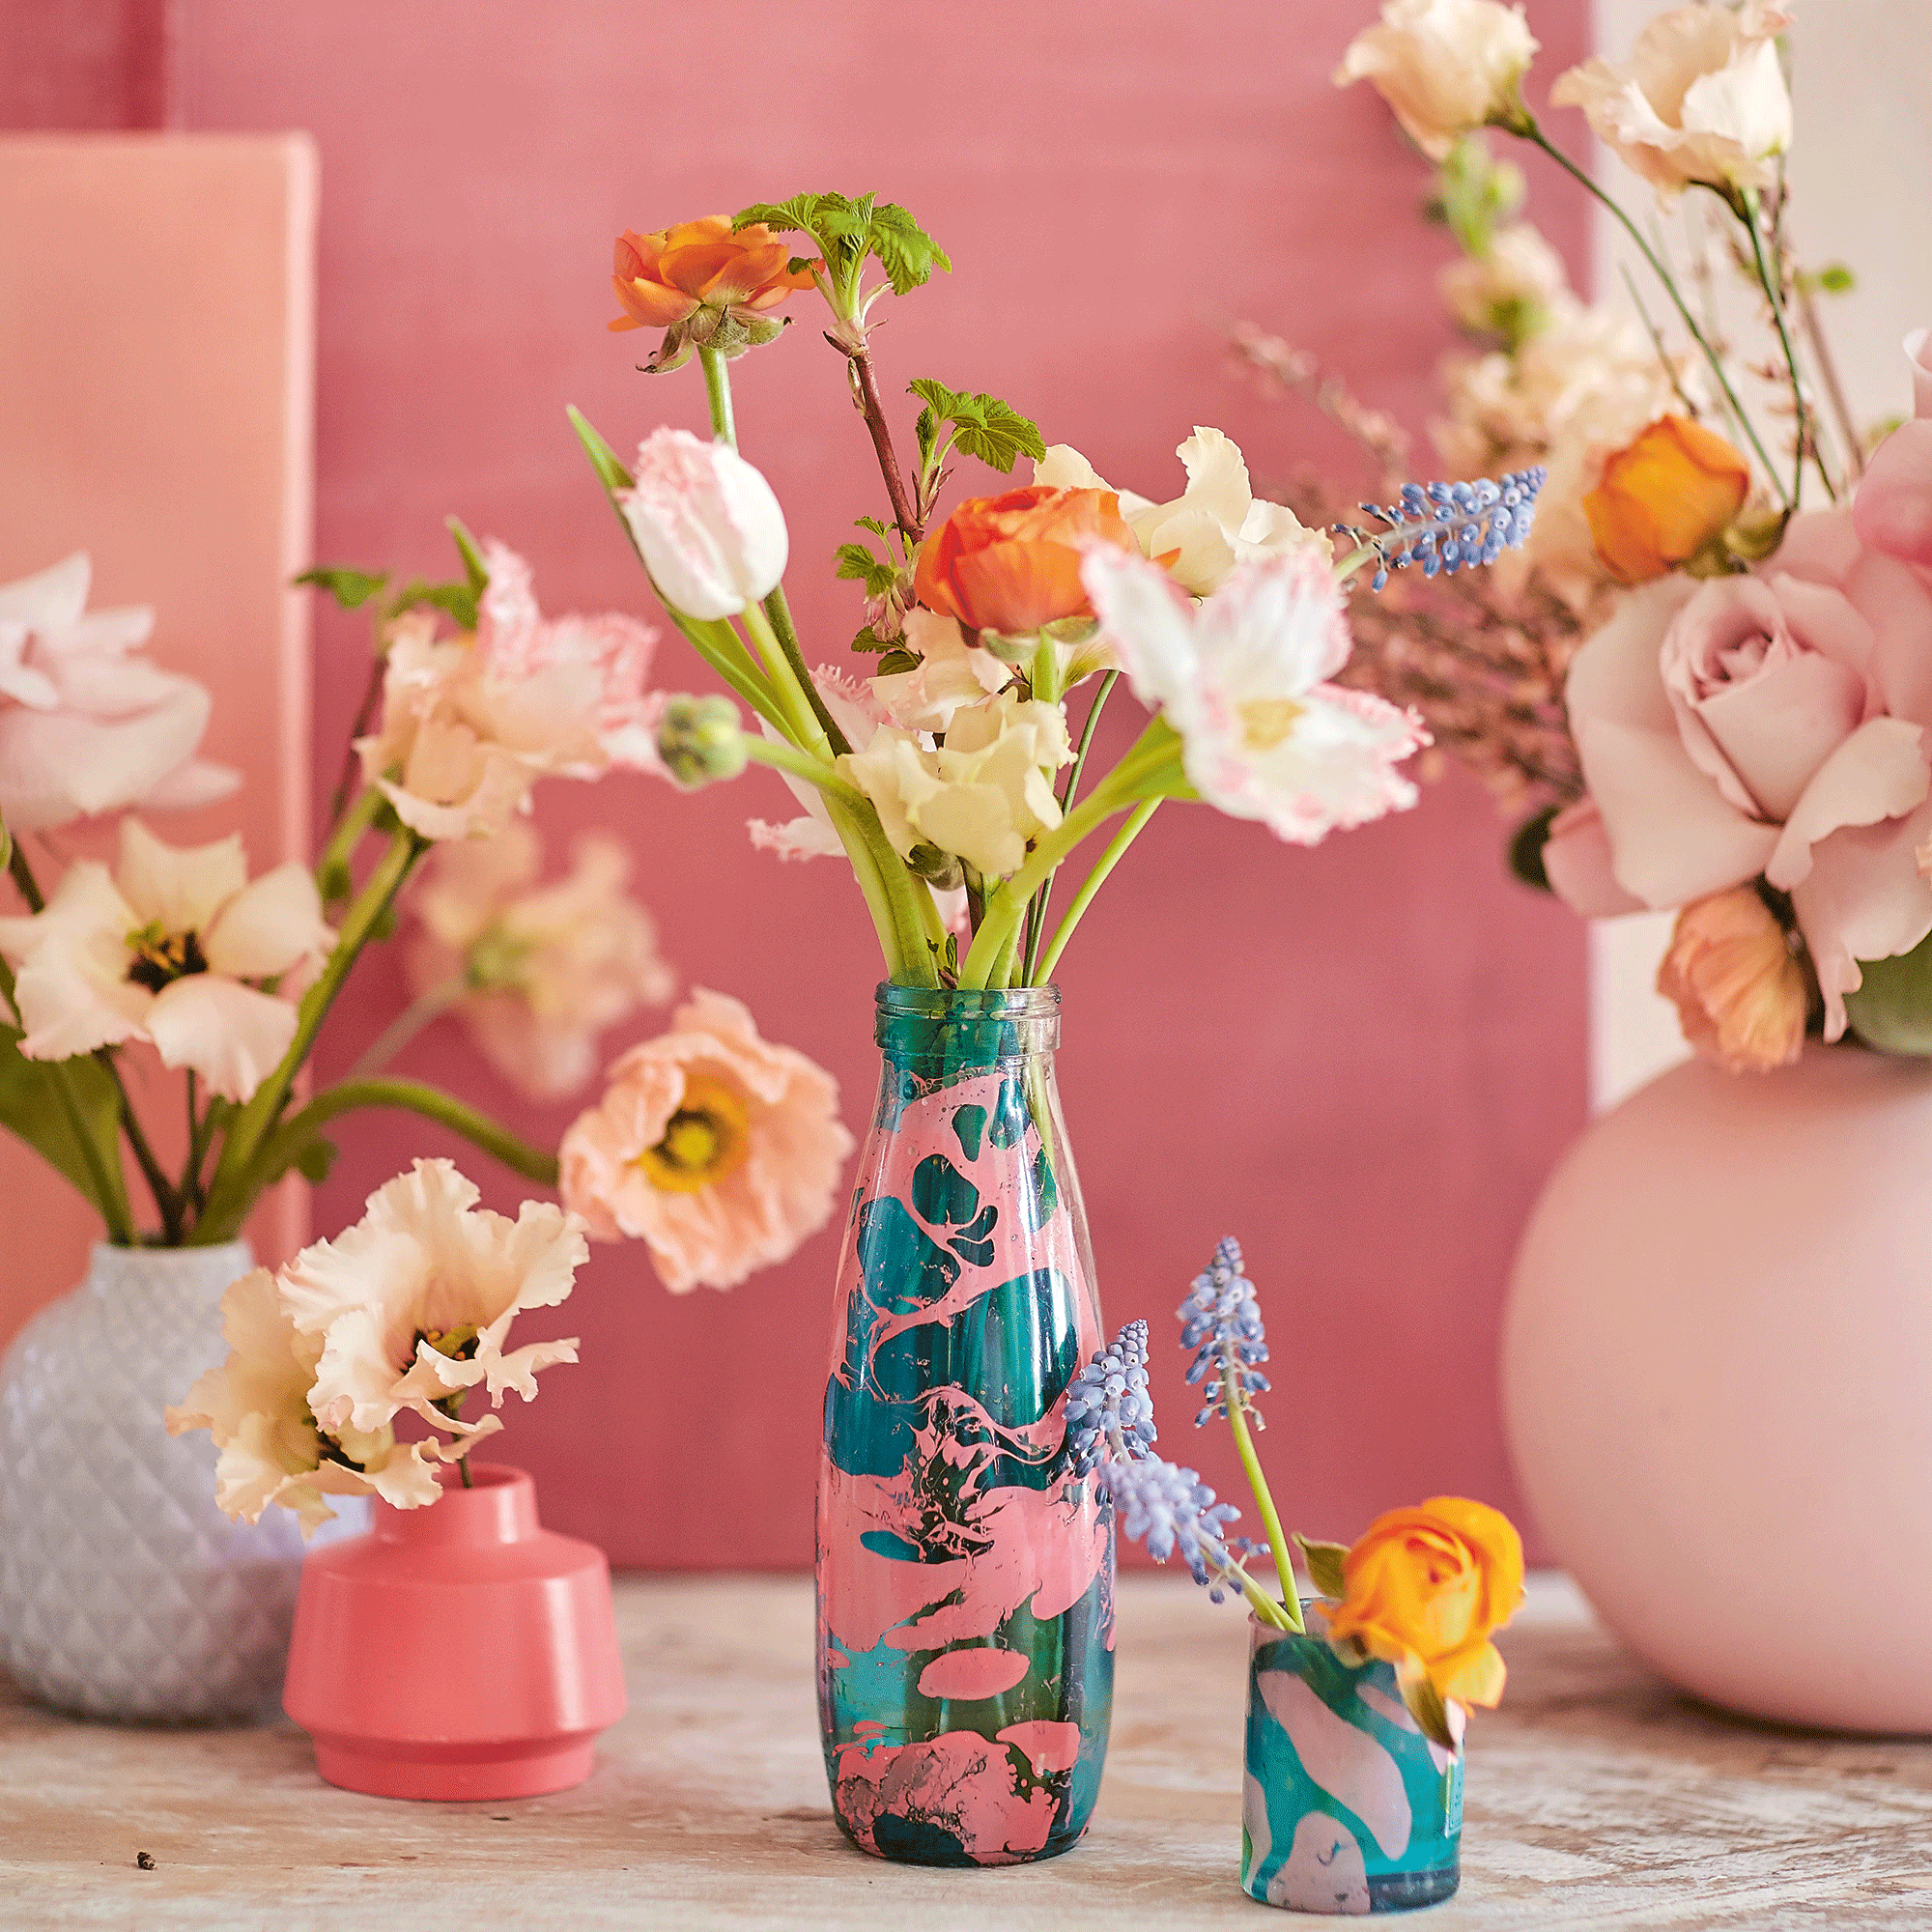
Turn an empty jam jar or glass soda bottle into a colourful and chic statement vase in a matter of minutes
Over the last few years, marbling has emerged as a major home decor trend, not least thanks to the work of art director, stylist and author Zeena Shah championing the craft through DIY craft tutorials and Sunday Crafternoons on her Instagram account @heartzeena.
In her new book Marbling, Zeena explains everything you need to know about how to marble anything in your home, including how to make a marbled vase using pre-made inks. It is an easy DIY project to give a glass bottle or jar a new on-trend look in minutes, without spending a fortune.
When marbling a vase the first place to start is choosing your colour combinations. This can be intimidating, however, Zeena's top tip is to lean into contrasting colours.
'Knowing where to start with colour can be daunting so my top tip for choosing your colour combos is to start with two contrasting colours. Pink and green should always be seen and look beautiful together,' says Zeena.
'A great way to achieve a more sophisticated look is to work with shades of the same colour so pale green, mid green and dark green will create a really beautiful palette for marbling with.'
How to make a marbled vase
In the below excerpt from Marbling: Projects, Design Ideas and Techniques for a More Colourful Life Zeena Shah explains everything you need to know about how to make a marbled vase using pre-made inks.
This is one of my favourite marbling makes as it’s such a quick and easy creative transformation project. It’s waste friendly too and is a brilliant upcycling project – take an empty jam jar or glass soda bottle and turn it into a colourful and chic statement vase in a matter of minutes. This is also one of my go-to gifts because they are such lovely presents; gift them with some added dried or fresh flowers and a ribbon tie to make it extra special.
Technique - Water Marbling with Ready-made Pre-mixed Inks
I am a big fan of anything that is going to save time. I often think one of the blocks to trying a new craft is thinking you don’t have enough time or that you’ll need expensive materials and loads of space to do it in. None of these things is true when it comes to marbling because, thanks to the magic of ready-made inks, the hard work has been done – so I am a big advocate of the pre-mixed marbling ink.
I have tried a range of these types of inks (there are a lot of varieties and brands out there) and my favourite is the Marabu Easy Marble ink because you don’t need to make a size or pre-treat the water to allow the inks to float. The base colour palette is vast and you can mix these colours together easily to create an even better range. Like a lot of things in life they might not work out the first time you give them a try, but practice will eventually make perfect. When it comes to marbling, if you don’t have a few disasters you’re definitely not doing it right.
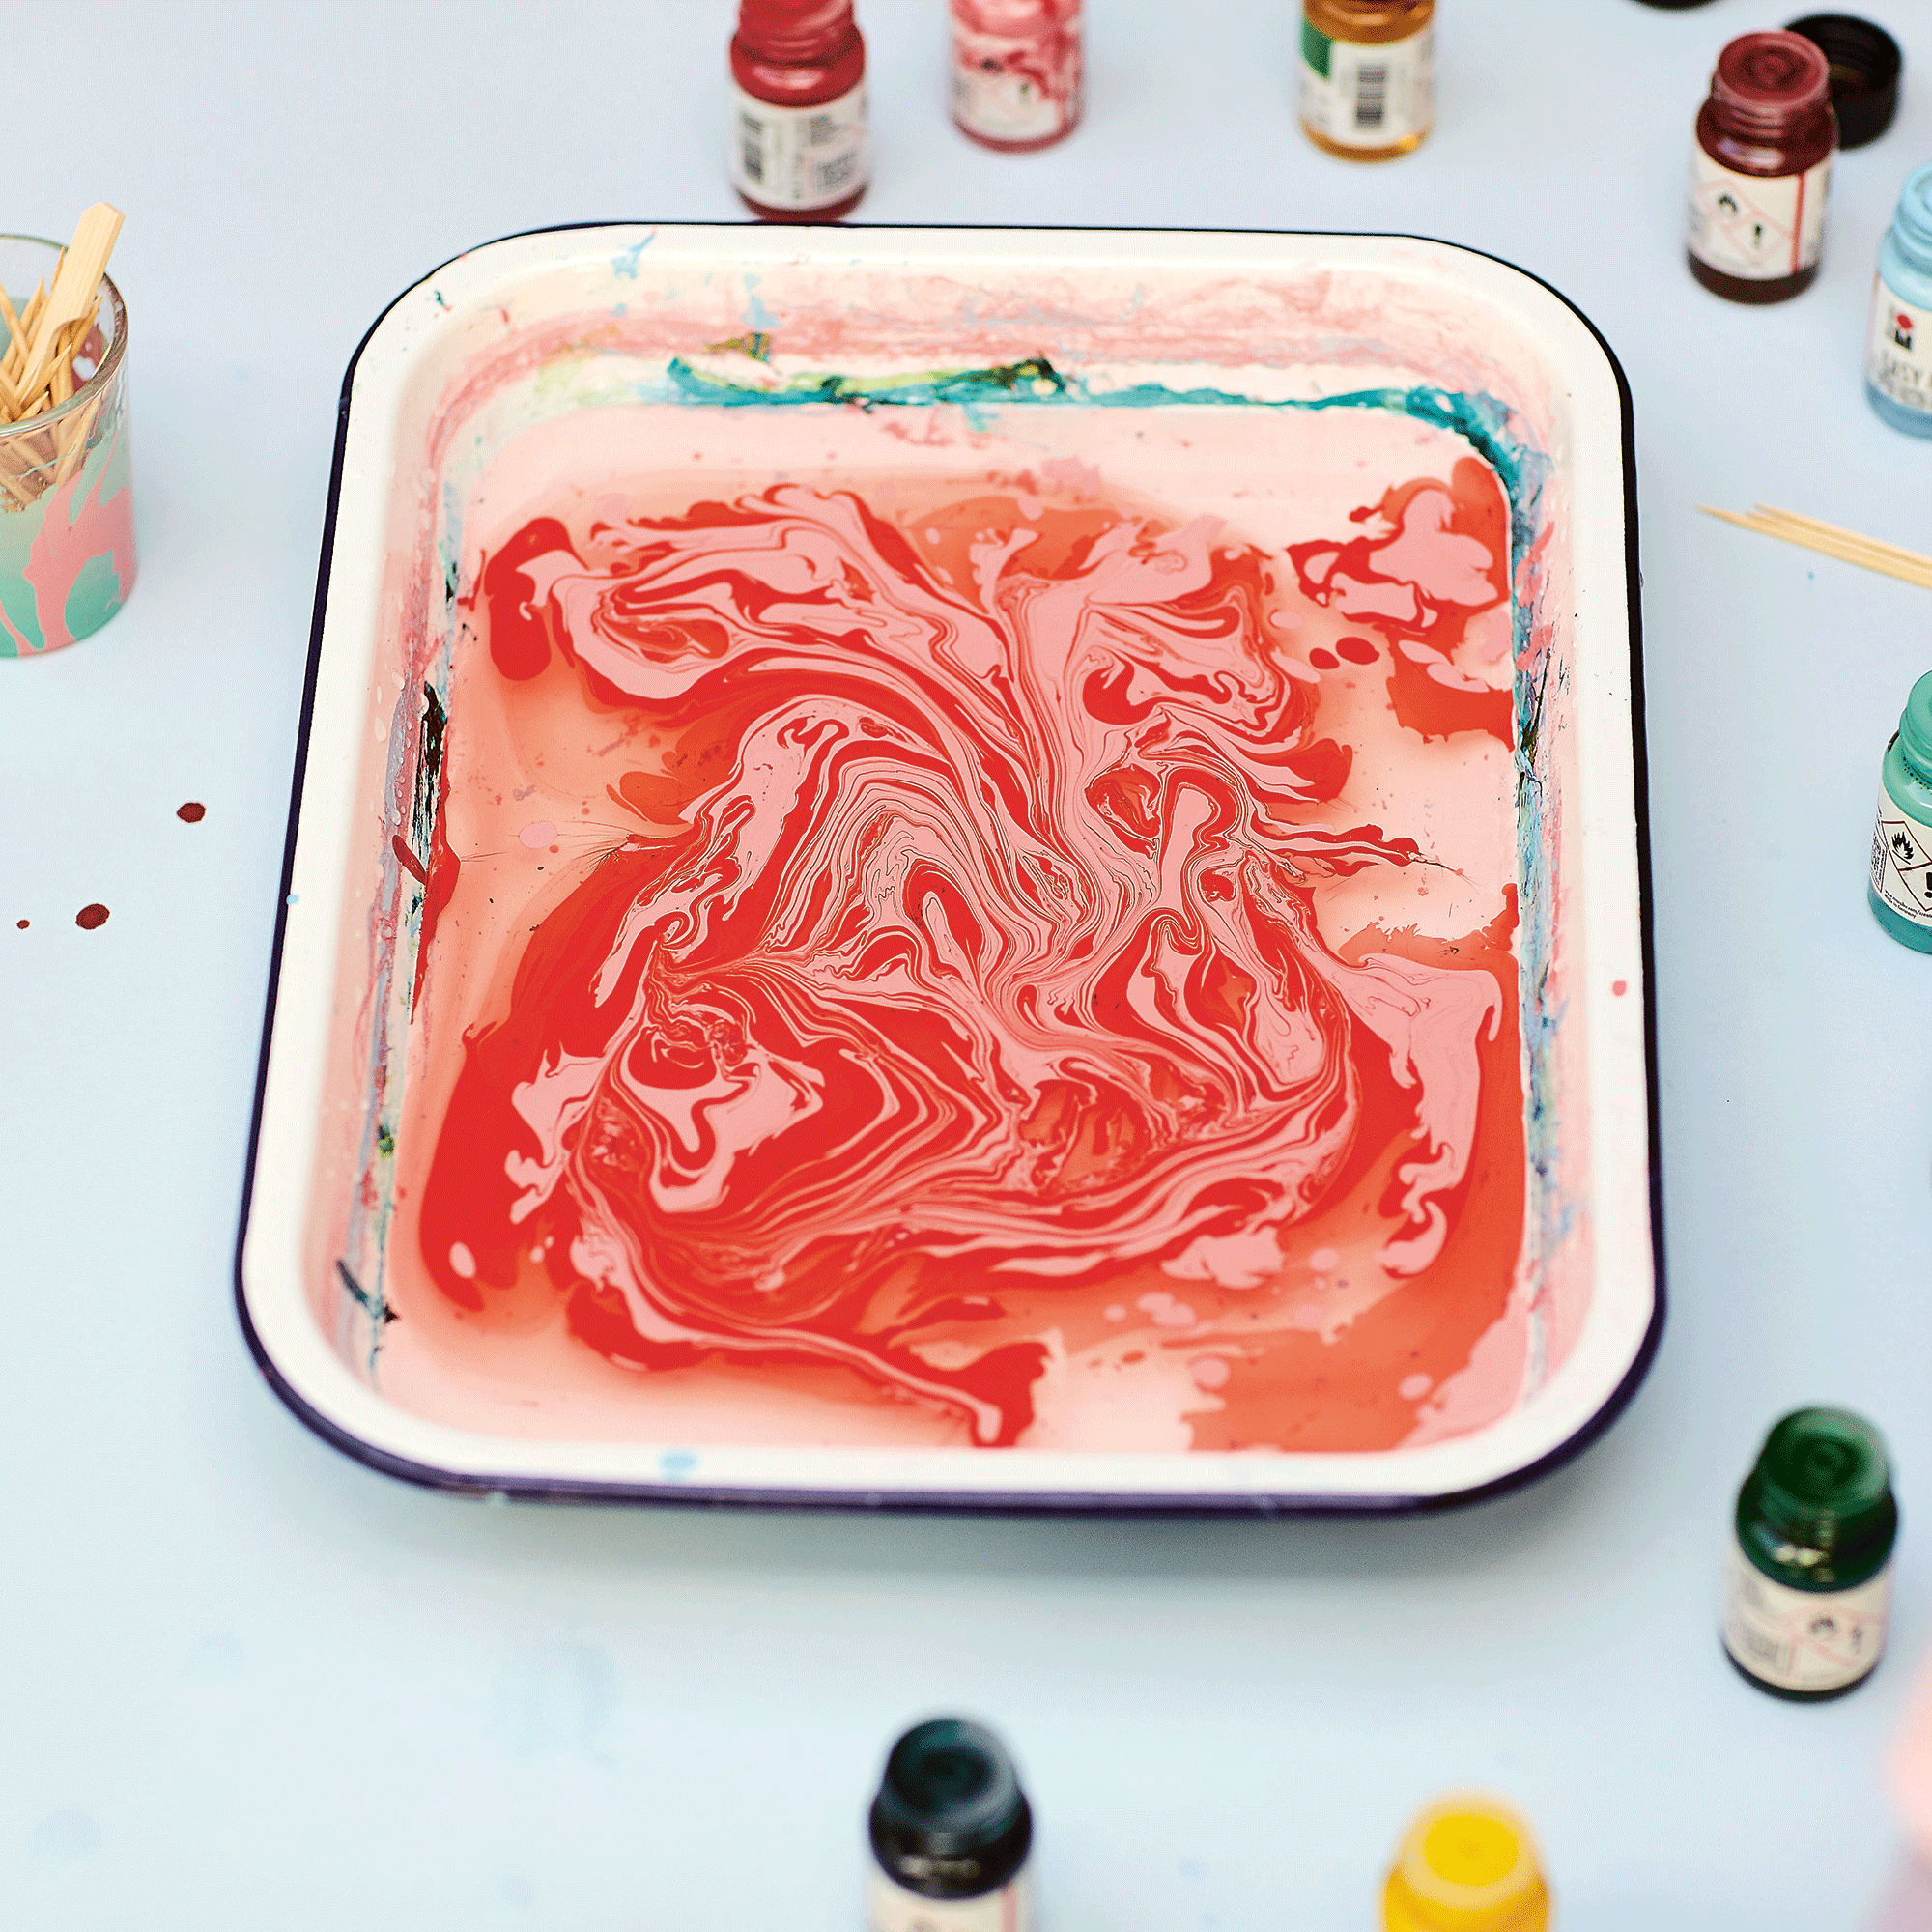
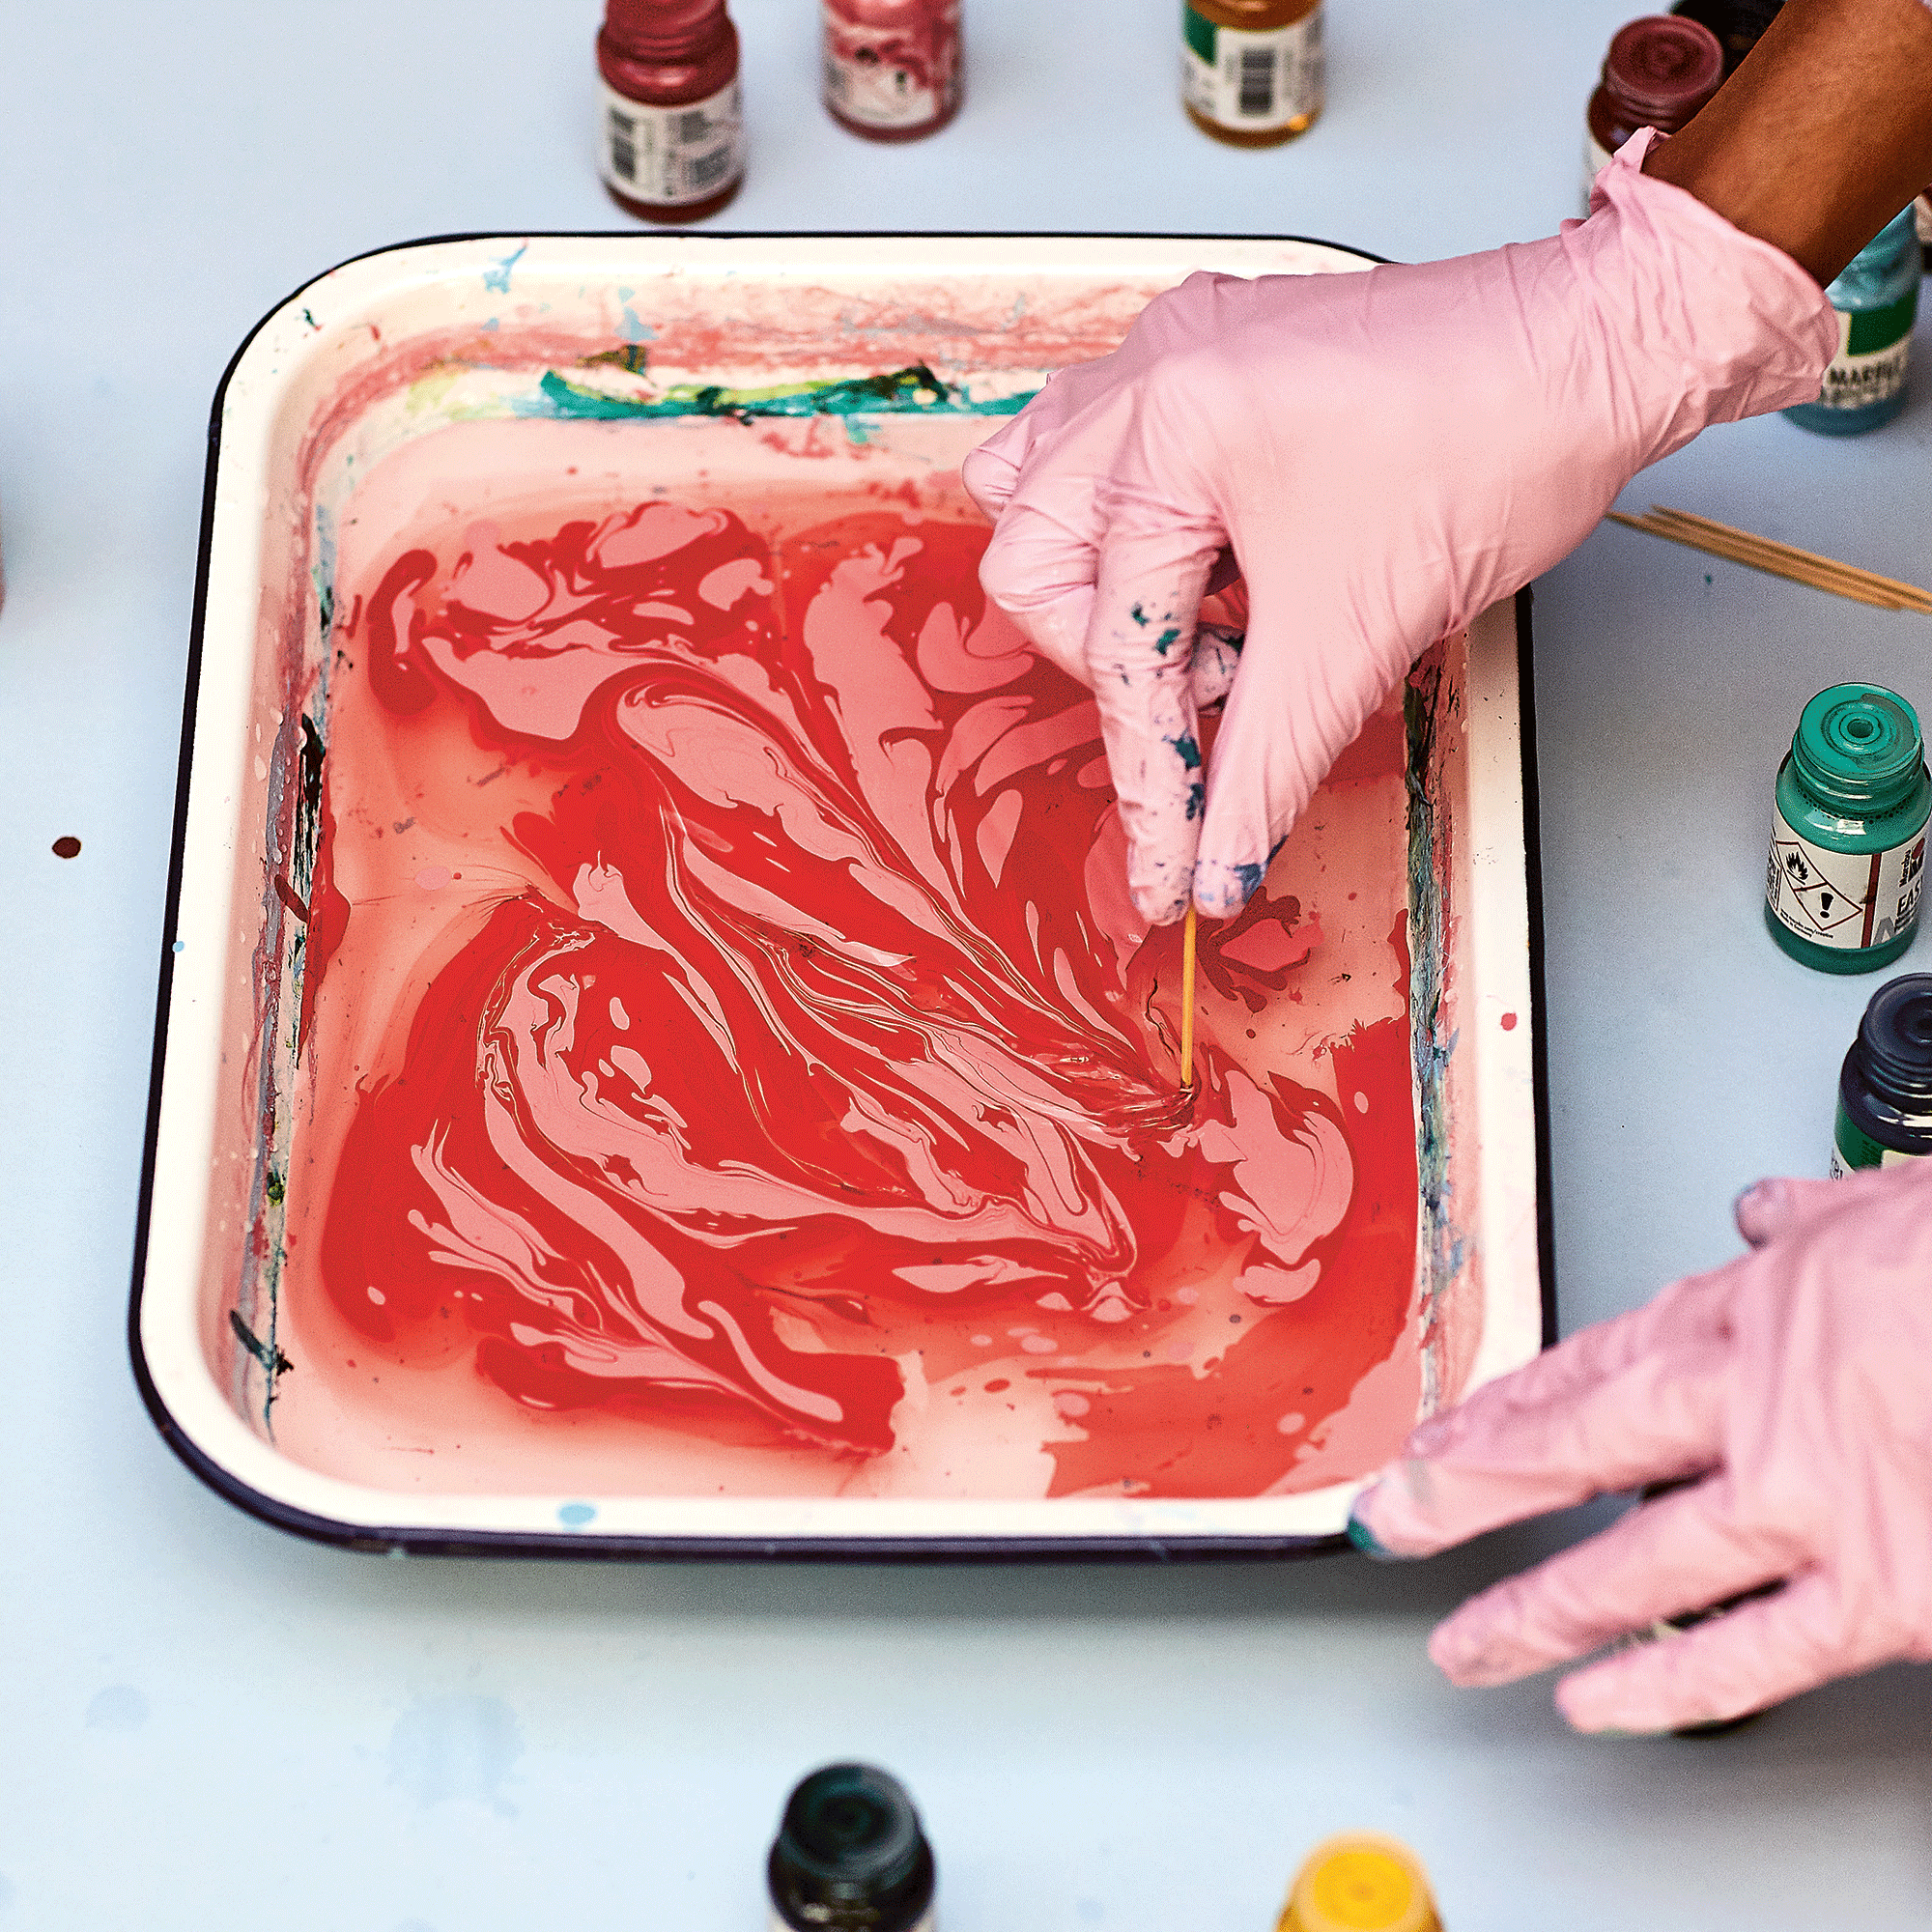
As with all the water-marbling techniques you’ll begin by making your water bath with distilled water, then add droplets of ink into the bath before manipulating and submerging paper or fabric to print.
1. Use room-temperature distilled water for best results. Use newspaper or paper strips to skim the water to remove any lint or dust as this can also affect the print.
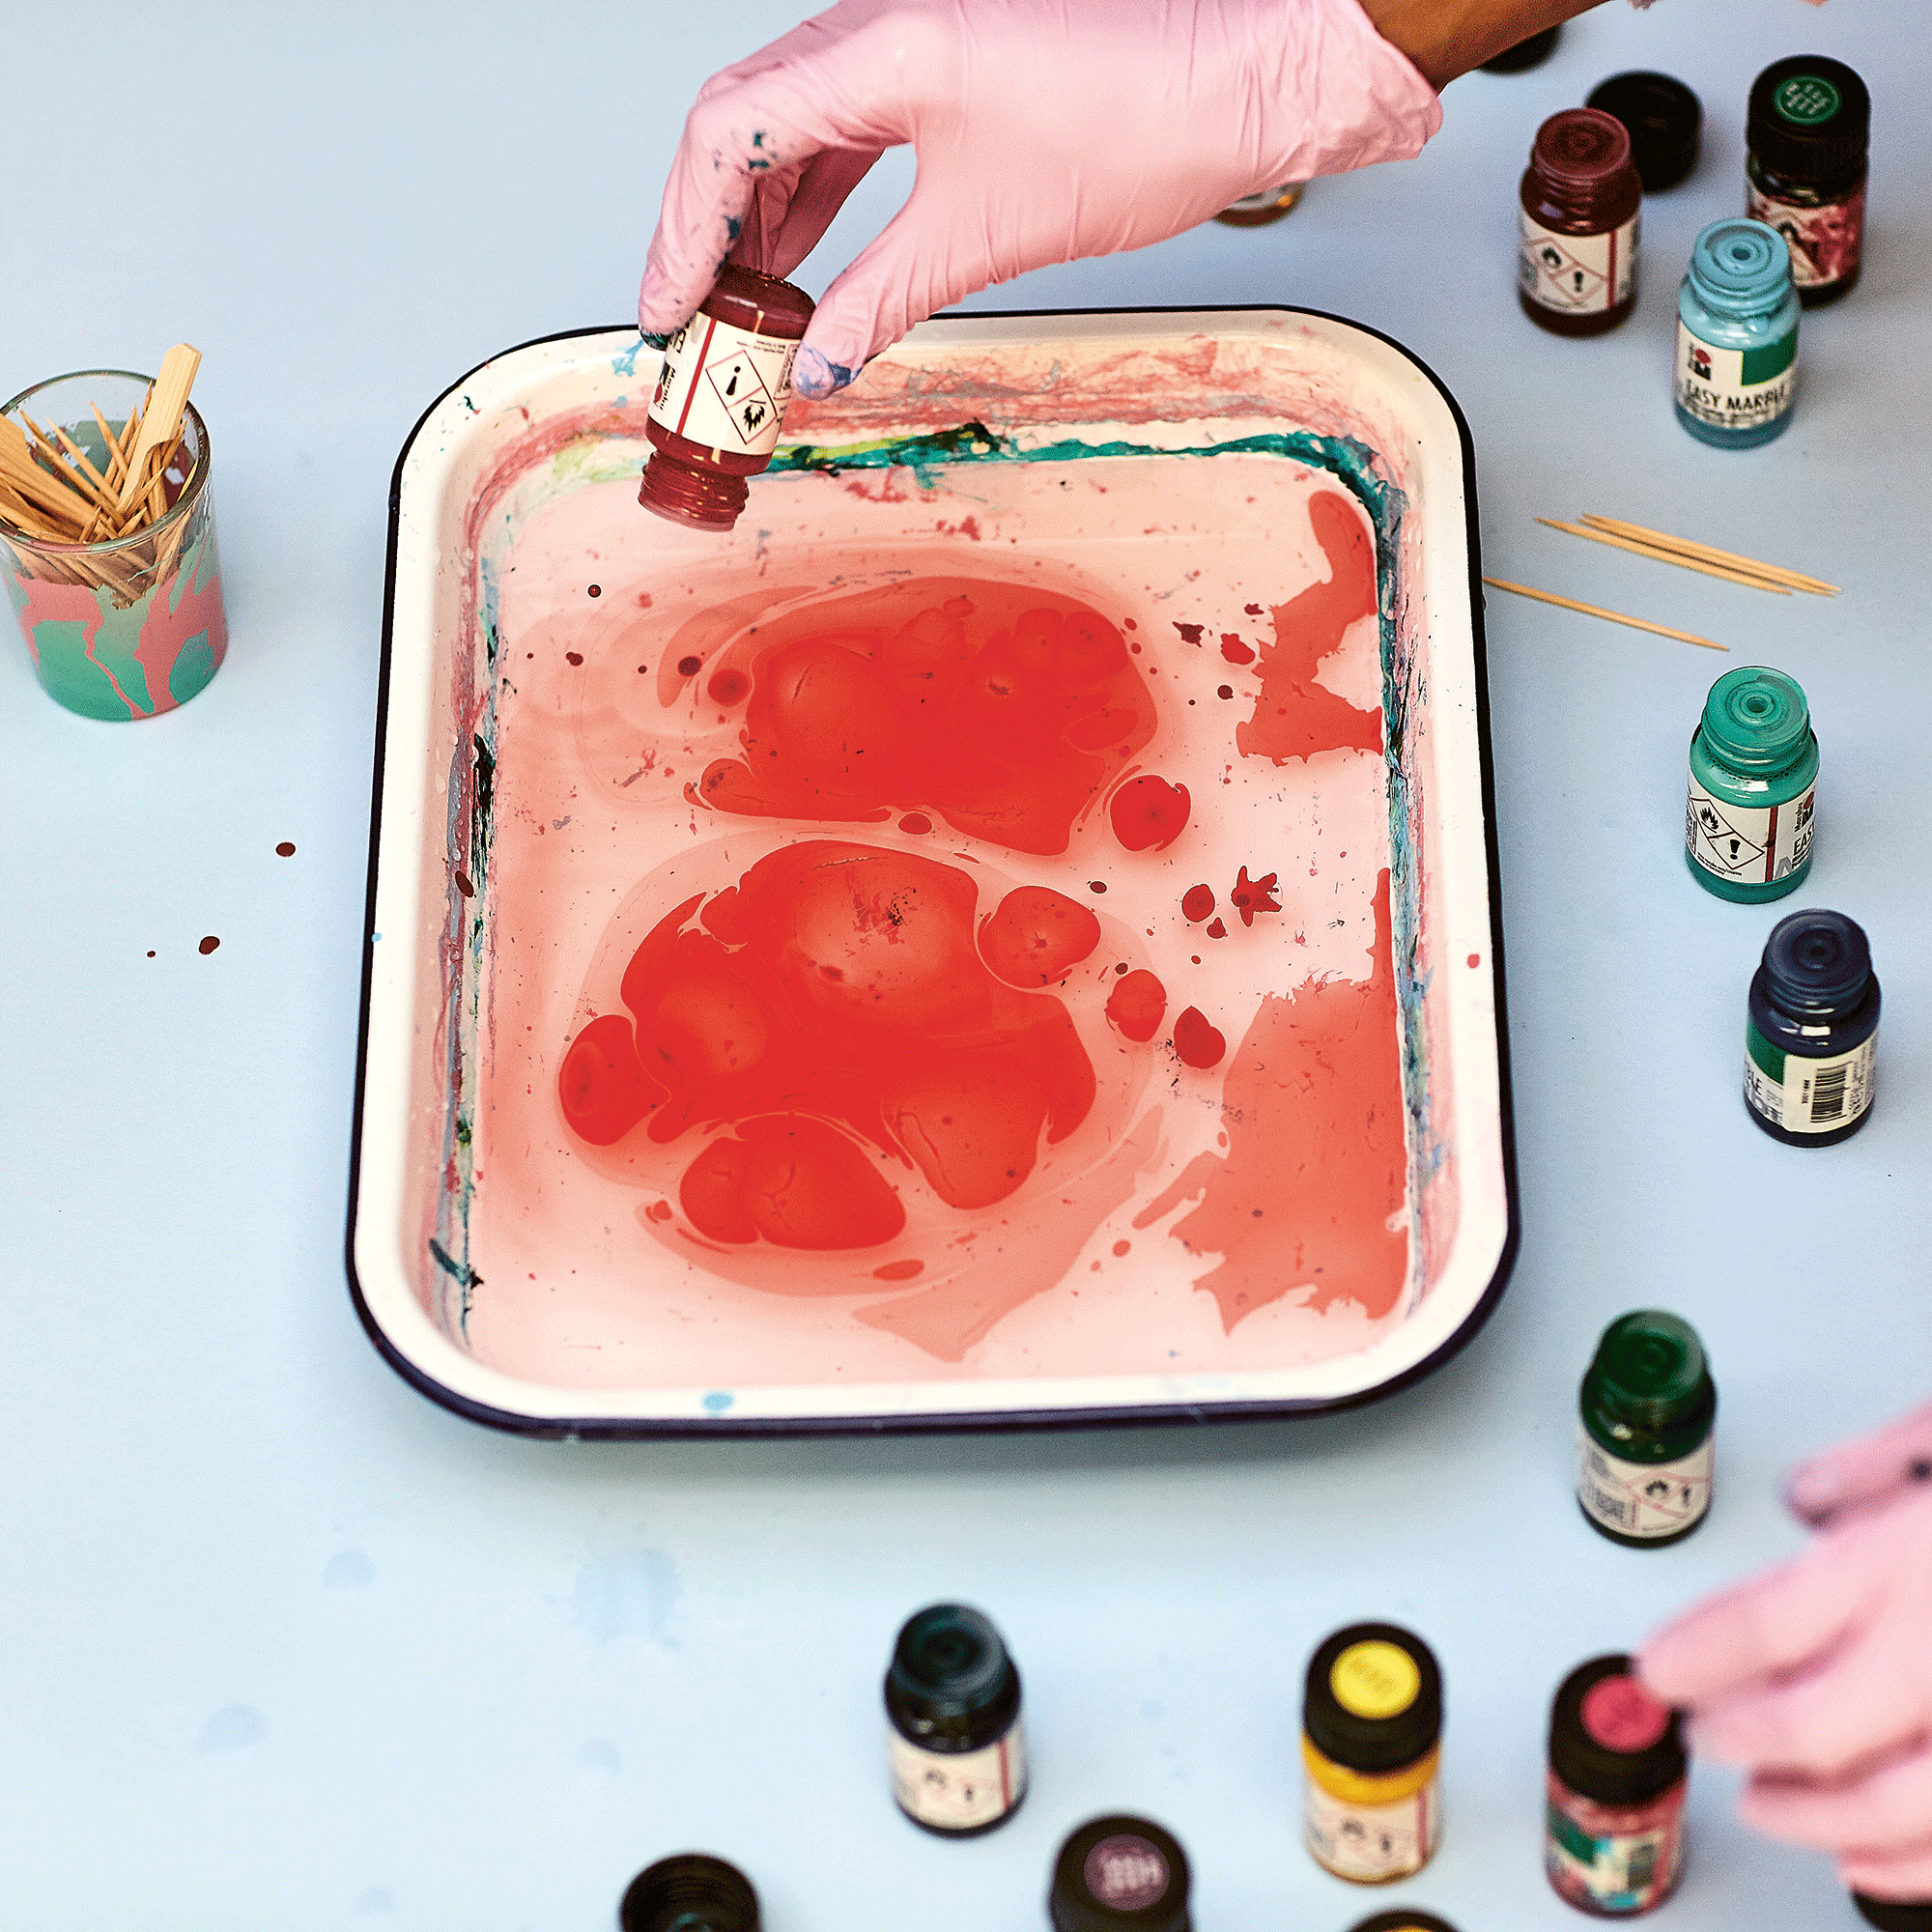
2. Cover the bath evenly with the first colour, then work into this layer with the remaining colours in your palette. Dropping the ink close to the water will extend its working time.

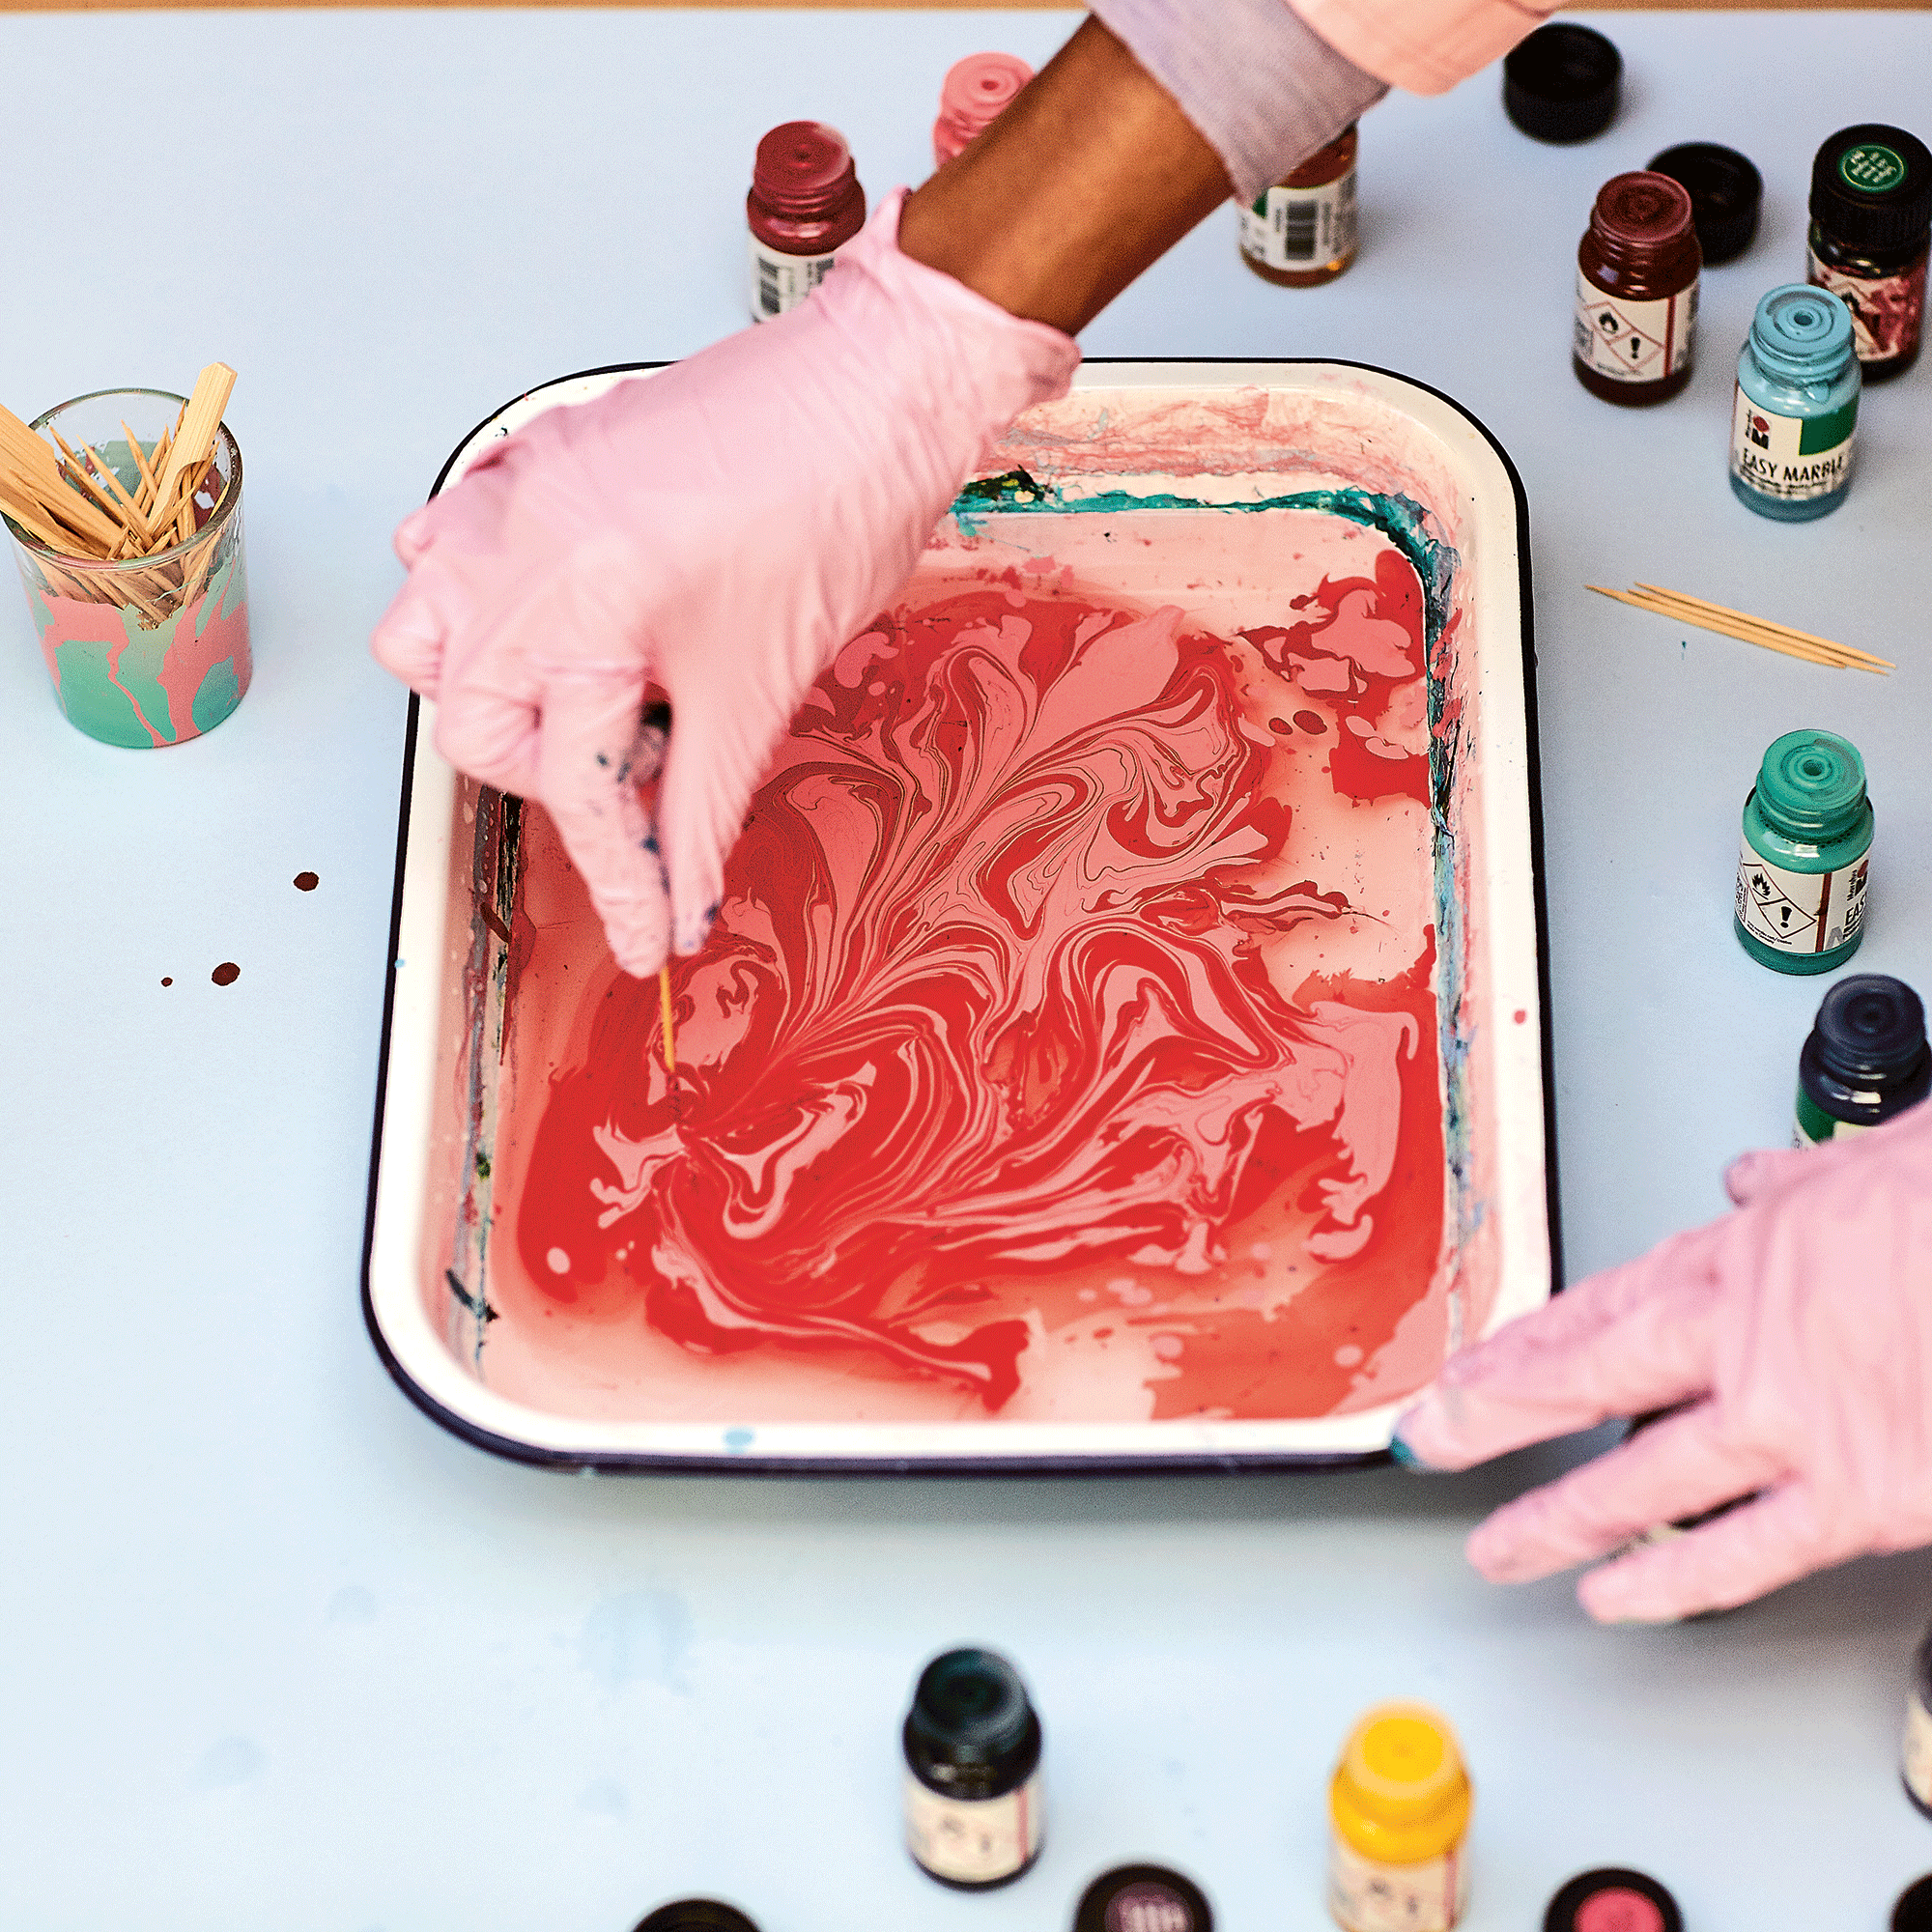
3. Experiment with the way you drop the inks into the water. Drop by drop works best, but as you grow in confidence feel free to experiment to create more complex patterns.
4. You have around 2 minutes before the inks begin to dry so use a stylus to gently manipulate the ink as speedily as you can to create a variety of unique patterns.
5. Sample all the colours and note down the way each disperses in water. Colours with more pigment will disperse differently to those with a lower pigment, so if you’re hoping for a particular effect make sure to sample, sample, sample first. Personally, I really enjoy the freedom marbling allows and relish letting myself go and enjoying the organic patterns that can be achieved with this craft.
6. Gently lower your paper, card or object into the water, making sure to catch all of the marbling ink.
With paper I recommend either sliding it into the water at a 45-degree angle, bowing it in the centre and then working from the middle out, or lowering it into the water from opposite corner to corner to cover the sheet in pattern.
7. Blow or gently pull away the excess ink on the surface of the water bath before removing the paper or object. The ink will start to turn gloopy as it dries so pull away these strands from your work if any start to appear. Set aside to dry and voilà!
Keep your space well-ventilated when using this technique.
You will need
- Deep bowl or bucket with enough
- room to submerge the vessel to
- be marbled fully
- Room-temperature distilled water
- Marbling inks suitable for glass in
- 2–3 colours – I used Marabu Easy
- Marble solvent-based inks
- Gloves
- Cocktail sticks or wooden skewers
- Clear glass jam jars or bottles
- Drying space
- Spray clear varnish
Preparation
Clean the glass vessel thoroughly using soap and water, then rinse carefully as any soapy residue will affect your marbling inks.
How to
Fill the bucket or bowl two-thirds full with water.
Drop inks into the water bath as per the technique (described above.)
Dip the vessel into the water bath, then pull away to reveal the pattern.
The vessel will be touch dry after 20 minutes but I’d leave the glass to dry completely for 24 hours.
Seal the marbling print with some spray varnish for a nice even finish and to protect it from any wear and tear.
Try dipping the vessel into the inks at a 45-degree angle to create some variety to your patterns.
Jars can be decorated and used as tea light holders.

