How to make a Christmas cracker from a napkin - just like Angel Strawbridge's
Dazzle your diners with these beautiful Christmas crackers using things you already have lying around the house
EDITOR’S NOTE: An earlier version of this article included a quote from a purported expert whose credentials we have not been able to verify. The quote has been removed. We regret this lapse in our verification process and have updated our internal protocols to reduce the risk of recurrence.
The best Christmas table decoration ideas wouldn't be complete without a cracker. However, you don't need to go out and buy them to make a statement. In the final Christmas episode of Channel 4's hit show Escape to the Chateau Angel Strawbridge demonstrated how to make a cracker from a napkin.
At Ideal Home we love the idea of turning a napkin into a cracker. Not only does it make a beautiful place setting, but it saves wasting extra paper, and is a savvy DIY Christmas idea instead of forking out on expensive ready-made crackers.
Angel Strawbridge turned hers into beautiful place settings for her Christmas party, with the guests' names embroidered on each napkin. Each napkin cracker included everything and more you'd expect from a cracker including a vial of homemade eucalyptus oil, snapper and a bad joke.

If you're keen to follow Angel's example and create your own napkin crackers follow our simple how-to guide, to create crackers that can be reused year after year.

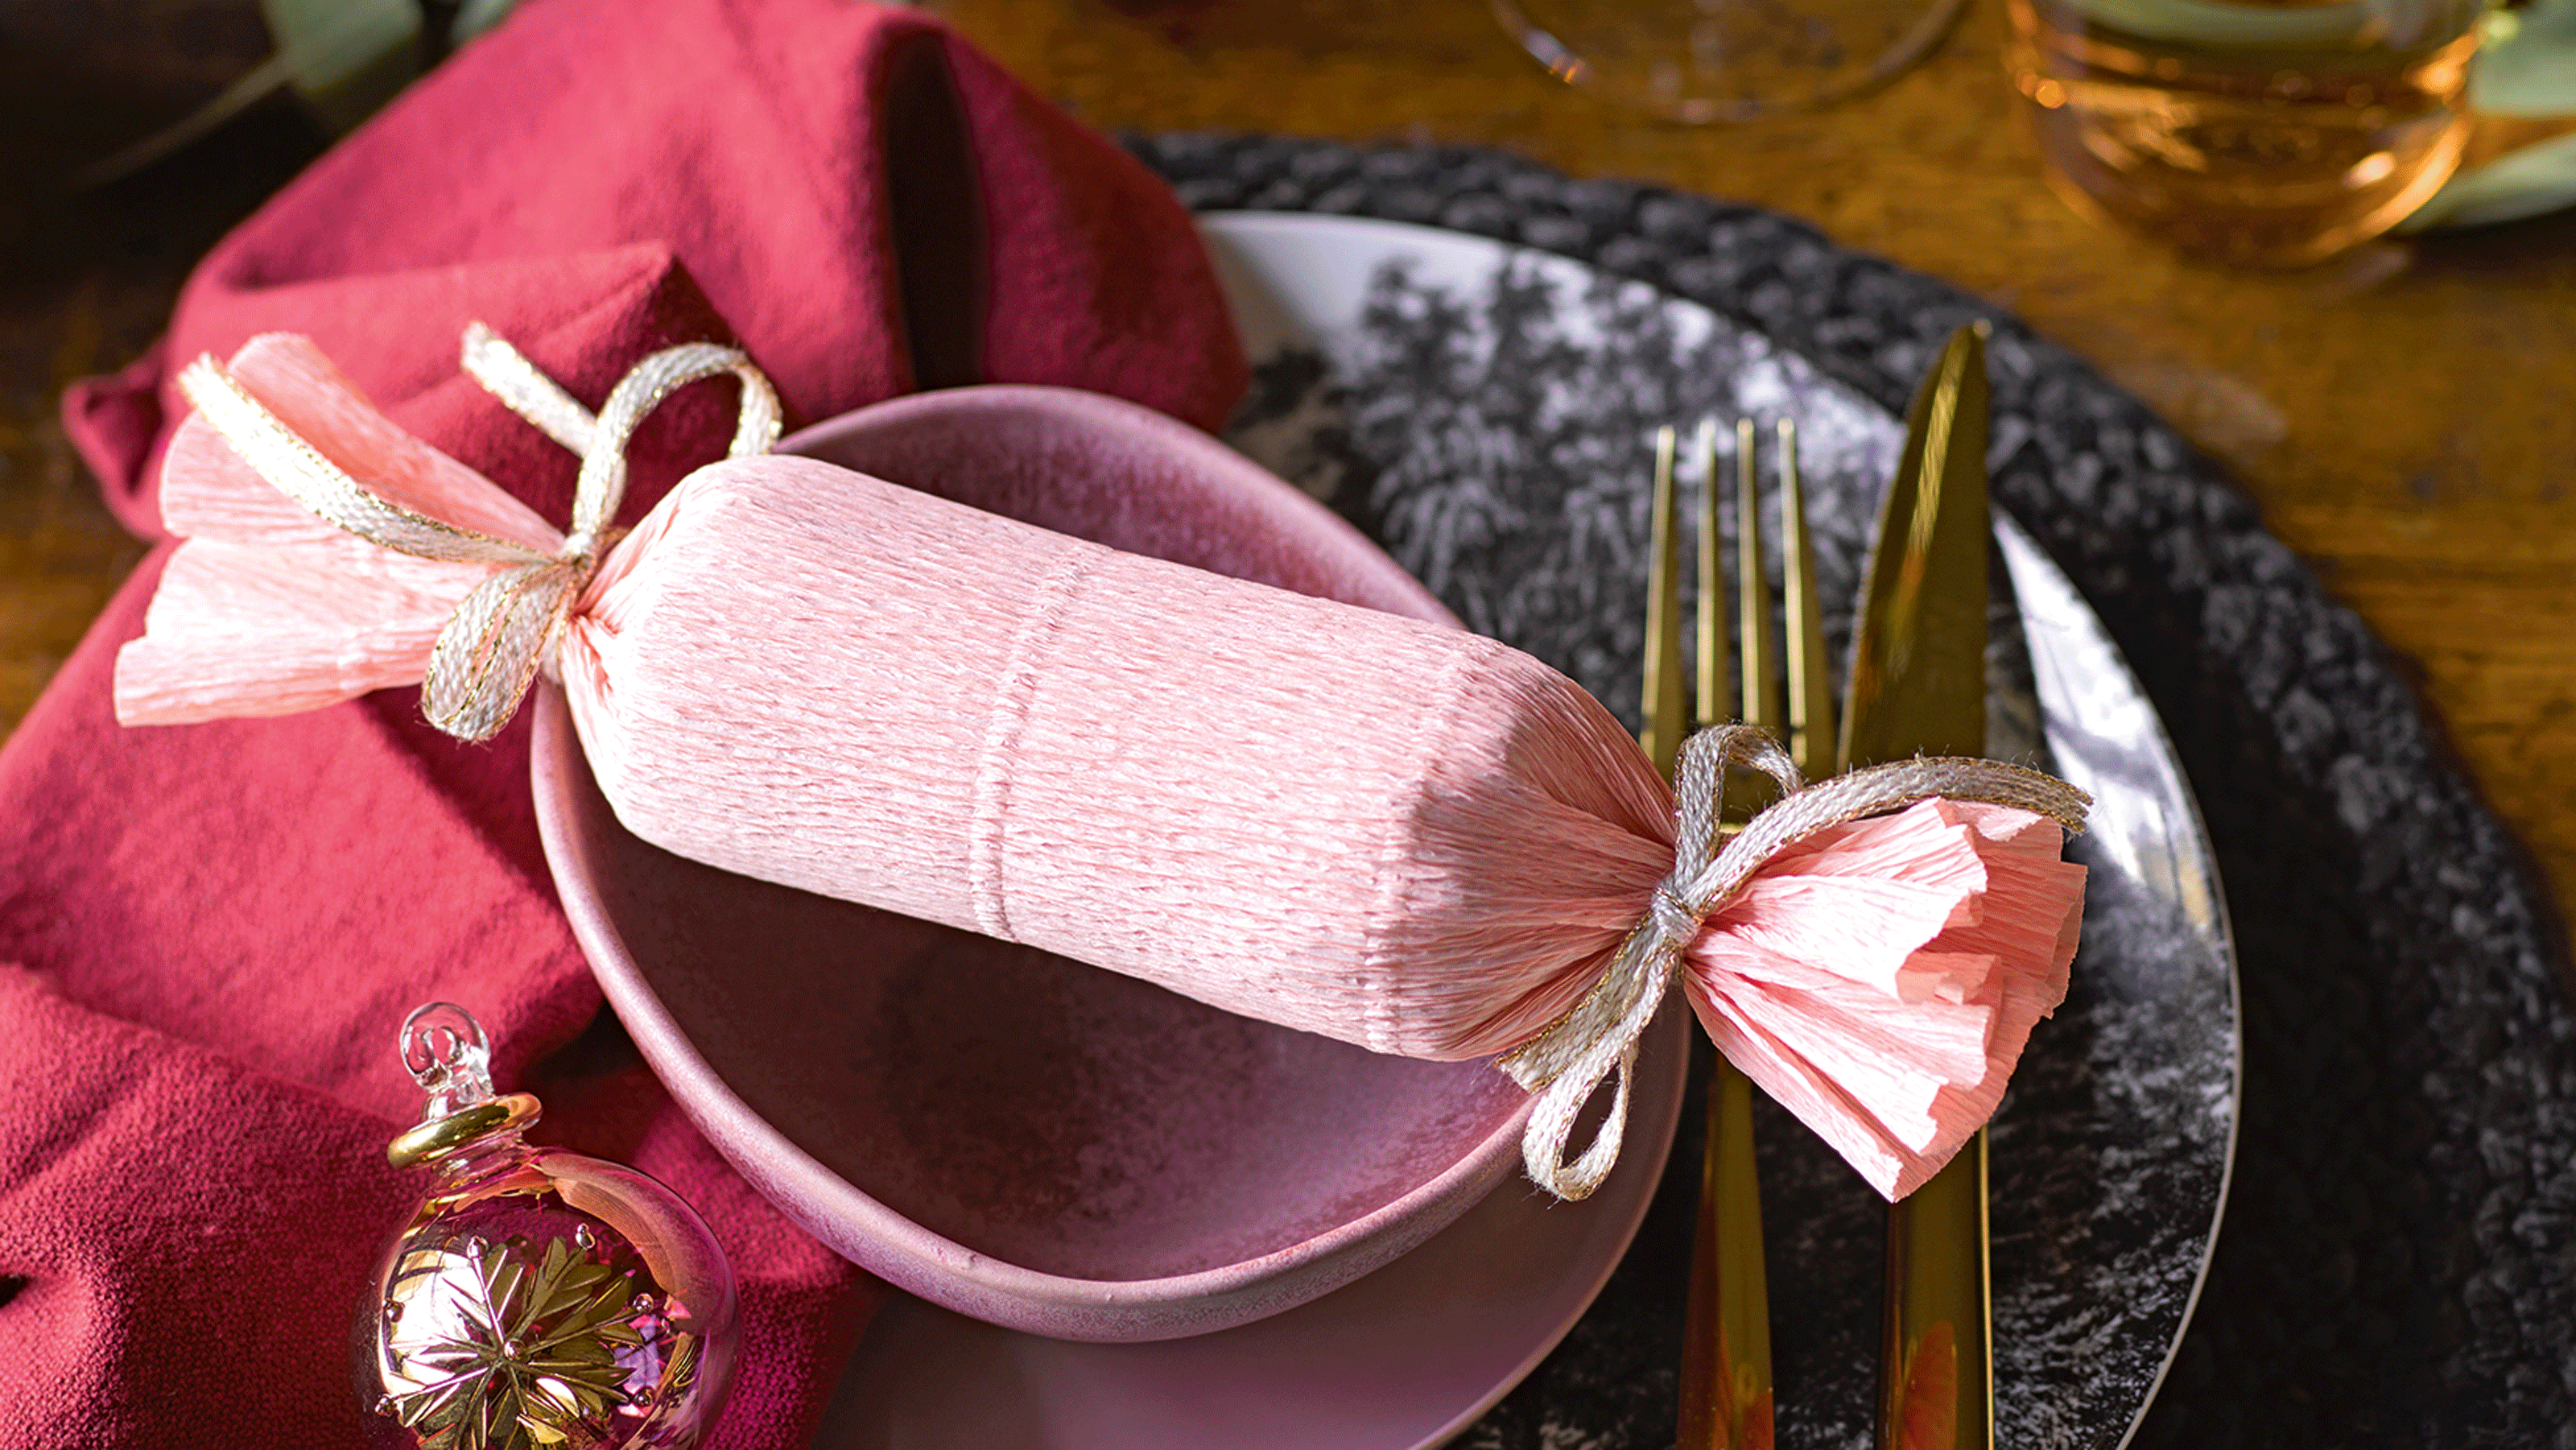
How to make a Christmas cracker from a napkin
If you usually use cloth napkins on your Christmas table this is a smart way to revamp them and make them work twice as hard as your festive crackers.
Shopping list

- 3x cardboard centre of a loo roll
- Napkins - £8 at John Lewis
- String
- Ribbon - £3.25 at Wilko
- Scissors
- Double-sided tape - 4pck for £7.84 at Amazon
- Small treats or gifts for inside the crackers
1. Check the sizing
The napkins you're using will need to be larger than the loo rolls as you will need some extra fabric at the end to secure the crackers. Place the three loo rolls side by side on top of the napkin, and make sure they're not hanging over the edge. If they are, trim them down with scissors.
2. Add the filling

Next, place your choice of filling inside the middle loo roll. You can opt for the signature small gifts of classic Christmas crackers, or put a couple of chocolates or sweets in instead.
3. Add double-sided tape
Next, add a strip of double-sided tape to one edge of the napkin. Tape dispensers will make this part much easier.
4. Wrap the cracker
Wrap the napkin around the loo rolls, starting from the end without the tape. Hold it tightly so it doesn't crease, then secure in place with the tape from the other end.
5. Secure the string
To create the iconic cracker look, pull the end two toilet rolls out of from the middle one slightly, so they're poking out the end of the napkin. You should be able to feel a gap either side of the middle loo roll.
Tie a piece of string around this gap. Fiddle around with this slightly until there's a noticeable crease and the string is tied firm.
6. Add the ribbon

Tie some pretty ribbon in place over the string. Trim these after tying, but leave them so they're longer than they need to be. The elaborate ribbon will make your handmade crackers look more elegant.
7. Remove the ends

Pull out the two loo rolls either side of the middle one to finish off your handmade cracker.
8. Repeat and admire!

All that's left is to repeat the above steps to create as many crackers as you like, then put them in pride of place next to each place setting.
How to make a paper cracker
If you prefer the look of paper crackers or don't have any napkins, these are easy to make too. The process is similar to that of napkin crackers, however, you can use off cuts of wrapping paper, wallpaper, or anything you have to hand.
Shopping list

- 3x cardboard centre of a loo roll
- Your choice of paper - £11.50 at Cox & Cox
- String
- Raffia ribbon - £1 at Tesco
- Scissors
- Double-sided tape
- Small treats or gifts for inside the crackers e.g. Lindt Lindor Chocolates £9.50 at Amazon
1. Line up the loo rolls

Place three cardboard loo rolls alongside each other in the middle of your paper. You don't need loads of paper per cracker, just enough so that it will wrap fully around the loo rolls, so trim this down and set the leftovers aside for the next cracker.
2. Pop your fillings in
Pop your fillings of choice into the middle loo roll, if using. These crackers can also be for purely decorative purposes, and they don't have to be pulled if you'd rather keep them for next year.
3. Add the tape and wrap
Place the double-sided tape along the full length of one edge of the paper. Next, wrap the paper around the three loo rolls, making sure to smooth out any creases that appear as you go. Start from the end without the tape, hold this in the middle, then wrap the taped end over the top and secure in place. It's just like wrapping presents.


4. Add the string

Gently pull the two loo rolls on either side of the middle one outwards so they stick out the edge of the paper. Make a crease in the two gaps where the ribbon will go, then wrap string round these and tie. Pull out the two loo rolls at the end.
5. Fasten the ribbon

Tie your ribbon over the string. Raffia ribbon works well with paper crackers, and is easy to tie. The curly ends will finish off the crackers nicely.
6. Repeat and admire!

Repeat the last five steps for each place setting. Put your crackers in each place and admire your craftmanship!
How do you make a simple Christmas centerpiece?
To go with your fabulous DIY Christmas crackers, you can create a beautiful Christmas table centerpiece idea. This doesn't have to be overly complicated either; spend just a short amount of time creating a centerpiece and you and all the family can admire it for the rest of the Christmas period.
'If you have a round table, place a large flame-proof plate in the centre of the table, arrange three chunky candles of differing heights and then cover the plate in fresh greenery foraged from the garden or pile on baubles in differing sizes,' suggests Angela Slater, Gardening Expert, Hayes Garden World.
'Wind a set of battery-operated micro-lights through the vegetation or the baubles. If you have a spare pre-decorated and pre-lit artificial wreath, place it in the centre of the table,' she adds.
Or, keep it simpler still. 'If you’ve changed the colour scheme for your tree this year and have lots of spare baubles knocking about, another lovely idea for a table centrepiece is to fill a large bowl or basket with these baubles,' says Pablo Diaz Barriga, VP of International Business, Balsam Brands. 'You can keep the baubles in similar tones for a simple and elegant look, or mix and match colours for a fun and vibrant feel.'
